Edimax IC-3110 Скачать руководство пользователя страница 129

C

ONFIGURING THE 

S

URVEILLANCE 

S

OFTWARE


A

NDROID 

S

URVEILLANCE 

S

OFTWARE 

C

ONFIGURATION 

O

PTIONS


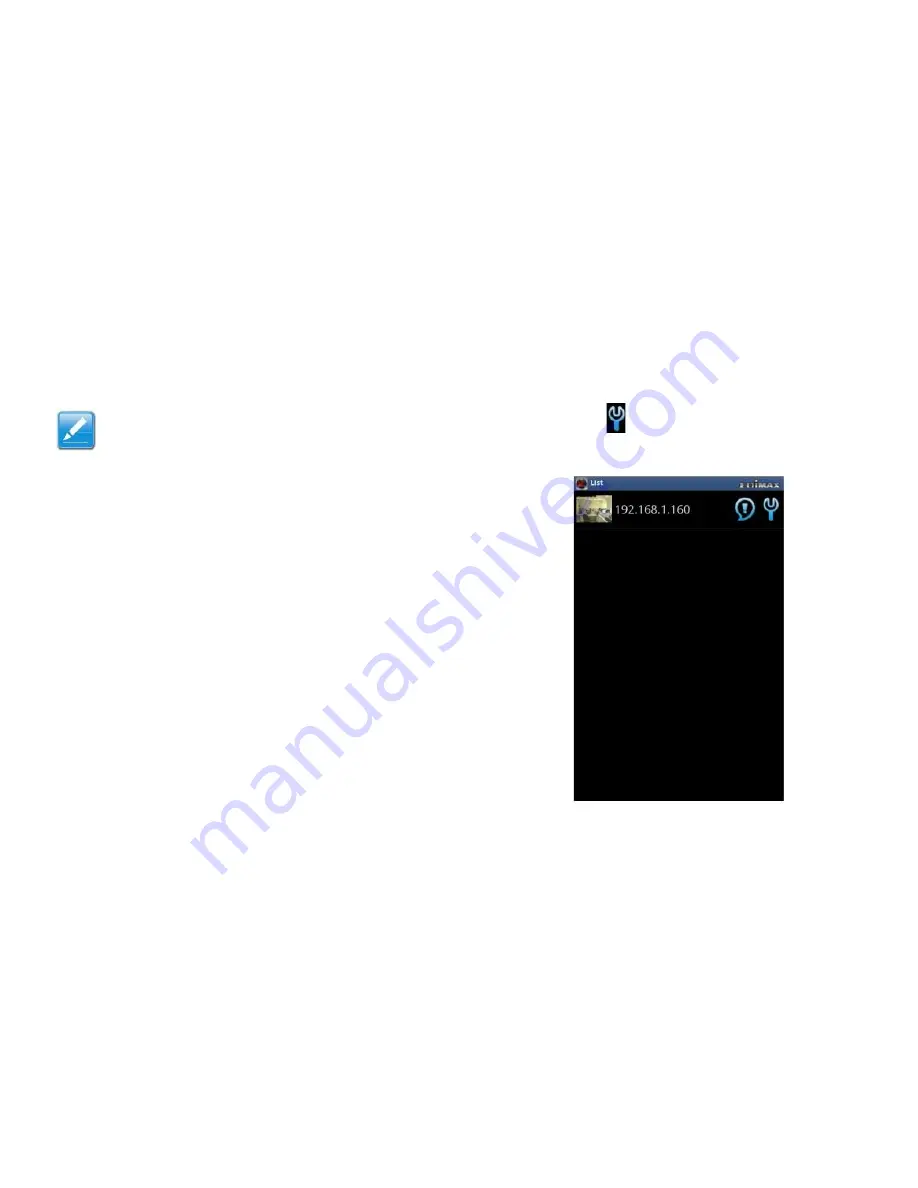
3.5.2 Android Surveillance Software Configuration Options


Note:


To add a network camera to the camera list


see 

Adding Network Cameras 

(page 3-85).


The EdiView application automatically searches the LAN for


existing Edimax network cameras and adds them to the


camera list.


Tap o

n a camera‟s


tion settings.


icon in the list to edit the configura-


3-85


Содержание IC-3110

Страница 1: ...IC 3110 USER MANUAL 07 2012 V1 0...

Страница 2: ...2 Rear View 1 4 IC 3110 1 4 IC 3110W 1 4 IC 3110P 1 5 Side View 1 6 Bottom View 1 7 G e t t i n g S t a r t e d Installing the Camera 2 1 Edimax EdiView Installation Package 2 5 Installing EdiView Fin...

Страница 3: ...Surveillance Software Configuring the EdiView Finder Utility 3 1 Toolbar Features 3 1 Setting the Interface Language 3 2 Configuring a Network Camera 3 2 Configuring the Web Based Management Interface...

Страница 4: ...UPnP 3 22 Login Free 3 23 RSTP 3 24 Configuring Motion Detection 3 26 Motion Detection 3 26 Detect Regions 3 29 Email 3 31 FTP Configuration 3 32 SD Card Settings 3 34 Configuring System 3 35 Camera...

Страница 5: ...imax com 3 51 Configuring the 16 Channel Viewer 3 52 Installing the 16 Channel Viewer Software 3 52 Adding Network Cameras 3 56 Adding a Network Camera on the LAN in Manual Mode 3 56 Adding a Network...

Страница 6: ...a on the Cloud with Cloud Mode 3 84 Android Surveillance Software Configuration Options 3 85 Configuring Network Settings on a LAN in IP Mode 3 86 Configuring Network Settings on the Cloud in Cloud Mo...

Страница 7: ...Camera from the List 3 100 Using the Surveillance Software Using the Web Based Management Interface 4 1 Camera Settings 4 1 Using myedimax com 4 6 Network Camera Image Toolbar 4 6 Enlarging and Reduci...

Страница 8: ...mera List 4 18 Viewing a Live View 4 18 Taking a Snapshot 4 19 Viewing Multiple Cameras 4 19 Pan Tilt Live View 4 20 Viewing Camera Events 4 21 Viewing an Event Image 4 21 Saving an Event Image Snapsh...

Страница 9: ...ERIES TABLE OF CONTENTS Pan Tilt Live View 4 27 Viewing Camera Events 4 28 Viewing an Event Image 4 28 Mapping a Camera 4 30 Appendix A Troubleshooting A 1 Appendix B Configuring Your PC s IP Address...

Страница 10: ...neral Conventions The following general conventions are used in this document CAUTION Indicates a potential for personal injury WARNING Indicates a potential loss of data or damage to equipment IMPORT...

Страница 11: ...titles directory names file names path names and program process names Constant width Indicates computer output shown on a computer screen including menus prompts responses to input and error mes sage...

Страница 12: ...programs prove defective following their purchase the buyer and not this company its distributor or its dealer assumes the entire cost of all necessary servicing repair and any inciden tal or conseque...

Страница 13: ...IC 3110 SERIES COPYRIGHT Edimax Technology Co Ltd Add No 3 Wu Chuan 3rd Rd Wu Ku Industrial Park New Taipei City Taiwan Tel 886 2 77396888 Email sales edimax com tw XII...

Страница 14: ...id for at least three years to give you for a charge no more than the costs of physically performing source distribution a complete machine readable copy of the corresponding source code The GNU GPL a...

Страница 15: ...What s Inside...

Страница 16: ...g missing in the package and contact your dealer to claim the missing item s ITEM NAME QUANTITY Network Camera Detachable Antenna IC 3110W only Power Adapter Ethernet Cable CD with Utility Software Us...

Страница 17: ...when connected to the cloud When the network camera is linked to a wired network the LED lights up The LED flashes while video is transmitted or received through a wired network When the network camer...

Страница 18: ...HAT S INSIDE HARDWARE OVERVIEW ITEM DESCRIPTION Focus Ring Change the focus of the camera by rotating the focus ring clockwise or counterclockwise Lights up when the environment is too dark IR LEDs 1...

Страница 19: ...WHAT S INSIDE HARDWARE OVERVIEW Top View IC 3110 IC 3110W USB Port Antenna Port SD Card Slot SD Card Slot 1 4...

Страница 20: ...110P ITEM DESCRIPTION SD Card Slot USB Port IC 3110 only Accepts SD SDHC memory card for image video storage Accepts a USB Wi Fi adapter to enable wireless access Antenna Port IC 3110W only Connects t...

Страница 21: ...WHAT S INSIDE HARDWARE OVERVIEW Back View ITEM DESCRIPTION Tripod Connector MAC Address Attaches to the enclosed tripod stand Unique MAC address Cloud ID of the camera 1 6 Tripod Connector MAC Address...

Страница 22: ...s to an audio lead for audio output LAN Connects to the Ethernet LAN cable This port also provides power when connected to a PoE switch IC 3110P only 12V DC Connects to the 12V power adapter WPS Reset...

Страница 23: ...Getting Started...

Страница 24: ...to set up your network camera 1 Remove the camera and its accessories from the packag ing 2 Review the contents and compare with the component list If any components are missing please contact the su...

Страница 25: ...GETTING STARTED INSTALLING THE CAMERA 4 Connect antenna to the antenna connector located at the top of the network camera Note This step applies to the IC 3110W model only 2 2...

Страница 26: ...lace the camera on a flat surface and point it in the direction you want to monitor If you want to place the camera on the ceiling or a wall secure the camera using the tripod connector located at the...

Страница 27: ...he power cable into the power jack located at the rear of the network camera To use an Ethernet cable insert the Ethernet cable into a PoE switch or PoE injector IC 3110P only Note After installation...

Страница 28: ...he network camera When the CDROM is inserted in the computer the following screen is shown The following options are available on the CDROM Setup Utility Installs the EdiView Finder utility Windows on...

Страница 29: ...NDER UTILITY SOFTWARE 2 3 Installing EdiView Finder Utility Software Click the Setup Utility icon to start the installation wizard 1 Click Next to start the installation process Note Click Cancel at a...

Страница 30: ...fault value or Click Browse to select a different location on your file system Select Create a desktop icon to add an appli cation icon to the desktop Select Create a Quick Launch icon to add an appli...

Страница 31: ...installa tion settings in the information window 8 The progress of the installation is displayed in the fol lowing window This step may take several minutes to complete 7 Click Install to continue or...

Страница 32: ...NG EDIVIEW FINDER UTILITY SOFTWARE 10 EdiView Finder is installed Click Launch EdiView Finder Utility if you want to use the application after the installation is finished 11 Click Finish to close the...

Страница 33: ...iew Finder for the First Time Wired and PoE Models Note This section applies to the IC 3110 3110P model s only 1 Run EdiView Finder and double click on a listed net work camera Note Alternative method...

Страница 34: ...ED RUNNING EDIVIEW FINDER FOR THE FIRST TIME 2 The utility automatically detects the cloud connection 3 When the utility establishes a connection to the cloud click Next to set the network s name and...

Страница 35: ...anation on configuring the advanced settings 5 Enter a password twice Once to create it and a second time to confirm it 6 Click OK to continue 7 Select DHCP to set the camera to automatically obtain a...

Страница 36: ...ifferent encryp tion settings may impact camera performance and security Please refer to your router or access point user manual for more details Note This section applies to the 3110W model s only 1...

Страница 37: ...R THE FIRST TIME 2 The utility automatically detects the cloud connection 3 When the utility prompts to configure wireless settings click Yes to set up a wireless connection 4 Pick the SSID for the wi...

Страница 38: ...TTING STARTED RUNNING EDIVIEW FINDER FOR THE FIRST TIME Note Alternative method run WPS mode to connect to the wireless router Make sure your wireless router supports WPS 5 Click Start to continue 2 1...

Страница 39: ...FINDER FOR THE FIRST TIME 6 Unplug the network camera s Ethernet cable and click Next 7 When the network camera has successfully connected to your wireless router the utility shows Connection detecte...

Страница 40: ...er a camera name Note If no password is entered the default 1234 is used 11 If the setup is successful a dialogue is shown with a URL for remotely viewing the camera over the cloud 10 Enter a password...

Страница 41: ...pass word Note To install the network camera location application see Installing EdiView Finder Utility Software page 2 6 Note If the EdiView Finder utility can not locate a network camera on the LAN...

Страница 42: ...a tion Preview Window Icon Connection information for a network camera is displayed in each listing under IP Address Other camera related information such as camera name model and MAC address is also...

Страница 43: ...GETTING STARTED LOCATING NETWORK CAMERAS ON THE NETWORK 3 Click OK to open a preview window or Cancel to close the login window 2 20...

Страница 44: ...Configuring the Surveillance Software...

Страница 45: ...ur network Toolbar Features The EdiView Finder utility has two buttons one to search for network cameras and one to display a camera s configura tion settings Search Camera Click this button to search...

Страница 46: ...plified Chinese You can select the language to use from the language dropdown menu located in the lower right corner of EdiView Finder 2 Enter the password for the camera default 1234 in the login dia...

Страница 47: ...P to set the camera s IP address 5 Select DHCP to have the network router designate an IP address or select Static IP to enter the desig nated IP address subnet mask gateway and DNS information 6 To m...

Страница 48: ...t IE Make sure the network camera is powered on to ensure it is detected by the management interface Refer to Front View page 1 2 for further details To view the web based management interface do the...

Страница 49: ...me and password The default user name is admin and the default password is 1234 4 If the following prompt is displayed click OK 5 Click Download the latest ActiveX link to down load the plugin 3 Click...

Страница 50: ...TALLING THE WEB BASED MANAGEMENT INTERFACE 6 Click Run to start the installation 7 The following confirmation prompt appears 8 Click Run to install the plugin or Don t Run to cancel the installation 9...

Страница 51: ...ERFACE Follow the on screen Set Up Wizard until the installa tion is complete 10 Click Finish to complete the installation The management interface screen is now displayed on the browser Note Press F5...

Страница 52: ...CONFIGURING THE SURVEILLANCE SOFTWARE INSTALLING THE WEB BASED MANAGEMENT INTERFACE Note DirectX and system drivers may be required Download Microsoft DirectX from http www microsoft com 3 8...

Страница 53: ...night vision M JPEG Adjust the video resolution quality and frame rate settings on the M JPEG configuration screen To view the video features click on the Video menu item To view the settings of the...

Страница 54: ...y second A higher frame rate provides a smoother viewing expe rience but requires more network bandwidth If you are using this video camera on a low bandwidth network a lower frame rate value is recom...

Страница 55: ...ry second A higher frame rate provides a smoother viewing expe rience but requires more network bandwidth If you are using this video camera on a low bandwidth network a lower frame rate value is reco...

Страница 56: ...e rate provides a smoother viewing expe rience but requires more network bandwidth If you are using this video camera on a low bandwidth network a lower frame rate value is recom mended On Screen Disp...

Страница 57: ...n the camera s display image or Dis able to hide it Night Vision The camera is equipped with 9 IR LEDs to enhance video quality in low light environments Show Time Click Apply for settings to take eff...

Страница 58: ...off automatically LEDs will activate when it s too dark If you do not know which option to select on this page select this one Switch IR LEDs on or off by schedule You have to enter the start time in...

Страница 59: ...ecify TCP IP parameters in this menu if you want to change the camera s IP address use PPPoE Dynamic DNS or activate the UPnP features LAN Choose the how the camera connects to the LAN If Static IP Ad...

Страница 60: ...agement interface here If it s not 80 you will have to add port after the IP address hostname of this network camera For example if the HTTP port number you specified here is 90 and the IP address of...

Страница 61: ...here Enter the PPPoE password assigned by your ISP here Enter the MTU Maximum Transmission Unit given by your ISP here Ask your ISP if you do not know what value you should enter here The default valu...

Страница 62: ...Infrastructure when you have a wireless access point and you have computers with wired network connections ITEM Available Net works DESCRIPTION This shows all wireless access points found by this netw...

Страница 63: ...TEM SSID DESCRIPTION Enter the SSID of the wireless access point you wish to connect to It should be less than 32 alphanumerical charac ters When you select a wireless access point its SSID will be en...

Страница 64: ...displayed on the button If a connection can not be established within 120 seconds you will be prompted by a message box and you can press the Start PBC button to try again Enter the encryption key of...

Страница 65: ...account at dyndns org http www dyndns org Detailed instructions on how to apply for a new account can be found on dyndns org s website ITEM Enable DDNS DESCRIPTION Select Enable to activate the Dynam...

Страница 66: ...his network camera automatically This feature is useful since you do not have to remember the IP address of this network camera Simply open Net work neighborhood and it s there After the UPnP feature...

Страница 67: ...own web application you can use this feature Enter the filename here and click Apply to save settings Other users can access the image using this filename with a jpg extension and with the camera s I...

Страница 68: ...ar the text in the Filename field and click Apply RSTP If you want to watch video captured by this network camera on your own RTSP Real Time Streaming Protocol media player you can use this feature to...

Страница 69: ...P com patible media player to play the RTSP stream remember to add sdp as the file extension Enter the path of the H 264 RTSP video file When you use a RTSP compatible media player to play the RTSP st...

Страница 70: ...es within a specific region the motion detection feature is very useful The camera will detect motion within a defined region and take a snapshot when motion is detected Motion Detection You can use t...

Страница 71: ...motion to 60 sec onds Select the duration you wish this cam era to wait before recording an image Select the duration you wish this cam era to record images when a motion is detected from the dropdown...

Страница 72: ...tion to an SD card Select Disable to disable this feature Select Enable to save the file to a net work folder that supports SAMBA also known as Windows Network Neighbor hood Select Disable to disable...

Страница 73: ...han one schedule can be set on a single timeline Click Save to save changes to the time lines Click Select All to select all the timeline schedules Click Delete All to delete all the timeline schedule...

Страница 74: ...s in the image If the objects in the image captured by the camera have moved click this but ton to reload the image captured by the camera so you can define the motion detection region more precisely...

Страница 75: ...utlook Express or ask your network administrator or ISP Enter the sender s email address Note Some mail servers reject emails from unknown senders It is recommended you enter your own email address he...

Страница 76: ...tlook our Outlook Express or ask your network adminis trator or ISP Username Please enter the username of the SMTP server here if your SMTP server requires the use of authentication Please enter the p...

Страница 77: ...Certain usernames may have restrictions and therefore can not place files in a directory not owned by the user Select Enable to use passive mode to send files or select Disable to not use this featur...

Страница 78: ...le Recording DESCRIPTION Check the box and this camera will automatically erase older image files to make room for new ones when the SD card is full If you don t want to lose old image files do not ch...

Страница 79: ...to get the operational information of this camera Camera Information Camera information allows you to set the name and admin istrator s password After you select System a sub menu appears There are si...

Страница 80: ...twork camera The camera name must be unique within the same network Password The password to the default admin account can be changed here The default password is 1234 For security reasons it is recom...

Страница 81: ...will get the date and time from a NTP server automatically ITEM Daylight Saving Time Synchronize with PC Time DESCRIPTION If your area of residence uses daylight saving select Yes otherwise select No...

Страница 82: ...d FTP server or select Disable to disable this fea ture You have to configure the FTP server parameters in the FTP Set tings menu before this feature will take effect The FTP Settings menu is found un...

Страница 83: ...the network camera to send individual images according to the time interval set Select Enable to enable scheduled recording or select Disable to disable this feature ITEM Time Interval DESCRIPTION Thi...

Страница 84: ...eviously saved recorded video will be overwritten by the latest recorded video Utilities This menu allows you to upgrade firmware clear all settings reboot the network camera and switch LED lights on...

Страница 85: ...ter the upgrade procedure is done PLEASE NOTE THAT THE IP ADDRESS OF THE CAMERA WILL RESET TO ITS DEFAULT VALUE 192 168 2 3 ITEM Reset to Fac tory Defaults DESCRIPTION Replace current settings with th...

Страница 86: ...Status This menu provides all information about this network cam era such as the firmware version system uptime date time and network information System Log All activities of this network camera are l...

Страница 87: ...t to allow them to modify system settings you can give them a user level username and password so they can only view the image and can not change any system setting This camera supports up to 16 users...

Страница 88: ...ter the camera and video menu while a guest can only view images Click this button to add the account Modify an existing user s information You have to select a user from user list first Remove an exi...

Страница 89: ...nonymous Enable this feature to allow users to view the camera image without requiring a user ID and password ITEM Anonymous Login DESCRIPTION Select Enable to activate the anony mous account or Disab...

Страница 90: ...he settings for using an SD card to store the video recording data from the camera Note SD card storage is activated under the Motion Detection menu Status The used and free space information is shown...

Страница 91: ...u re using in your email software such as Outlook or Outlook Express or ask your network administrator or ISP Enter the sender s email address Note Some mail servers reject emails from unknown senders...

Страница 92: ...d Reserved Space Enter the username for the SMTP server Enter the password for the SMTP server Select from the dropdown menu the amount of SD card space that will be reserved and will not be used ITEM...

Страница 93: ...er Launching myedimax com Note System administrator rights are required to launch the applet in IE Log into Windows with an administrator account or use the Run as Administrator feature to launch IE O...

Страница 94: ...ONFIGURING MYEDIMAX COM 2 If the following window is shown click Run 5 The network camera can now be controlled from the applet 3 When myedimax com loads enter the camera s pass word The default passw...

Страница 95: ...ation icon on the toolbar located below the image speed Use the dropdown lists to change the video res olution and operating language 3 Click Apply to save the changes or Cancel to discard them 1 To c...

Страница 96: ...l Viewer Software An alternative to the web based interface is the desktop 16 Channel Viewer software which offers the ability to view multiple cameras at once Note For information about the EdiView i...

Страница 97: ...G THE 16 CHANNEL VIEWER SOFTWARE 1 Click Next to start the installation process 2 Click Browse to set the application installation folder or click Next to use the default value 3 Click Next to continu...

Страница 98: ...ppli cation icon to the desktop Select Create a Quick Launch icon to add an application icon to the quick launch bar The application is ready to install Review the installation details information in...

Страница 99: ...EWER SOFTWARE 7 The progress of the installation is displayed in the fol lowing window This step may take several minutes to complete The 16 channel viewer application is installed 9 Click Finish to e...

Страница 100: ...ote If prompted by a Windows security alert for the firewall to block or unblock the IPCamViewer program click Unblock or the network camera surveillance software will not function correctly Adding a...

Страница 101: ...he software cannot detect the network camera on the LAN automatically you will have to enter the settings manually 7 Click OK to save the changes or Cancel to discard 3 Select a Channel from one to si...

Страница 102: ...ote site using PnV mode To add a network camera in PnV mode 1 Click the Set Up button to show the configuration menu 2 Click Configure Cameras to show the configuration screen 3 Select a Channel from...

Страница 103: ...tility 7 Click OK to save the changes or Cancel to discard Adding a Network Camera on the Cloud in DDNS Free Mode Cameras added in Dynamic Domain Name System DDNS Free mode can be accessed from anywhe...

Страница 104: ...ID Password The Camera ID is the camera s MAC address which is found on the camera itself or by running the EdiView Finder utility 7 Click OK to save the changes or Cancel to discard 3 Select a Channe...

Страница 105: ...RFACE OVERVIEW 3 4 2 User Interface Overview Language Display Layout Video Display Area Full Screen Scan Close Window Stop Surveillance Minimize Window Zoom Out Zoom In PTZ Control Home Recording Set...

Страница 106: ...anguage Changes the camera image dis play layout Click the display layout button to change the current lay out There are 8 display layouts Click this button to switch to full screen mode Press the ESC...

Страница 107: ...ported cameras Click this button to return the cam era to the home or default posi tion This function is only available for supported cameras Start video recording Playback Play back a recorded video...

Страница 108: ...Options Before using the surveillance software the camera s must be configured Click the Set Up button and a popup menu appears Camera Select Configure Cameras to show the camera configu ration dialog...

Страница 109: ...ill have to enter the set tings manually Rescan all cameras on your local net work if you didn t see the camera you expected in the Camera Search box or new cameras have been added to your local netwo...

Страница 110: ...hould change the pre inserted password if you changed the password of the selected camera Select the video encoding format of this camera MJPEG MPEG4 or H 264 Clear all fields in the Camera Config ura...

Страница 111: ...set You can specify a one time schedule for the selected camera this schedule will be executed once only Click this button to show the One Time Schedule window In this tab you can set up scheduled vi...

Страница 112: ...cording schedule that will be executed at the specified time of cer Weekly Sched tain weekday s in a week Please ules check all weekdays that apply and set the start time in the From field Set the dur...

Страница 113: ...TION Edit You can modify a scheduled recording item Select a schedule in the One Time Schedules list and click the Edit button to edit the start and end time of this schedule Delete a selected schedul...

Страница 114: ...surveillance software will not play the audio captured by this camera Check this box and the network camera surveillance software will not record the audio captured by this camera Save settings in th...

Страница 115: ...in seconds that the cam era will record when motion has been detected Send an alarm when motion has been detected by the camera Send an email to a pre defined address when motion has been detected by...

Страница 116: ...directory you wish to store the recorded videos and captured images Click the Browse button to pick a direc tory on your hard disk Displays remaining storage space Available Recording Space Secondary...

Страница 117: ...behavior of the application when hard disk space is full Set the application to delete files recorded more than a set time period ago Define the time period to pause between every camera switch when y...

Страница 118: ...er you should use please refer to the settings pro vided by your ISP network administra tor SMTP port Specify the port number of the SMTP server you wish to use here By default and the setting of most...

Страница 119: ...In most cases it s the same as your POP3 username Please refer to the setting of your email software or ask your ISP network administrator if you re not sure about this Enter the password for the SMT...

Страница 120: ...le Disable Password Confirm Pass word DESCRIPTION Requires password authentication when this software starts Password authentication is not required when this software starts Enter the password you wi...

Страница 121: ...urveillance Software 3 5 1 Installing the Android Surveillance Software To install the EdiView Network Camera application on an Android device follow these instructions 1 Launch the Android Market 2 T...

Страница 122: ...RVEILLANCE SOFTWARE INSTALLING THE ANDROID SURVEILLANCE SOFTWARE 3 Tap Ediview to download and install the application 4 At the installation confirmation screen tap Install to start installation or Ca...

Страница 123: ...e installation status displays on screen The process takes several minutes depending on connection speed 5 When the application is successfully installed Appli cation installed is displayed on the scr...

Страница 124: ...are two ways to add a network camera to the camera list Automatically Adding a Camera When the EdiView application is launched it automatically searches the LAN for all Edimax network cameras Automat...

Страница 125: ...NFIGURING THE SURVEILLANCE SOFTWARE INSTALLING THE ANDROID SURVEILLANCE SOFTWARE If a camera is found it is shown in the camera list If no camera is found tap OK to close the information dia logue 3 8...

Страница 126: ...CONFIGURING THE SURVEILLANCE SOFTWARE INSTALLING THE ANDROID SURVEILLANCE SOFTWARE Tap Manually to manually add a new network camera 3 82...

Страница 127: ...into the following fields PARAMETER DESCRIPTION Camera Name IP Address DDNS Port Username Define a name for the camera that is displayed in the camera list Enter the IP address or the host name of a n...

Страница 128: ...Cloud ID Define a name for the camera that is displayed in the camera list Enter the Cloud ID of the network camera The Cloud ID is a twelve character alphanumeric value of the network camera found on...

Страница 129: ...Software Configuration Options Note To add a network camera to the camera list see Adding Network Cameras page 3 85 The EdiView application automatically searches the LAN for existing Edimax network...

Страница 130: ...METER DESCRIPTION Camera Name IP Address DDNS Port Username Define a name for the camera that is displayed in the camera list Enter the IP address or the host name of a network camera Enter the port n...

Страница 131: ...me Cloud ID Define a name for the camera that is displayed in the camera list Enter the Cloud ID of the network camera The Cloud ID is a twelve character alphanumeric value of the network camera found...

Страница 132: ...eo Display Parameters To configure the video display parameters of the network camera do the following 1 Tap the button 2 Drag the slider bars right or left to configure brightness saturation sharpnes...

Страница 133: ...ving a Network Camera from the List To remove a network camera from the list do the following 1 Tap a camera in the list and hold 2 When the Delete Network Camera dialogue shows remove your finger 3 T...

Страница 134: ...llance Software 3 6 1 Installing the iOS Surveillance Software Note Make sure the device is connected to a Wi Fi or 3G network before launching the application To install the EdiView Network Camera ap...

Страница 135: ...NG THE SURVEILLANCE SOFTWARE INSTALLING THE IOS SURVEILLANCE SOFTWARE 2 When the application is successfully installed the Edi View icon is shown on the screen 3 Launch EdiView by tapping the EdiView...

Страница 136: ...re two ways to add a network camera to the camera list Automatically Adding a Camera When the EdiView application is launched it automatically searches the LAN for all Edimax network cameras Automatic...

Страница 137: ...RVEILLANCE SOFTWARE INSTALLING THE IOS SURVEILLANCE SOFTWARE If a camera is found it is shown in the camera list If no camera is found an empty list is shown Tap Add New Camera to manually add a new n...

Страница 138: ...TION Camera Name IP Address Port Username Define a name for the camera that is displayed in the camera list Enter the IP address of a network camera Enter the port number of the cam era Enter the user...

Страница 139: ...fields PARAMETER DESCRIPTION Camera Name ID Define a name for the camera that is displayed in the camera list Enter the Cloud ID of the network camera The Cloud ID is a twelve character alphanumeric...

Страница 140: ...Software Configuration Options Note To add a network camera to the camera list see Adding Network Cameras page 3 85 The EdiView application automatically searches the LAN for existing Edimax network...

Страница 141: ...settings PARAMETER DESCRIPTION Camera Name IP Address Port Username Define a name for the camera that is displayed in the camera list Enter the IP address of a network camera Enter the port number of...

Страница 142: ...D Define a name for the camera that is displayed in the camera list Enter the Cloud ID of the network camera The Cloud ID is a twelve character alphanumeric value of the network camera found on the in...

Страница 143: ...s darkest and 5 is bright est Set the saturation level of the video 1 is lowest and 5 is highest Set the sharpness level of the video 1 is lowest and 5 is highest Set the video quality level of the vi...

Страница 144: ...RVEILLANCE SOFTWARE IOS SURVEILLANCE SOFTWARE CONFIGURATION OPTIONS Removing a Network Camera from the List To remove a network camera from the list do the following 1 Tap Edit 2 Tap to remove the sel...

Страница 145: ...CONFIGURING THE SURVEILLANCE SOFTWARE IOS SURVEILLANCE SOFTWARE CONFIGURATION OPTIONS 3 Tap Delete to remove the network camera from the list 3 101...

Страница 146: ...Using the Surveillance Software...

Страница 147: ...g the Web Based Management Interface Note The Web Based Management Interface is activated by entering the camera s IP address into the address bar of Internet Explorer Camera Settings The Camera menu...

Страница 148: ...and H 264 Different encoding types have different bandwidth requirements and provide different video quality If the place where this network camera points to has fluorescent light s the image may fli...

Страница 149: ...n so the change s will take effect For the following features changes take effect right away Click the Snapshot button to save the display image as an image file a mes sage box appears after you click...

Страница 150: ...by your computer s microphone to the camera s external speaker Press and hold this button then speak into the microphone Please note that an exter nal speaker must be connected to this camera Digital...

Страница 151: ...USING THE SURVEILLANCE SOFTWARE USING THE WEB BASED MANAGEMENT INTERFACE ITEM DESCRIPTION Full Screen Click this button to display the image in full screen mode 4 5...

Страница 152: ...twelve character Cloud ID of the net work camera found on the included Cloud ID card see Figure 3 1 For example if your Cloud ID is 1234567890ab enter 1234567890ab myedimax com into your web browser N...

Страница 153: ...etwork camera in that direction 3 Click the circle located in the center of the arrow set to return the network camera to the home or original position 4 Click the icon to hide the navigation arrows 1...

Страница 154: ...rrent image and save it on a local hard drive 2 When prompted to save the file enter the filename and select a location to save the file 1 Click the full screen icon to enlarge image view to full scre...

Страница 155: ...youts to choose from LAYOUT DESCRIPTION Displays the video of 1 camera only Displays the video of up to 4 cameras Displays the video of up to 6 cameras Displays the video of up to 8 cameras Every layo...

Страница 156: ...USING THE SURVEILLANCE SOFTWARE CHANGING THE DISPLAY LAYOUT LAYOUT DESCRIPTION Displays the video of up to 10 cameras Displays the video of up to 13 cameras Displays the video of up to 16 cameras 4 10...

Страница 157: ...CREEN MODE 4 3 2 Full Screen Mode To maximize the display space on your monitor view the camera layout in full screen mode Click the full screen button to active full screen mode Full Screen To exit f...

Страница 158: ...tch between all configured cam eras Note If a camera is configured but disconnected it will still be displayed in a scan sequence The camera display will be blank and you ll see Disconnected displayed...

Страница 159: ...re to see more objects within the camera s view or enlarge the image size to see certain objects in more detail Please select a camera in the video display area by clicking on its image then click to...

Страница 160: ...ature you can change the position of the camera s lens to see dif ferent areas within the camera s view To use the PTZ feature click on a camera in the video dis play area Click one of the directional...

Страница 161: ...ge of a selected camera by clicking the Start Recording button Snapshot Start Recording Click the Snapshot button once to take a snapshot When recording starts you ll see a message such as 1 1 10 00 0...

Страница 162: ...kinds of search functions Video Playback Time Search Search all video files within a given time period Motion Search Search all video recorded by using the motion detection feature within a given tim...

Страница 163: ...Menu Buttons To show the EdiView menu buttons press the menu button on the Android device The EdiView menu buttons perform the following functions Reload the network camera list Show information about...

Страница 164: ...2 Viewing the Camera List Viewing a Live View If the network camera is connected you ll see a picture appear Tap the picture to view the live image If there are new events available tap the icon To c...

Страница 165: ...save it on your Android device tap the button Viewing Multiple Cameras If you have more than one network camera tap the but ton to see the images of up to four network cameras at the same time You ll...

Страница 166: ...same time Pan Tilt Live View Tap a network camera in the camera list to see a live image Hold the Android device horizontally to enlarge the network camera s live image view To activate pan tilt mode...

Страница 167: ...Event Image When a new event or movement has been detected by the network camera the icon appears in the network cam era list Tap the icon to see the list of events All events are displayed along wit...

Страница 168: ...s displayed along with the time it was triggered To see an enlarged picture hold the Android device horizontally Saving an Event Image Snapshot To save a snapshot of this event tap the button The mess...

Страница 169: ...of the network camera on Google Maps An active Internet connection is required to show the map on the Android device Tap the Map button at the bottom of the device to access the map menu Google Maps...

Страница 170: ...ation drag a finger over the map in a direction until the desired location is found A blue pin is placed at the center of the map to mark the location of the network camera When you find the location...

Страница 171: ...REFRESHING THE CAMERA LIST 4 4 4 Refreshing the Camera List If new cameras are added or removed from the network scan the network again to update your camera list To update the cameras displayed in t...

Страница 172: ...nu buttons press the menu button on the iOS device The EdiView menu buttons perform the following functions Show information about the EdiView application View live images of network camera Show a lis...

Страница 173: ...of the screen to cycle between one four and twelve camera live views Pan Tilt Live View Tap the button on the upper right corner of the screen to switch to Gesture mode Slide a finger over the live i...

Страница 174: ...E SOFTWARE VIEWING CAMERA EVENTS 4 5 3 Viewing Camera Events Viewing an Event Image To view events which are motions detected by the network camera tap the Events button Select a network camera to sho...

Страница 175: ...USING THE SURVEILLANCE SOFTWARE VIEWING CAMERA EVENTS Tap an event to see an enlarged image 4 29...

Страница 176: ...can use this feature to mark your network cameras on Google Maps so you can locate them and remember their physical locations easily Note You need an active Internet connection to show a map on your i...

Страница 177: ...the device location drag a finger over the map in a direc tion until the desired location is found Note A red pin indicating the location of the network camera is placed at the center of the map When...

Страница 178: ...d the computer are not in the same subnet they will not be able to communicate with each other 2 Please make sure the IP address you used to connect to the network camera is correct 3 If you forget th...

Страница 179: ...a lower resolution 3 If you re connecting to this camera from the Internet it could be caused by a slow Internet connection instead of a problem with the camera However when the net work connection i...

Страница 180: ...orrectly powered Power LED is on but you still can not connect to the camera when you re sure the IP address is correct please contact your dealer for help Image is fuzzy 1 Adjust the focus ring on th...

Страница 181: ...n how to solve the problem 5 Change the threshold to a more sensitive setting I heard strange sounds when I use the pan tilt function 1 Please check if anything has jammed the camera and remove it 2 I...

Страница 182: ...owing instructions to manually set up an IP address that is within the same net work segment as your network camera If the first three segments of the IP address of your com puter is not 192 168 2 you...

Страница 183: ...APPENDIX B CONFIGURING YOUR PC S IP ADDRESS 2 Double click the Network Connections icon 3 Right click Local Area Connection and click Properties B 2...

Страница 184: ...enter an IP address begin ning with 192 168 2 and ending with a value greater than 2 and less than 254 for example 192 168 2 339 In the Subnet mask field enter 255 255 255 0 Keep all other fields empt...

Страница 185: ...t the IP address back to 192 168 2 3 Current settings on the network camera are lost Ask the network administrator to check the DHCP release table If the camera was set to obtain the IP address by DHC...

Отзывы: