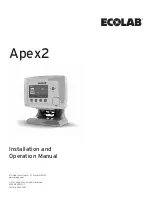
Apex2
Installation and Operation Manual
370 Wabasha Street N. St. Paul, MN 55102www.ecolab.com
© 2012 Ecolab Inc. All rights reserved.43569/5400/0112Part No. 9223-2253
Страница 1: ...Apex2 Installation and Operation Manual 370 Wabasha Street N St Paul MN 55102 www ecolab com 2012 Ecolab Inc All rights reserved 43569 5400 0112 Part No 9223 2253...
Страница 2: ...tional Pressure Switch 9 New Install Wiring 10 Machine Signals and Apex2 Power 10 11 I O Board Connections 12 Sealing Block 13 Retrofit Kit Converting Apex to Apex2 14 Apex Rinse Additive Signal Wire...
Страница 3: ...ctionable and intuitive information to the customer and creates an efficient interface for Ecolab sales representatives This control system will help the customer achieve superior results with improve...
Страница 4: ...pump Squeeze tubes with different delivery rates for high or low volume installations Variable speed DC motor 8 30 RPM Adjustable run time and start delay on door machines Optional Pressure Switch fo...
Страница 5: ...cm IO Box Dimensions Height 9 2 23 4 cm 14 7 37 3 cm w door open Width 10 7 27 1 cm one pump Depth 5 5 14 0 cm Electrical Requirements The Apex2 Controller operates within the following Incoming Powe...
Страница 6: ...tory to electrically connect this input Sanitizer Lid Switch that prevents sanitizer pump from running while the lid is open Note This is an optional feature used with certain external dispensers A ju...
Страница 7: ...e Thermistor Apex2 Retrofit Kit 9223 1071 Contents Apex2 User Interface Module Apex2 I O Enclosure Cover I O Board assembly Inductive Probe 12 RS 485 Communication Cable Rinse Thermistor Apex2 New Cus...
Страница 8: ...e only the wall mount bracket Note Avoid mounting the controller in areas near the dish pre scrap area and the rinse section of the dish machine due to excessive water heat and food soil Connect RS 48...
Страница 9: ...rged particularly on shallow tank machines Before drilling the hole in the wash tank identify and avoid any obstructions both inside and outside the wash tank Installations Steps 1 Drill Cut a 7 8 22...
Страница 10: ...for separate installations of the rinse injection line and the thermistor use the supplied 1 8 FNPT x 1 8 MNPT brass bushing ONLY OR b If the thermistor and rinse line must be installed in the same p...
Страница 11: ...to be installed The rinse injector will then be activated when the switch closes from the pressure created by the flow of the final rinse water 1 Locate hexagon feature on the bottom of the I O enclos...
Страница 12: ...power the electrical overcurrent protection and grounding connections must comply with the applicable portions of the National Electric Code ANSI NFPA 79 latest edition and or other local electrical...
Страница 13: ...or pressure switch connections must be connected for all installations Main Power Connect Blue and Brown wires to constant voltage source Connect Green with Yellow stripe wire to verified earth groun...
Страница 14: ...e Thermistor Detergent Dispenser Lid Switch Pressure Switch optional 12 1 8 APEX DETERGENT LID SWITCH SANITIZER MOTOR PRESSURE SWITCH OPTIONAL DETERGENT VALVE APEX RINSE MAIN POWER RED BLK BLK S BRN B...
Страница 15: ...al noise interference After making wire connections install the cable sealing block inside the Apex2 I O Enclosure 1 Place sealing block underneath wires and align the guides into position See figure...
Страница 16: ...ir 3 Connect the supplied grey wire to the male connector of the white wire 4 Route the grey wire out the bottom of the rinse dispenser to the Apex2 I O Enclosure Note Leave the remaining white termin...
Страница 17: ...nclosure causing the cover to unsnap from the stainless steel hinge pin b Do not throw the Apex board into the garbage The board must be disposed of properly c Ship to Ecolab Hwy 251 Rockton Rd South...
Страница 18: ...tall the supplied 4 pin jumpered Phoenix connector in the Rinse Lid Switch and San Lid Switch location on the Apex 2 I O board f Connect the Inductive Probe to the Apex2 I O board Wrap excess cable ou...
Страница 19: ...mp runs at the set rinse pump speed for the programmed Rinse Pump Limit or until the rinse input is turned off whichever comes first ii Door Machine Timed Mode 1 Door machine functionality such as rac...
Страница 20: ...2 5 seconds ii Rinse Additive Third Product 1 Pump delay Door Mode only a Set the delay time for starting the rinse third product pump after receiving a qualified wash signal This value ranges from 0...
Страница 21: ...19 v Alarm Priority...
Страница 22: ...ower lights See I O Board diagram in the electrical section for further information Can the Apex2 controller play videos Yes training videos are located in the Help screen from the main screen and ala...
Страница 23: ...unication Light see page 16 If not blinking disconnect dish machine power for 10 seconds at main breaker and reconnect If problem remains replace I O Board Apex2 Controller does not feed Detergent 1 S...
Страница 24: ...ignal on the I O board and check rinse pump delay setting If motor does not operate check for DC voltage at rinse pump terminals on I O Board During Rinse Pump Test if voltage is greater than 1 VDC an...
Страница 25: ...place pump squeeze tube 3 Check injection fitting for obstruction clean or replace as needed 4 Check squeeze tube for wear and replace if needed Rinse Aid Pump will not prime 1 Check tubing connection...
Страница 26: ...ded with new squeeze tube inside the pump housing It may be beneficial to use a screwdriver to rotate the roller assembly clockwise to assist in the placement of the squeeze tube 7 Lubricate the new s...
Страница 27: ...3 2196 Electrical Apex2 I O Board 6 8349 4007 Electrical Apex2 Power Supply 7 9200 0027 Electrical Apex2 RS 485 Terminating Plug 8 8374 0357 Electrical 24VDC Rinse Pump Motor 9 9200 1077 Miscellaneous...
Страница 28: ...llaneous Apex2 I O Box Cable Seal 9202 2555 Miscellaneous Apex2 I O Box Ecolab Badge 9200 0012 Miscellaneous Apex2 RS 485 Cable seal for retrofits 9200 2115 Plastic Part Apex2 I O Box Cover 9200 2132...
Страница 29: ...us 1 4 Rinse Aid Pump Jaco Head Fitting 9266 2220 Miscellaneous 5 8 OD Mayon Tubing 25 8330 0541 Miscellaneous 1 2 Liquid Tight Conduit 100 9204 2084 Plumbing 24V DC Solenoid Valve Guide Tube Bell Hou...
Страница 30: ...Pump Limit Adjust Third Product Pump Start Delay 15 0 RPM Set the rinse aid pump run time limit per rack Range 0 50 seconds increments of 1 second Default 15 seconds Adjust Rinse Pump Speed Adjust Ri...
Страница 31: ...e line for 30 seconds at the programmed Rinse Pump Speed Adjust Rinse Pump Speed Adjust Rinse Pump Limit Adjust Rinse Start Delay Adjust Pump Prime Set the rinse aid pump run time limit per rack Range...
Страница 32: ...tergent Adjust Rinse Aid Adjust Third Product Back Set rinse pump speed Range 8 30RPM increments of 0 5RPM Default 15RPM Prime the rinse line for 30 seconds at the programmed Rinse Pump Speed Adjust R...
Страница 33: ...Valve Run Time Adjust Detergent Dose Interval Adjust Initial Detergent Charge 1 Adjust Detergent Adjust Rinse Aid Adjust Third Product Back Set rinse pump speed Range 8 30RPM increments of 0 5RPM Def...
Страница 34: ...gent Adjust Rinse Aid Adjust Third Product Back Set rinse pump speed Range 8 30RPM increments of 0 5RPM Default 15RPM Prime the rinse line for 30 seconds at the programmed Rinse Pump Speed Adjust Rins...
Страница 35: ...d Switch Position Machine Signal Interface Diagnostics Out of Product Alarms Dispensing Tests Probe Diagnostics Detergent Inactive Rinse Aid Inactive Third Product Inactive Press start to turn the det...
Страница 36: ...1 Product Selection Language Set Up Alarms Unit of Measurement Reset to Default Settings Set Tablet Values Date Time Machine Setup Set date and time on controller 1 Product Selection Language Set Up A...
Страница 37: ...activations 1 Rack Counts Diagnostic Data Alarm Data I O Board Information Controller Board Information Apex 2 controller Serial number build date and software version 1 Rack Counts Diagnostic Data Al...