Installation
21
6.
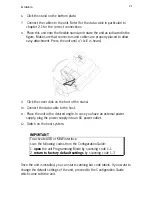
Click the stand on the bottom plate.
7.
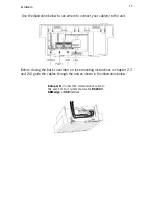
Connect the cables to the
unit
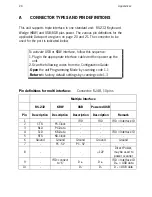
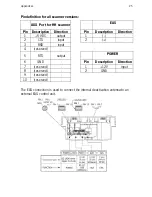
. Refer (for the data cable in particular) to
chapter 2.1 for the correct connections.
8.
Place th
is unit
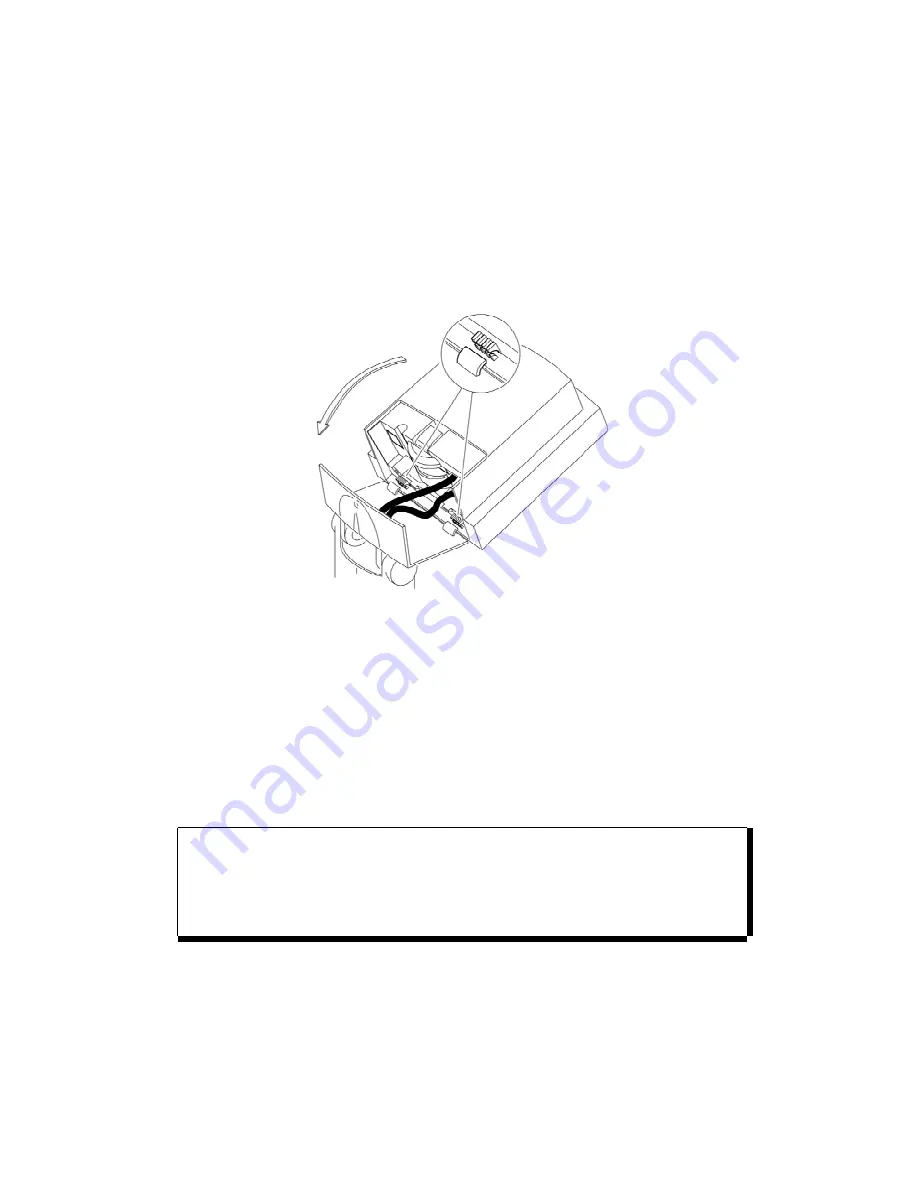
onto the flexible stand and rotate the
unit
as
indicated in the
figure. Make sure that connectors and cables are properly
placed to allow
easy attachment. Press the
unit
until a "click" is heard.
9.
Click the cover disk on the foot of the stand.
10.
Connect the data cable to the host.
11.
Place the
unit
in the desired angle. In case you have an external power
supply, plug the power supply into an AC power outlet.
12.
Switch on the host system.
IMPORTANT
To activate USB or KBW interface
scan the following codes from the Configuration Guide:
1.
open
the
unit
Programming Mode by scanning code 1.1
2.
return to factory default settings
by scanning code 1.3
Once the
unit
is installed, you can start scanning bar code labels. If you want to
change the default settings of the
unit
, proceed to the Configuration Guide
which came with the
unit
.
Содержание EC-OS-7200D
Страница 1: ......
Страница 2: ...User s Manual...
Страница 6: ...Chaper 1 Product Overview...
Страница 16: ......
Страница 17: ...Chapter 2 Installation...
Страница 27: ...Appendices A Connector types and pin definitions B Technical Specifications C Troubleshooting...
Страница 30: ...Appendices 26...
Страница 36: ......

