Echo Bear Cat CH6627H, Руководство пользователя
"Echo Bear Cat CH6627H" - мощный и надежный газонокосилка для профессионального использования. Владельцы могут скачать бесплатное Руководство пользователя для этой модели на manualshive.com. Здесь описаны все функции и инструкции по эксплуатации, чтобы обеспечить долгий срок службы и эффективную работу этого инструмента.
Поделиться
Скачать


Отзывы:
Нет отзывов
Похожие инструкции для Bear Cat CH6627H

PCF 15
Бренд: CyberChill Страницы: 12
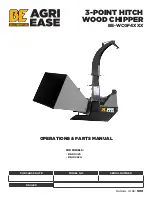
BE-BX42S
Бренд: AGRI EASE Страницы: 46

YCAA-B
Бренд: York International Страницы: 72

PRECISION CUT 7756U
Бренд: BaBylissMEN Страницы: 16

MILLENNIUM YK
Бренд: York Страницы: 16

1888
Бренд: Moser Страницы: 116

Hyperchill ICE076
Бренд: Parker Hiross Страницы: 172

I-Trim
Бренд: hairway Страницы: 3

MR 662
Бренд: Maestro Страницы: 52

A 518 Di
Бренд: Jensen Страницы: 39

801621UK
Бренд: Zip Страницы: 24

RecipPak YEAZ88DR6
Бренд: York Страницы: 92

EWWQ049KAW1M
Бренд: Daikin Страницы: 174

IB26008
Бренд: Morphy Richards Страницы: 2

BRC65
Бренд: Bushranger Страницы: 9

BRC40
Бренд: Bushranger Страницы: 9

TW 18/100G
Бренд: Timberwolf Страницы: 30

Entec TW 190H
Бренд: Timberwolf Страницы: 41


