background image


7-6-2011                                                                   15                                                                ebode DVLHD22 

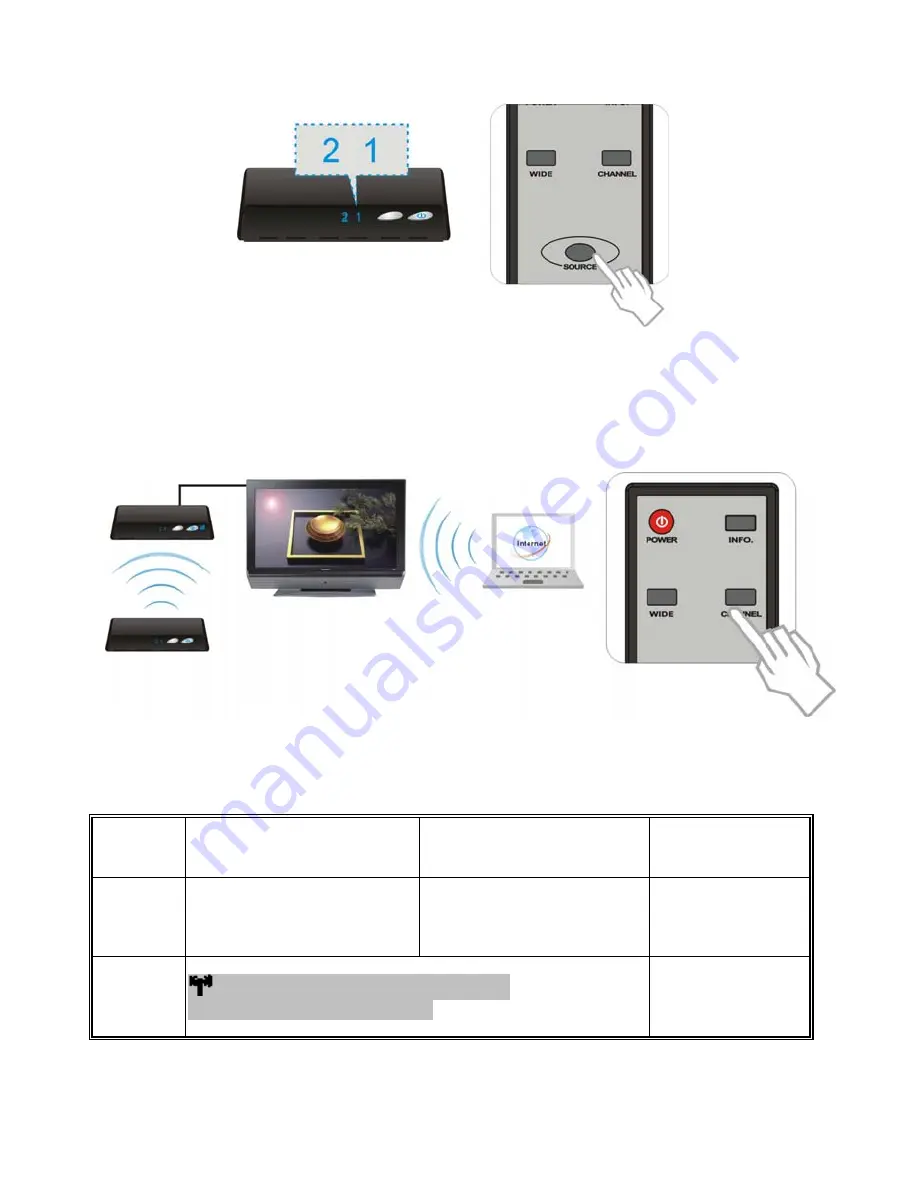
(6) Press the Source button until you see the video being broadcasted from your device.  


(7) If you have electronic devices such as a cordless phone, wireless access point/ router 

sharing the 5GHz channel frequency, when you use it near the Transmitter and Receiver, you 

may experience disturbed picture or diminished sound quality.  Press the CHANNEL button on 

the remote control to change them to different channels. 


Note

A. Changing the Transmitter and Receiver to a different wireless channel: 


1. Enter the wireless RF 
channel adjustment mode 

2. Changes to the next 
available RF wireless 
channel 

3. Exit the wireless RF 
channel adjustment 
mode 

Method 

Press the CHANNEL button on 
the Remote Control Unit 
(RCU) for current channel 
status display. 

Press the CHANNEL button 
on the RCU again within 5 
seconds to switch channel 
randomly. 

No button is pressed 
for 5 seconds.  

OSD 
Display 
Status 

▃▆

  HDMI1 [CH 8] WIDE Off  1280x1024 

Press again to change Channel 

Exit. 


Содержание DVLHD22

Страница 1: ...Full HD Wireless Video Kit Full HD Wireless Video Receiver and Transmitter DVLHD22...

Страница 2: ...7 6 2011 2 ebode DVLHD22...

Страница 3: ...er 100 240V AC in 5V 3A DC out Power Adaptor Frequency Band 4 9 5 9GHz Include non DFS and DFS Frequency Bands Operating Range The maximum video transmission range is 20 meters 66 feet The minimum ran...

Страница 4: ...rating labels Never connect an adapter or power cord when it is damaged In that case contact your supplier If there is any danger of a thunderstorm it is a good precaution to unplug the power supply f...

Страница 5: ...eters 66 feet LOS Line of sight with no latency Both IR Sensor Extender Cable and IR Blaster Extender Cable are included in the package so users can point their own remote control of the A V source at...

Страница 6: ...set via HDMI out and the AV equipment via HDMI in Then you can enjoy the same digital content on your 2nd HDTV set connected to the Receiver possibly in another room Z HDMI IN Connect Transmitter to H...

Страница 7: ...and the Loop through connection is on Press it pointing at Transmitter to enter Standby mode and the Loop through connection is off INFO Press this button to display related information Please refer n...

Страница 8: ...ll keep on 3 The Standby mode consumes 90 less of the power User has to press power key on top cover of both Transmitter and Receiver to resume to Active mode D On Screen Display OSD vs Remote Control...

Страница 9: ...1280x1024 Press again to change Channel Press the Channel button again within 5 seconds to switch Channel manually HDMI1 CH 8 WIDE Off 1280x1024 Press again to change Channel Press the WIDE button of...

Страница 10: ...HDMI cable included The Transmitter has two HDMI inputs for the latest High Definition device like PS3 Blu ray Player 2 Connect the Transmitter HDMI OUT to the HDTV set s HDMI IN port with an HDMI ca...

Страница 11: ...e POWER button lights up in solid blue when the Receiver is connected to the power mains Step3 Setup the IR blaster extender cable and IR sensor extender cable If necessary connect the Infrared IR bla...

Страница 12: ...ays infrared command from your remote control to the device Users can control their AV devices by pointing their remote control to the TV of RX instead of to their AV equipment If the Receiver will be...

Страница 13: ...lugged into the electrical outlet the Transmitter and Receiver will be turned on automatically 3 If it is in Standby mode and Loop thru display off Both POWER LED of Transmitter and Receiver are lit i...

Страница 14: ...Receiver Note During this period the Transmitter will enter Standby mode and turn off Loop thru display when press the POWER button of Transmitter or press the POWER key of the remote control unit to...

Страница 15: ...remote control to change them to different channels Note A Changing the Transmitter and Receiver to a different wireless channel 1 Enter the wireless RF channel adjustment mode 2 Changes to the next...

Страница 16: ...ncy MHz Support Region Channel Support Region Channel Support Region Channel 5160 X X X X X X 5180 V 1 V 1 V 1 5200 V 2 V 2 V 2 5220 V 3 V 3 V 3 5240 V 4 V 4 V 4 5260 5700 X X X X X X 5745 V 5 X X X X...

Страница 17: ...on HDMI1 CH10 WIDE off 1280x1024 Standby Mode Loop thru Off Blinking Blue Blinking Initial Boot up or Linking System boots up Or RF linking Note A HDMI1 CH WIDE off Searching available channels Blinki...

Страница 18: ...Format this is an indication that the video frame rate from the source device is not supported please refer chapter 5 to switch a supported video timing Step 5 For multi room audio video transmission...

Страница 19: ...lative position of the main holes and attach this paper on wall 2 Drill pilot holes 3 Insert the supplied two Anchors into the wall 4 Insert two screws into the anchors Leave 1 8 length for mounting t...

Страница 20: ...upported Format Ensure your video resolution and frame rate is recognized supported and within the transmission range Connect the source device to your TV to check and modify the video format compatib...

Страница 21: ...Supported Resolution If the SOURCE LED continues to blink in blue slower than no signal mode OSD display No Supported Format and there is no video displayed or the video quality suffers it indicates t...

Страница 22: ...ncy No latency 1ms Antenna High Performance Internal Antennas Operating Frequencies 4 9 5 9GHz Include non DFS and DFS Frequency Bands Power Supply 100 240V AC in 5V 3A DC out Power Adaptor Operating...

Страница 23: ...7 6 2011 23 ebode DVLHD22 NOTES...

Страница 24: ...s for energy using Technical data and copies of the original Declaration of Conformity are available and can be obtained from ebode electronics PB 25 NL 4264ZG the Netherlands User Information for Con...

Страница 25: ...onforme aux exigences essentielles et aux autres dispositions pertinentes de la Directive 1999 5 EC Espa ol Spanish Este equipo cumple con los requisitos esenciales asi como con otras disposiciones de...

Страница 26: ...ite personal buttons for you and your partner also give you quick access to all your own favourite channels too The remote can be set up within 5 minutes and is very easy to use and navigate As the TA...

Страница 27: ...e fitting All you need is an iPodTM HiFi television or PC to provide your music and a standard E27 socket to plug into and this multiroom two source system will deliver brilliant lighting and tuneful...

Страница 28: ...7 6 2011 28 ebode DVLHD22 www ebodeelectronics eu...

Отзывы: