


8
Section 2: Receiving, unpacking, and inspection
Series NRX with PXR - type RF low voltage power (air) circuit breakers instruction manual
MN013002ENH03 September 2016 www.eaton.com
Section 2: Receiving, unpacking, and inspection
Suggested tools
●
Flat-blade/Phillips head screwdrivers
●
3/8-inch levering tool or extension/ratchet
●
5 mm Allen head screwdriver
●
1/2 inch socket and ratchet or 1/2 inch wrench
Circuit breaker unpacking and inspection
Inspect shipping containers for obvious signs of external
damage. Record any observed damage for reporting to
the transportation carrier and Eaton. All reports and claims
should be as specific as possible and include the order
number and other applicable nameplate information.
ote:
N
The outside of the circuit breakers shipping container
includes a transport “Tip-N-Tell” indicator alerting the
receiver as to whether or not the shipping container
was transported and handled in the required man-
ner. Refer to FIgure 6 for details about the indicator
before removing the circuit breaker from its con-
tainer.
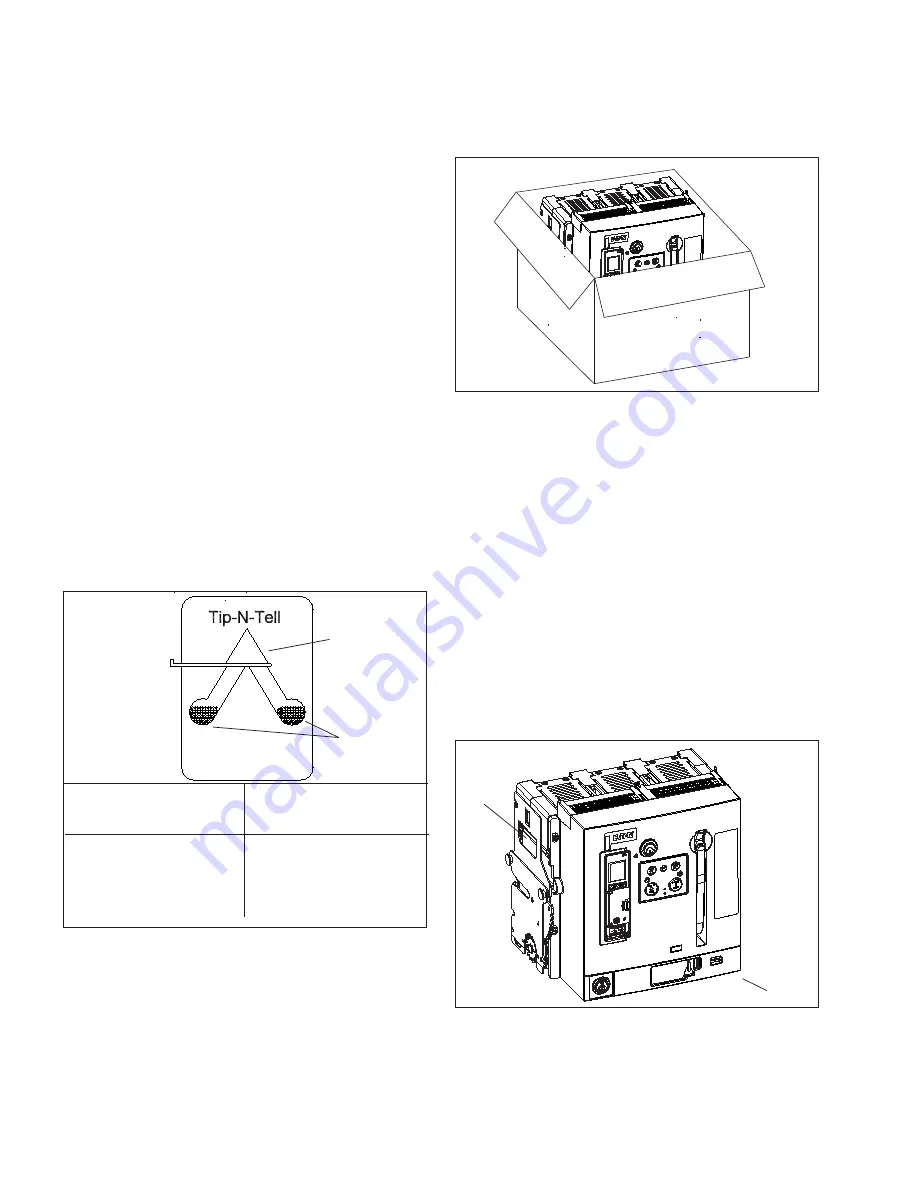
Figure 6. Transport indicator.
When ready to inspect and/or install a Series NRX circuit
breaker, proceed with the following steps:
Step 1: Carefully open container and remove all packing/
shipping material and documentation.
Triangle at top of indicator is
partially full or totally full of blue
beads.
• Transport was not in keeping
with instructions (breaker con-
tainer was tilted or overturned).
• Check breaker closely for dam-
age.
Triangle at top of indicator has no
blue beads in it.
• Breaker container was not tilted or
overturned during transport.
Triangle
Blue Beads
Figure 7. Step 1.
ote:
N
Also follow Step 1 when handling a separately
shipped drawout cassette.
Step 2: Save all packing/shipping material and documenta-
tion for future shipments or breaker storage purposes.
Step 3: Move the breaker to a convenient place for closer
examination. Drawout breakers are provided with a lifting
handle on both sides to assist lifting.
Use an appropriate device to lift the breaker or cassette
(Figure 9). If one is not available, it is recommended
that a minimum of two people be used to lift/move a
breaker or cassette.
ote:
N
Refer to Figure 9 for additional precautions and lifting
procedures.
Step 4: Repeat Step 3 for a drawout cassette. The cassette
is provided with a lifting indentation on each side.
Figure 8. Step 3.
Lifting
handle
Lifting
area


