


55
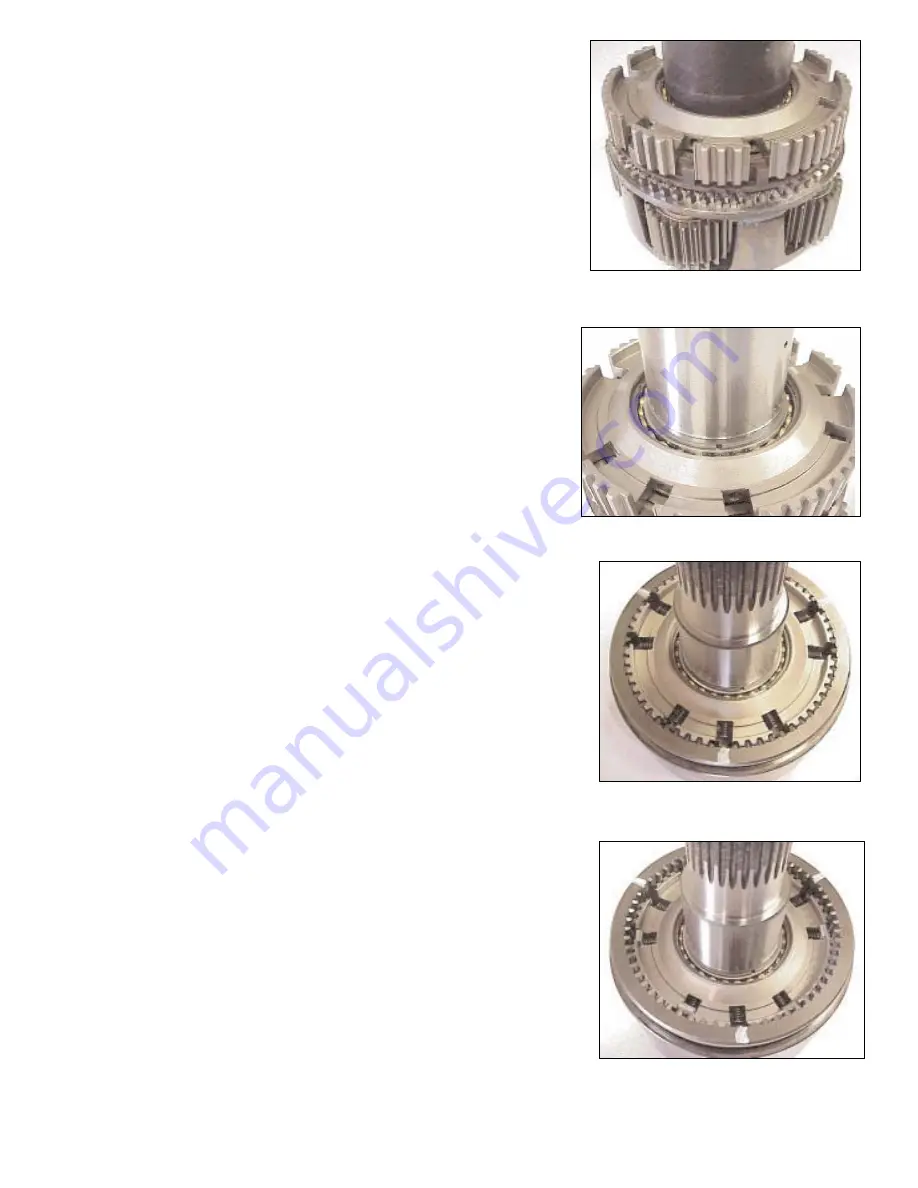
i) Place synchronizer hub and bearing assembly onto the
shaft aligning the slots in the hub with the shoulders on the
synchronizer ring. Use a soft mallet and drift or mandrel to
ensure the bearing is fully home against the stop.
j) Install retaining snap ring.
k) Apply grease to 9 springs and put one spring and plunger
each in nine slots. Mark one flat internal tooth on shifting
sleeve as shown. Sliding sleeve up, align the annulus
coinciding the mark with one central slot and slide the
assembly over the planet gears.
l) Lift up annulus and support it by about 15 mm thick piece.
Ensure the plungers and the springs are fully inside the
holes in all the six slots and no plunger projects out of spring.
Snap one roller with grease applied to it, by hand between
the plunger head and sliding sleeve, each into the six outer
slots (two outer of each set of three slots) - in the
synchronizer hub.
Содержание EEV-7202
Страница 1: ...1 Service Manual 2 Speed Transmission EEV 7202 Feb 14 ...
Страница 3: ...3 Section 1 General ...
Страница 11: ...11 Features Description ...
Страница 20: ...20 Power flow ...
Страница 22: ...22 ...
Страница 23: ...23 Exploded Views ...
Страница 24: ...24 ...
Страница 25: ...25 ...
Страница 26: ...26 ...
Страница 27: ...27 ...
Страница 28: ...28 ...
Страница 29: ...29 Loctite locations ...
Страница 30: ...30 Section 2 Main Transmission Overhaul ...
Страница 31: ...31 Transmission case Dis assembly ...