Operation instructions
Cap/wrench
It is keyed for one way in/
one way out when fully
switching to ensure positive
switch contact.
The molded arrow on the
switch shaft must line up
with the molded arrow
inside the wrench.
The white molded arrow on
the interior of the cap points
to the switched position.
Lever or hotstick
handles
Lever or point of rigid
Hotstick Handle points to
the switched position. To
switch, back out lockscrew,
rotate to desired position,
turn in lockscrew to ensure
positive switch contact.
WARNING
Enclosed “Warning” decals (Eaton P/N 1139089A01 and
P/N 1139090A01) must be displayed at or near operating
handle of switch as a warning to service personnel .
Failure to do so will constitute a waiver of all warranty
and indemnity obligations which may be attributable
to Eaton .
WARNING
The misapplication of the switch constitutes a potential
hazard to life and property . Accordingly, the user must
exercise due care in utilizing these instructions to
assure that the switch is properly applied .
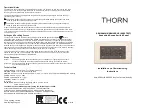
The decals included with the handle kit are to be located on
the tank wall near the switch operating handle as a warning
to service personnel (see Figure 1).
Failure to do so will constitute a waiver of all warranty and
indemnity obligations attributable to Eaton.
Cap/wrench switches
Figure 1 . Warning decals
2
INSTALLATION INSTRUCTIONS
MN800014EN February 2017
100 A tap-changer switch cap/wrench, lever or hotstick operable handles installation instructions