3
Manual CEAG W 270.3 LED with charger Z 345.3
40071860171_A August 2018 www.ceag.de
1 Normenkonformität
Die Leuchte ist konform mit: EN 60 598-1, EN
60 598-2-22 und DIN EN 1838. Gemäß DIN EN
ISO 9001 entwickelt, gefertigt und geprüft.
1 Conformity with standards
Conforms to: EN 60 598-1, EN 60 598-2-22 and
DIN EN 1838.
Developed, manufactured and tested in accord-
ance with DIN EN ISO 9001.
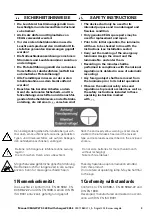
SICHERHEITSHINWEISE
• Die Leuchte ist bestim mungs gemäß in un-
beschädigtem und einwandfreiem Zustand
zu betreiben!
• Als Ersatz dürfen nur Originalteile von
CEAG verwendet werden!
• Vor der ersten Inbetriebnahme muss die
Leuchte entsprechend den im Abschnitt In-
stallation genannten Anweisungen geprüft
werden!
• Die Notleuchtenkenn zeich nung vornehmen:
Stromkreis und Leuchtennummer zuordnen
und eintragen.
• Die Protokollführung gemäß der nationalen
Vorschriften ist durchzuführen (entfällt bei
automatischer Protokollierung)!
• Alle Fremdkörper müssen vor der ersten
Inbetriebnahme aus dem Gerät entfernt
werden!
• Beachten Sie bei allen Ar beiten an dem
Gerät die nationalen Sicherheits- und Un-
fallverhütungsvorschriften und die nachfol-
genden Sicherheitshinweise in der Betriebs-
anleitung, die mit einem versehen sind!
SAFETY INSTRUCTIONS
• The device shall only be used for its
intended purpose and in undamaged and
flawless condition
• Only genuine CEAG spare parts may be
used for replacement and repair
• Prior to its initial operation, the luminaire
will have to be checked in line with the
instructions (see installation sector)
• Carry out the marking of the emergency
luminaire: Assign the circuit and the
luminaire No. and enter them.
• Recording in the minutes shall be
performed in compliance with the national
regulations (is deleted in case of automatic
recording).
• Any foreign object shall be removed from
the luminaire prior to its initial operation!
• Observe the national safety rules and
regulations to prevent accidents as well as
the safety instructions included in these
operating instruction marked
with
Batterie nicht länger als 6 Monate ohne Ladung
lagern!
Die technischen Daten sind zu beachten!
Do not store batteries for more than 6 month
without recharging!
Note technical details!
Möglicherweise gefährliche optische Strahlung.
Bei Betrieb nicht für längere Zeit in die Lampe
blicken. Kann für die Augen schädlich sein.
Possibly hazardous optical radiation emitted
from this product.
Do not stare at operating lamp. May be harmful
to the eye.
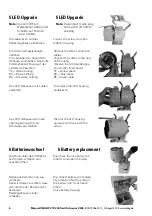
Den beiliegenden gelben Warn-Aufkleber gut sich-
tbar oben am Leuchtenkopf sowie die geänderten
Typen- und Hinweisschilder, wie auf den beiliegen-
den Aufklebern beschrieben, anbringen
Stick the enclosed yellow warning sticker clearly
visible to the luminaire’s head and the revised
type and note labels as described on the enclosed
stickers..


