


16
Generally speaking, you should select a kind of IP Mode from the two IP Modes
if you use GIP300/GIP300P IP Phone in the local area network..
You can select the “Static” IP Mode if you are familiar with the Network
Configuration and you can fill all the parameters in the texts by yourself.
You can also select the “DHCP” IP Mode and let GIP300/GIP300P IP Phone get
all the parameters from the DHCP Server.
You can ask Administrator if you are still not clear.
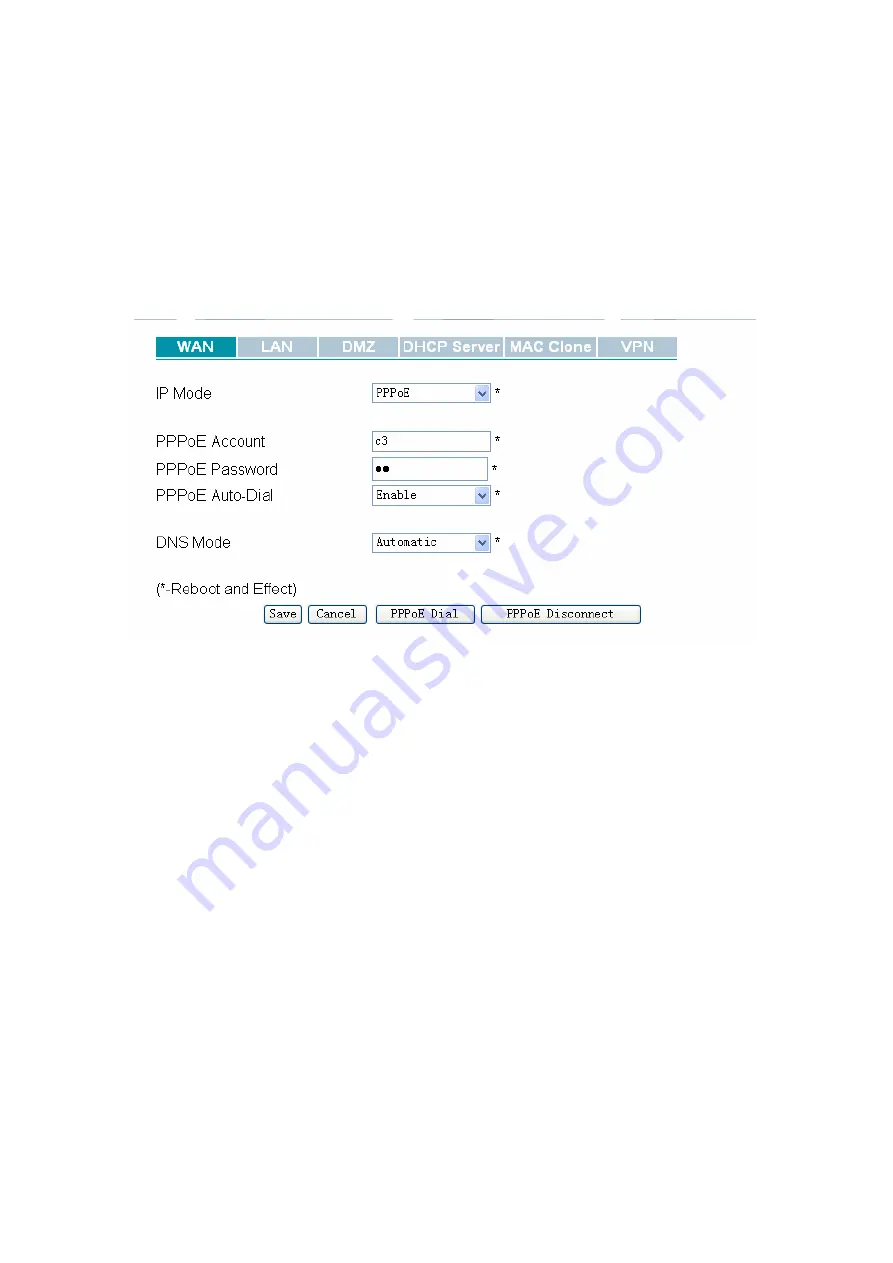
3. PPPoE settings
(1) Set “PPPoE” in the “IP Mode” text.
(2) Fill the PPPoE account and password in the texts.
(3) Enable the “PPPoE Auto-Dial”. You can also disable the “PPPoE Auto-Dial” if
you click the “PPPoE Dial” manually for dialing the number.
(4) You should set “manual” in the “DNS Mode” if you set “DNS” by yourself. And
then fill the DNS in the two following texts. Generally speaking, you can set
“Automatic” in the “DNS Mode” and GIP300/GIP300P IP Phone will get “DNS”
from DHCP Server automatically.
(5) You should click the “Reboot” in the left of the page to reboot the IP Phone if you
see the words “Please REBOOT to make the changes effective!”. After Reboot, you
can see PPPoE Status successful and the network parameters in the System Status
page if GIP300/GIP300P IP Phone dial the number successfully.
You can select the “PPPoE” IP Mode if you are family users or your PC connects to
Internet by ADSL. You should connect your PC with GIP300/GIP300P IP Phone’s
LAN. In detail, you can see the following LAN settings.
LAN settings:
Содержание GIP300
Страница 1: ...GIP300 300P User Manual Version 1 0 ...


