To order parts and supplies: 800.343.9353 >> eastwood.com
19
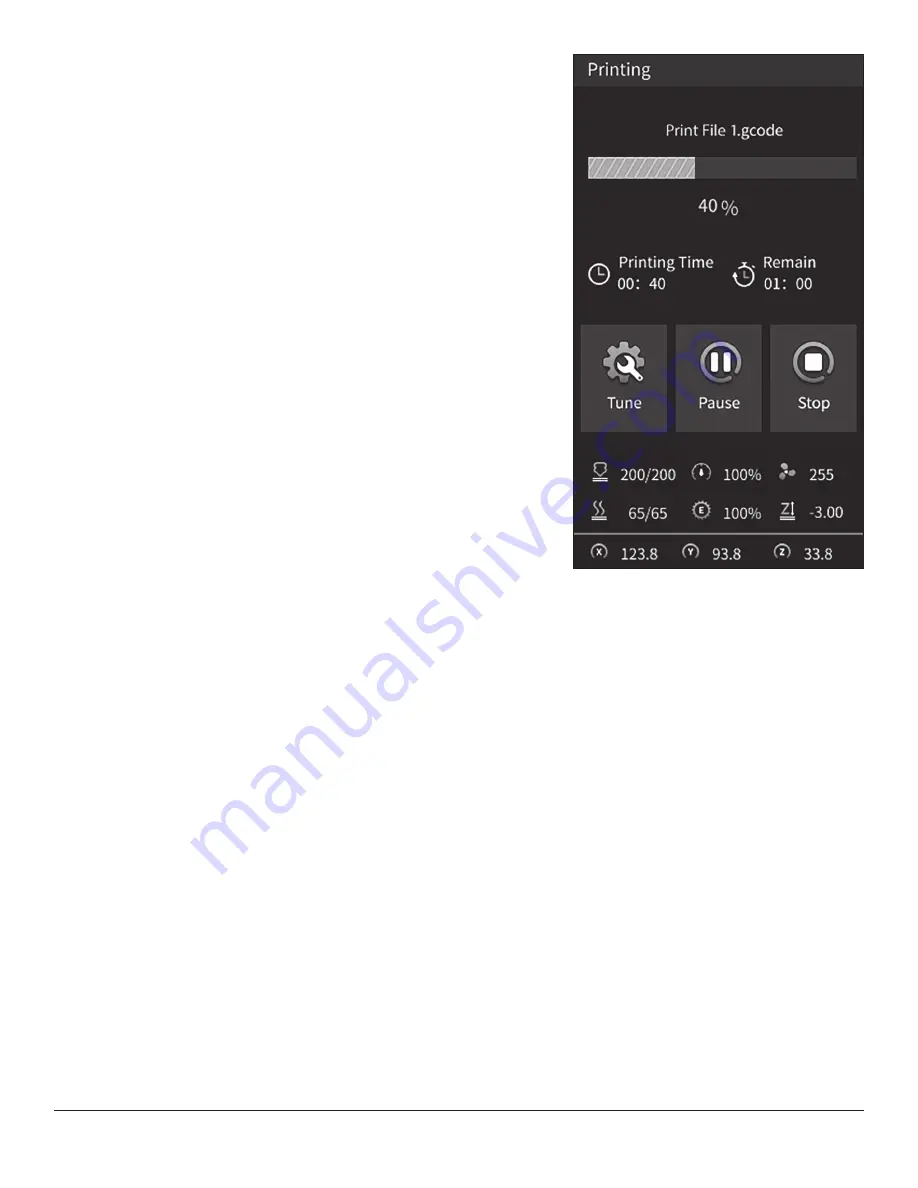
PRINT IN PROGRESS SCREEN MENUS (FIG 36)
When a print is in progress the screen shows more information and options relevant
to the print. Upon finishing it will show the time to it took to print and ask to confirm
before returning to the main screen. Printing time elapsed and remaining time format
is displayed in
(hh:mm)
format.
•
Tune
-
Speed:
Adjusting print speed scales the speed at which the printer
is operating, on-the-fly; eg.100 is the set speed as defined by the G-code,
120 is 20% faster, 90 is 10% slower.
-
Nozzle Temp:
Control nozzle temperature set point in degrees Celsius.
-
Bed Temp:
Control bed temperature set point in degrees Celsius.
-
Fan Speed:
Control the part cooling fan speed, relative adjustment 0 - 255.
-
Probe Z-Offset:
The Z-Offset is a very useful option for the start of the first
layer. It allows you to adjust the Z-Axis height above or below the
Auto home height in millimeters.
For example; If the first layer is not sticking to the print bed, the Z-Offset can be ad-
justed to a negative value like -0.20mm, on-the-fly, to get the perfect first layer height.
It can also be used to bump the height up if another surface, like tape, is added on top
of the build plate for better adhesion. After the auto homing is completed, this can be
adjusted, on-the-fly, to get the perfect first layer on a print.
•
Pause:
Pauses the print at the current location and turns off the heating.
The print can later be resumed.
•
Stop:
Cancels the current print in progress.
This option will ask for confirmation before cancelling the print.
FIG. 36
FIG. 36


