background image

10

WARNING!


Observe the safety instructions on page 6 

before using the product.

Make sure that the following requirements are met 

before using the Charging Robot:

—   The authorised electrician have set up the electrical 

connection properly.

—   The charger is properly configured.

—   The software is up to date (see page 11).

—   If you have set up access control, unlock it by using a 

registered RFID tag or disable it from the Easee App 

or the local WiFi interface.

1.

   Check the charging cable and connector for damage 

and impurities such as foreign objects and water 

ingress before charging.

2.

  Connect the charging cable to the Charging Robot 

and your electric car. The charging process starts 

and adapts automatically to the electric car and 

the available energy at any time according to the 

configuration.

If the car does not start charging, check that charging 

is activated in your car and that the connectors are 

properly plugged in. If charging still does not start, check 

what might be the cause on page 11.

Smart charging

Some operators offer smart charging which will delay 

charging to a suitable point in time, often tied to 

electricity price or similar mechanisms. When Smart 

charging is active the LED strip is lit blue, charging will 

not start until the operators criteria for charging is met. 

Contact you operator to know more and to find out if 

they offer this service.

How do I charge?

Apps and interfaces

WiFi interface

The WiFi interface is intended for local operation of the 

charger. It is not depended on an internet connection, 

but it needs a smartphone to be accessed.

Easee app

The Easee app is intended for everyday use of your 

Easee products. It can be used anywhere in the world 

through the Easee Cloud.

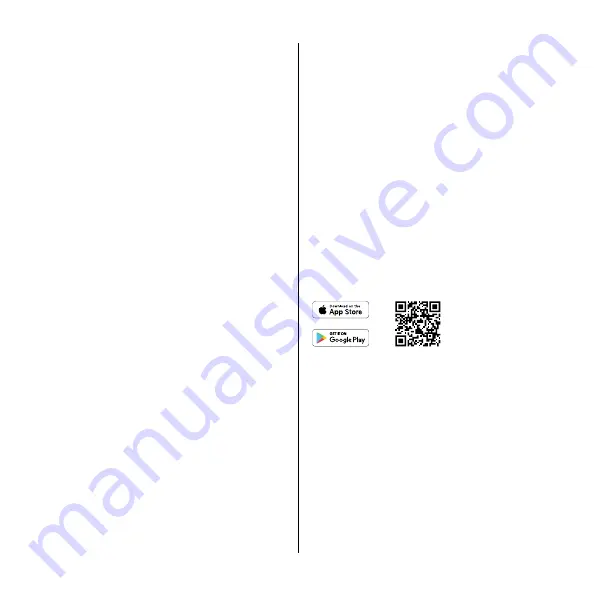
The Easee app can be downloaded from the application 

store of your iOS or Android mobile device. 

Easee Portal

The Easee Portal is a tool intended for administration of 

one or several Easee sites.

The Portal is mainly intended for site owners, installers, 

administrators, service providers and people who need 

to manage several products and sites from one interface.

Go to 

easee.support

 for more information on our 

interfaces.

Содержание Plug and Play

Страница 1: ...Easee Plug Play User installation guide...

Страница 2: ...ty Safety instructions Installation Installation instructions Daily use and operation How do I charge Apps and interfaces Charging Robot interface Maintenance Practical details 3 3 4 5 6 7 10 10 11 12...

Страница 3: ...t load bearing capacity It may only be operated with the approved operating parameters and under the specified environmental conditions see page 5 Uses other than those specified here are not permitte...

Страница 4: ...ons 2 Light strip The light strip communicates the status of the Charging Robot at all times Read more about this on page 11 3 RFID area The integrated RFID reader enables access control of the Chargi...

Страница 5: ...meter 2 Easee Home Load balancing of up to 3 units per circuit Easee Charge Load balancing of up to 101 units per circuit Sensors and indicators Light strip with LEDs showing the status of the charge...

Страница 6: ...n the product lights up red there is a fault For more information see page 11 Make sure that children do not play with the product Never touch the contacts of the Type 2 socket and never insert foreig...

Страница 7: ...careful and follow the instructions Installation instructions 1 Unscrew the locking screw at the bottom of the Easee Ready 2 Insert the two ends of the included tool into the two openings at the bott...

Страница 8: ...e 3 When the Chargeberry is in the track press it forcefully down until you hear a click 4 Paste the PIN code sticker on the back of the manual or in another safe location e g inside of the fuse cabin...

Страница 9: ...1 Hang the front cover at the top of the backplate and let it fall into place 2 Press the bottom of the front cover until you hear a click 3 Bend the lower part of the rubber cover down 4 Screw in the...

Страница 10: ...might be the cause on page 11 Smart charging Some operators offer smart charging which will delay charging to a suitable point in time often tied to electricity price or similar mechanisms When Smart...

Страница 11: ...nst the RFID area of the Charging Robot in order to authenticate and initiate the charging White fast flashing light RFID tag received awaiting key verification Red constant light General error Unplug...

Страница 12: ...uit insulation with the Chargeberry installed in the backplate may damage the electronics or impact the reading negatively Maintenance Practical details Warranty The device is free from material defec...

Страница 13: ...be isolated before dismounting starts Use the installation guide and follow the steps in reverse in order to dismount the Charging Robot in the correct order Disposal This electronic equipment must no...

Страница 14: ...ding retrieving data or computer networks without the written permission of Easee AS Easee and all other Easee product names and slogans are trademarks or registered trademarks of Easee AS Easee produ...

Страница 15: ...15...

Страница 16: ...16 Easee AS Grenseveien 19 4313 Sandnes Norway easee com...

Отзывы: