13
For additional information email
or call 800-345-6007 M-F 8-5
Operator’s Manual
CRT Rototiller
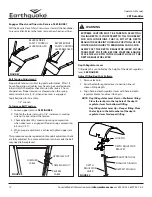
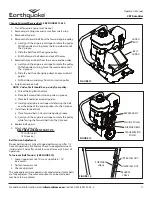
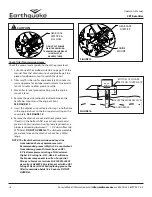
Wheel Lock Pins
To Place Wheels In Free-Wheel Position Do As Follows:
NOTE: This allows wheels to turn freely on the axle for
easy transportation.
1. Remove lock pin. Slide wheel inward toward machine.
SEE FIGURE 10
2. Insert lock pin through the axle hole only, fold lock ring
to secure pin to axle.
3. Repeat for other wheel.
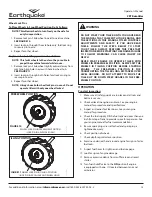
To place wheels in tilling position do as follows:
NOTE: This locks wheels to the axle so they are able to
propel the machine forward while in use.
1. Remove lock pin. Slide wheel slightly outward away from
machine. Align hole in axle with hole in wheel hub.
SEE FIGURE 11
2. Insert lock pin through both holes, fold lock pin ring to
secure pin to axle.
3. Repeat for other wheel.
NOTE: Always have both wheel lock pins in or out. Do not
operate tiller with only one wheel locked.
WHEEL LOCK PIN IN TILLING POSITION
(LOCK PIN IN AXLE HOLE AND WHEEL HOLE)
13549-0012R1
TILLING POSITION
FIGURE 11
WHEEL LOCK PIN IN FREE-WHEEL POSITION
(LOCK PIN IN AXLE HOLE ONLY)
13549-0011R1
FREE-WHEEL POSITION
FIGURE 10
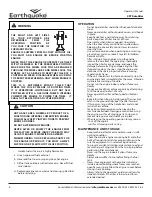
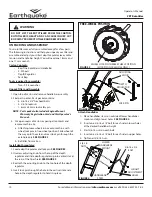
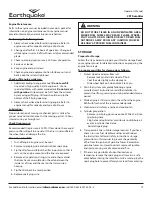
DO NOT START YOUR TILLER UNTIL YOU HAVE READ
THE MANUAL THAT CAME WITH YOUR ENGINE, AND
THE SECTIONS IN THIS MANUAL TITLED CONTROLS,
ADJUSTMENTS AND SAFETY. IF YOU HAVE READ
THESE, FOLLOW THE STEPS BELOW TO START
YOUR TILLER. ALWAYS PERFORM THIS PRE-START
INSPECTION BEFORE STARTING THE ENGINE. FAILURE
TO FOLLOW WARNINGS CAN CAUSE INJURY OR
DEATH.
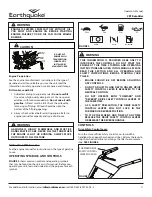
NEVER START ENGINE OR OPERATE TILLER WITH
WHEELS IN FREE-WHEEL POSITION. ALWAYS SET THE
WHEELS IN TILLING POSITION BEFORE STARTING
ENGINE. THE FREE-WHEEL POSITION IS FOR
TRANSPORTING THE TILLER LONG DISTANCES OVER
LEVEL GROUND. DO NOT ATTEMPT TO MOVE THE
TILLER UP OR DOWN STEEP GRADES IN THE FREE-
WHEEL POSITION.
WARNING
OPERATION
Pre-start inspection:
1. Make sure all safety guards are in place and all nuts and
bolts are secure.
2. Check oil level in engine crankcase. See your engine
manual for procedure and specifications.
3. Inspect air cleaner for cleanliness. See your engine
manual for procedure.
4. Check the fuel supply. Fill the fuel tank no closer than one
inch from top of tank to provide space for expansion. See
your engine manual for fuel recommendations.
5. Be sure spark plug wire is attached and spark plug is
tightened securely.
6. Check position of wheels.
7. Check depth regulator lever position.
8. Examine underneath and around engine for signs of oil or
fuel leaks.
9. Inspect fuel hoses for tightness and fuel seepage.
10. Look for signs of engine damage.
11. Remove excessive debris from muffler area and recoil
starter.
12. Turn fuel shutoff valve to the
ON
position if engine
is equipped with one. It’s located between tank and
carburetor.


