background image

10

E-flite Funtana 300 Assembly Manual


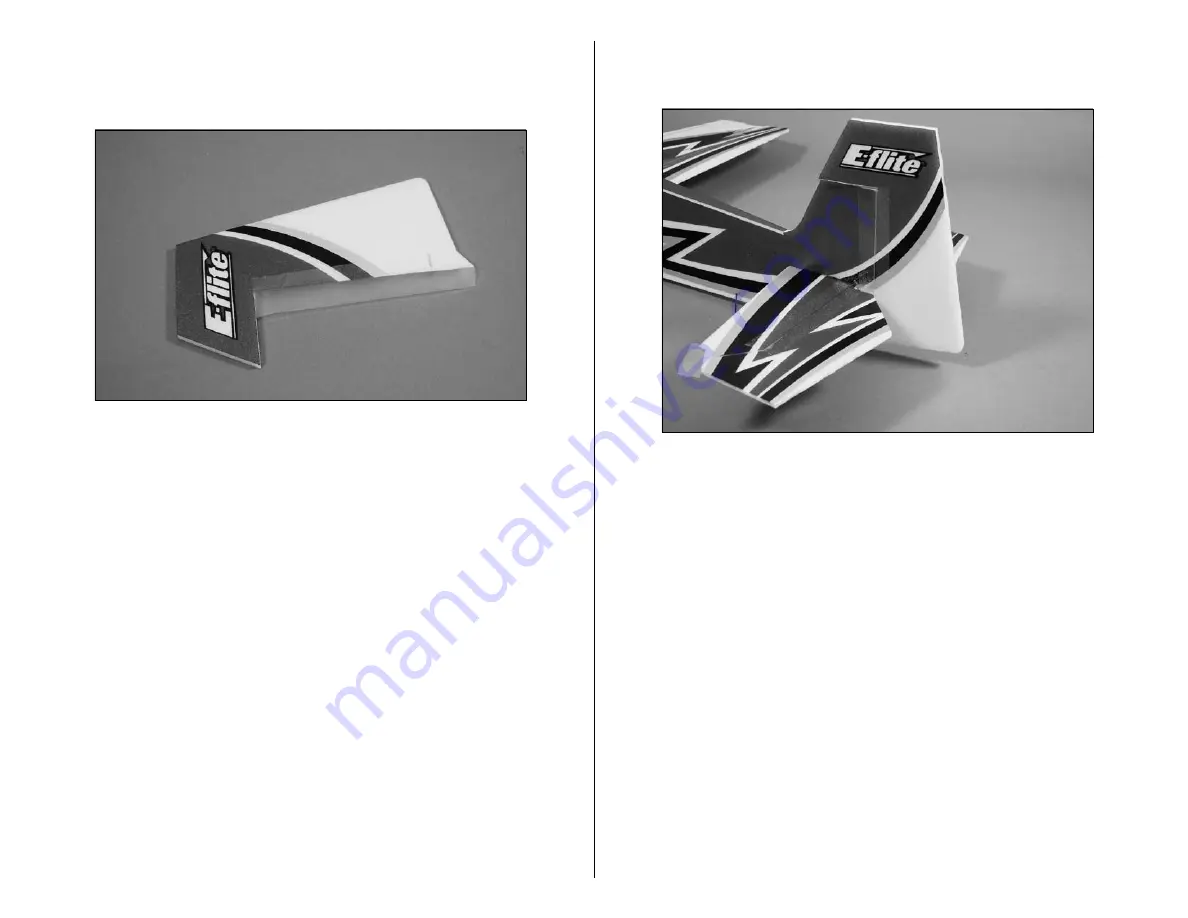
7. Apply hinge tape the the rudder as shown. The tape 

should not overlap onto the balance tab of the rudder or 

it will interfere with the operation of the rudder.


8. Attach the rudder to the fin. Make sure the balance 

tab on the rudder does not rub against the top of the fin.

Note

: Use low-tack tape to tape the control surfaces in 

their neutral positions. This will make the airframe easier 

to handle during assembly. Be careful not to tape the 

printed surfaces as there is a chance of the printing 

coming off when removing the tape.

Содержание Funtana 300 AR

Страница 1: ...Specifications Wingspan 32 in 810mm Length 30 in 760mm Wing Area 251 sq in 16 2 sq dm Weight w Battery 7 5 8 0 oz 215 230 g Weight w o Battery 6 75 7 0 oz 190 200 g Funtana 300 Assembly Manual...

Страница 2: ...g with the built up fuselage it is sturdy enough to be flown outdoors in up to 10 mph winds Table of Contents Specifications 1 Introduction 2 Using the Manual 3 Contents of Kit Parts Layout 3 Required...

Страница 3: ...rator 2 Required Radio Equipment You will need a minimum 6 channel transmitter for proper mixing and dual rate capabilities crystals micro receiver and three sub micro servos You can choose to purchas...

Страница 4: ...o Brushless ESC APC08038SF 8x3 8 Slow Flyer Prop THP7303SJPL 730mAh 3 Cell 11 1V Li Po JST EFLC3005 Celectra 1 3 Cell Li Po Charger Optional Accessories EFLA110 Power Meter Required Tools and Adhesive...

Страница 5: ...anty is limited to the original Purchaser Purchaser and is not transferable REPAIR OR REPLACEMENT AS PROVIDED UNDER THIS WARRANTY IS THE EXCLUSIVE REMEDY OF THE PURCHASER This warranty covers only tho...

Страница 6: ...ur local hobby store and or place of purchase cannot provide warranty support or repair Once assembly setup or use of the Product has been started you must contact Horizon directly This will enable Ho...

Страница 7: ...llowing address Horizon Product Support 4105 Fieldstone Road Champaign Illinois 61822 Please call 877 504 0233 with any questions or concerns regarding this product or warranty Safety Precautions and...

Страница 8: ...g to the rear of the fuselage The measurements must match from right to left If not adjust the position of the wing until both measurements are equal A A A A 2 Glue the wing to the fuselage using foam...

Страница 9: ...Step back and check that the wing and stabilizer are parallel to each other If not lightly sand the stabilizer saddle to correct for any alignment issues Once fully aligned glue the horizontal stab i...

Страница 10: ...on of the rudder 8 Attach the rudder to the fin Make sure the balance tab on the rudder does not rub against the top of the fin Note Use low tack tape to tape the control surfaces in their neutral pos...

Страница 11: ...0 1 2 inch 267mm carbon pushrod 3 1 4 inch 82mm carbon pushrod 2 Required Tools and Adhesives Foam safe CA Pin drill Drill bit 1 16 inch 1 5mm Hinge tape Phillips screwdriver 0 Low temperature hot glu...

Страница 12: ...2 to install the rudder and aileron control horns 4 Attach the Z bend on the 10 inch 254mm carbon pushrod to the middle hole on the elevator control horn 5 Attach the Z bend on the 10 1 2 inch 267mm c...

Страница 13: ...make sure they operate and are centered as well Also center the trims on the transmitter at this time If you are using a computer radio start with a clear model program and check that all sub trims a...

Страница 14: ...the micro pushrod connector into the outer hole in the servo arm mmm 11 Secure the micro pushrod connector to the servo arm using a micro pushrod connector backplate 12 Repeat Steps 8 through 12 to p...

Страница 15: ...ileron servo to the wing using the servo template on the wing Another alternative would be to use foam safe CA to glue the servo down 14 With the aileron and aileron servo centered use a 2mm x 4mm mac...

Страница 16: ...ing hot glue Slide the rudder pushrod into the micro control connector Another alternative would be to use foam safe CA to glue the servo down 16 With the rudder and rudder servo centered use a 2mm x...

Страница 17: ...ushrod into the micro control connector Another alternative would be to use foam safe CA to glue the servo down 18 With the elevator and elevator servo centered use a 2mm x 4mm machine screw and 0 Phi...

Страница 18: ...A Low temperature hot glue Hot glue gun 1 Slide the landing gear into the slot in the bottom of the fuselage A drop of foam safe CA can be placed on the gear to help keep it in position m 2 Use foam s...

Страница 19: ...ing on the landing gear covers and wheel pants to ensure they do not get damaged during the rest of the construction of the model 6 Slide the wheel pants onto the nylon wheel retainers With your Funta...

Страница 20: ...ps screwdriver 0 Hinge tape 1 Attach the motor to the firewall using the hardware provided with the motor and a 0 Phillips screwdriver Make sure to use threadlock on the screws to prevent them from vi...

Страница 21: ...time Install the speed control in the fuselage using hook and loop tape Secure the wires so they will not interfere with the operation of the motor during flight Important Information About Your Brush...

Страница 22: ...rol to change the direction of the motor rotation Note Never check the motor rotation on the bench with the propeller installed The plane could move and cause serious injury Always check the motor wit...

Страница 23: ...quare 1 Locate the top and bottom side force generators Note the tab on the top is toward the rear of the generator and the bottom has the tab toward the front of the generator m 2 Use foam safe CA to...

Страница 24: ...3 Check the movement of the ailerons with the radio system Moving the aileron stick right will make the right aileron move up and the left aileron move down 4 Use a ruler to adjust the throw of the e...

Страница 25: ...ore each flying session be sure to range check your radio This is accomplished by turning on your transmitter with the antenna collapsed Turn on the receiver in your airplane With your airplane on the...

Страница 26: ...ccording to the manufacturer s instructions and it will operate consistently Check all the control horns servo horns and clevises to make sure they are secure and in good condition Replace any items t...

Страница 27: ...ished in front of which all flying takes place with the other side for spectators Only personnel involved with flying the aircraft are allowed at or in front of the flight line Intentional flying behi...

Страница 28: ...11307 2007 Horizon Hobby Inc 4105 Fieldstone Road Champaign Illinois 61822 877 504 0233 horizonhobby com E fliteRC com...

Отзывы: