


28
E-flite Advance 25e ARF Assembly Manual
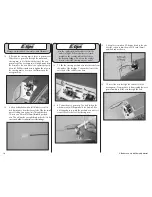
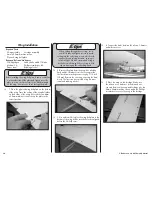
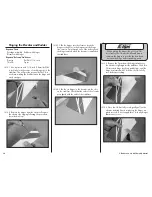
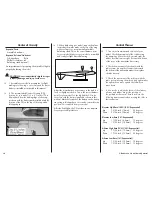
3. Use silicone adhesive to glue the pilot figure in the
cockpit. The pilot will be centered 2-inches (52mm)
forward of the back of the cockpit as shown.
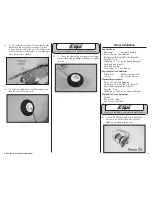
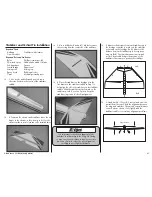
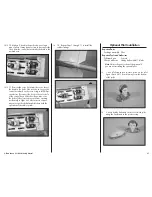
Canopy Installation - Option 1
Required parts
Fuselage assembly Canopy
2mm x 8mm sheet metal screw (4)
Required Tools and Adhesives
Drill
Drill bit: 1/16-inch (1.5mm)
Low-tack tape
Thin CA
Phillips screwdriver: #1
We show two different options for the canopy
installation. The second option can be found on
Page 29.
1. Use low-tack tape to tape the canopy to the
fuselage. Make sure it is centered left-to-right
on the fuselage.
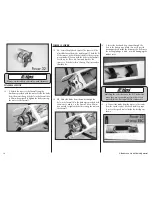
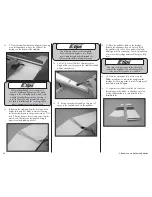
2. Use a pin vise and 1/16-inch (1.5mm) drill bit to
drill four mounting holes for the canopy. Position the
holes as far forward and rearward as possible.
3. Remove the canopy from the fuselage. Apply
2–3 drops of thin CA in each hole to harden the
surrounding wood. Allow the CA to fully cure to
prevent getting any on the canopy.
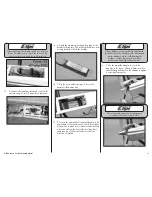
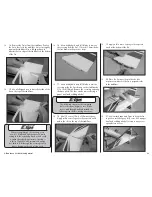
4. Attach the canopy using four 2mm x 8mm sheet
metal screws and a #1 Phillips screwdriver.
Содержание Advance 25e ARF
Страница 1: ...Advance 25e ARF Assembly Manual ...


