background image


© Copyright e-con Systems. 2020. All rights reserved. 


2.


Connect Pin 1 of CN4 connector with Pin 1 of high speed camera interface 
connector and Pin 1 of CN5 connector with Pin 1 of low speed camera Interface 
connector. 

The ROCK960 development board with e-CAM50_CU96 base board is shown in 
below figure. 


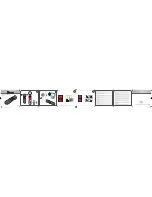
Figure 8: ROCK960 Development Board with e-CAM50_CU96 Base Board 

3.


Interface the adaptor board to the base board using the supplied 30 cm micro-
coaxial cables. 

The supplied micro-coaxial cable is shown in below figure. 


Figure 9: Micro-Coaxial Cable 

4.


Connect the one end of micro-coaxial cable to the CN2 adaptor board connector 
as shown in below figure. 

Содержание e-CAM50_CU96

Страница 1: ...e CAM50_CU96 Version 1 0 e con Systems 1 8 2020 Getting Started Manual ...

Страница 2: ...imer The specifications of e CAM50_CU96 board and instructions on how to use this board with ROCK960 development board are provided as reference only and e con Systems reserves the right to edit modify this document without any prior intimation of whatsoever ...

Страница 3: ...ted Manual Contents INTRODUCTION TO E CAM50_CU96 3 PARTS SUPPLIED 3 DESCRIPTION 4 E CAM50_CU96 BOARD HANDLING PROCEDURE 8 PREPARING SD CARD WITH PREBUILT BINARY 13 STREAMING OF E CAM50_CU96 BOARD 15 FAQ 17 GLOSSARY 20 SUPPORT 21 ...

Страница 4: ... the most commonly used small form factor lens mounts for board cameras e CAM50_CU96 is a color camera that supports uncompressed UYVY format in both still capture and video recording The supported resolutions and frame rates are listed in below table Table 1 Supported Resolutions and Frame Rates S NO Resolution Frame Rate fps 1 HD 1280 x 720 70 2 FHD 1920 x 1080 60 3 QHD 2560 x 1440 35 4 5 MP 259...

Страница 5: ...ty board based on Rockchip RK3399 platform It consists of ARM Cortex A72 Dual core up to 1 8 GHz and Cortex A53 Quad core up to 1 4 GHz CPU The ROCK960 development board supports two camera interfaces HDMI microSD Slot USB 3 0 Ethernet Audio Out and so on e CAM50_CU96 is a multi board solution which has three boards as follows Camera module e CAM55_CUMI0521_MOD Adaptor board eCAM130_TRICUTX2_ADAPT...

Страница 6: ...Y format This camera module is based on AR0521 CMOS image sensor from ON Semiconductor The AR0521 is a 1 2 5 optical form factor CMOS image sensor with an electronic rolling shutter The front and rear views of the boards are shown in below figures Figure 1 Rear View of e CAM55_CUMI0521_MOD Board Figure 2 Front View of eCAM130_TRICUTX2_ADAPTOR Adaptor Board ...

Страница 7: ...6 e CAM50_CU96 Getting Started Manual Figure 3 Rear View of eCAM130_TRICUTX2_ADAPTOR Adaptor Board Figure 4 Front View of ACC 96DEV_MIPICAMERA_ADP Figure 5 Rear View of ACC 96DEV_MIPICAMERA_ADP ...

Страница 8: ...d a 30 pin I PEX connector CN2 for connecting with e CAM50_CU96 base board Both the module board and adapter board are screwed into a single unit This single unit should not be separated This adaptor board acts as a bridge between the camera module and the base board e CAM50_CU96 is connected to ROCK960 development board with low and high speed interface connectors ...

Страница 9: ...0_CU96 base board with high speed and low speed camera interface connectors in the ROCK960 development board The CN4 and CN5 connectors location in the e CAM50_CU96 base board is shown in below figure Figure 6 Camera Connector location in e CAM50_CU96 Base Board The high speed and low speed camera interface connectors in the ROCK960 development board is shown in below figure Figure 7 Camera Connec...

Страница 10: ...60 development board with e CAM50_CU96 base board is shown in below figure Figure 8 ROCK960 Development Board with e CAM50_CU96 Base Board 3 Interface the adaptor board to the base board using the supplied 30 cm micro coaxial cables The supplied micro coaxial cable is shown in below figure Figure 9 Micro Coaxial Cable 4 Connect the one end of micro coaxial cable to the CN2 adaptor board connector ...

Страница 11: ...ial cable to the CN2 base board connector The location of CN2 connector on the base board is shown in below figure Figure 11 Location of CN2 Connector on Base Board The locking and unlocking positions of micro coaxial cable on the base board connector are shown in below figures Figure 12 Unlocking Position of Cable on Base Board CN2 Connector ...

Страница 12: ... CAM50_CU96 is connected to ROCK960 development board as shown in below figure Figure 14 e CAM50_CU96 Setup Interfaced to ROCK960 Development Board 6 Insert the memory card provided by e con Systems in the SD card slot before powering ON The location of SD card slot in ROCK960 development board is shown in below figure ...

Страница 13: ...The location of DC Jack is shown in below figure Figure 16 Power Supply Connector in ROCK960 Development Board 8 Connect a DC power with 12V 2A to power ON the ROCK960 development board as shown in below figure After powering ON the ROCK960 development board the green color LED on ROCK960 development board will glow This serves as an indication for power up of board ...

Страница 14: ... lsblk 4 Insert the SD card into the host computer 5 Run the previous command to view the newly recognized list of disk name 6 Run the following command to navigate to the location where prebuilt binary is stored in the host system cd location of prebuilt_binary The system img file is the required binary to flash in the SD card 7 Unmount the SD card if it is mounted 8 Run the following command to ...

Страница 15: ...14 e CAM50_CU96 Getting Started Manual sync Now the SD card is flashed with system image for ROCK960 board The operating system flashed on the microSD card is Debian GNU Linux 9 2 stretch ...

Страница 16: ...rd to boot up After booting the LEDs will start blinking and Debian desktop will open in the monitor You are now booting your newly installed operating system running on SD card on the ROCK960 board as shown below Figure 18 HDMI Keyboard or Mouse connected to ROCK960 Board 6 Run the following command to check whether the e cam50 kernel module named ar0521_mcu is loaded lsmod 7 Run the following co...

Страница 17: ... script Now the camera module is loaded and ready for streaming 11 Run the following Gstreamer command to stream the camera gst launch 1 0 rkcamsrc device dev video0 io mode dmabuf video x raw width WIDTH height HEIGHT framerate 60 1 fpsdisplaysink video sink rkximagesink text overlay false v Where WIDTH width of the frame example 1920 HEIGHT height of the frame example 1080 which can be changed a...

Страница 18: ...t 5 Is it possible to get RAW Bayer frames from the camera eCAM50_CU96 camera module does not support RAW Bayer format 6 Can the camera control options be altered in run time The camera controls can be changed after stopping the camera streaming 7 Can I use the flash trigger to capture images from this camera Currently the trigger option is not supported For customization please write to sales e c...

Страница 19: ...tex A53 CPU with upto 2 0 GHz frequency 16 What are the supported OSes for eCAM50_CU96 with Rock960 The supported OSes for eCAM50_CU96 with Rock960 is Debian GNU Linux 9 2 stretch In future e con Systems planned to provide AOSP support For customization please write to sales c onsystems com 17 How many cameras can I connect with Rock960 boards Currently one camera is supported Two cameras can be i...

Страница 20: ...n I get the mechanical 2D and 3D files for the eCAM50_CU96 PCB Yes Please write to sales e consystems com for the PCB files 24 What are the warranty terms of the e CAM50_CU96 camera Please refer this www e consystems com warranty asp page for warranty terms ...

Страница 21: ...1280 x 720 resolution HDMI High Definition Multimedia Interface microSD micro Secure Digital MIPI Mobile Industry Processor Interface QHD Quad HD Industry name for 2560 x 1440 resolution SOC System on Chip USB Universal Serial Bus UYVY YUV422 16 bit image format with UYVY ordering VGA Video Graphics Array Industry name for 640 x 480 resolution V4L2 Video for Linux version 2 is a collection of devi...

Страница 22: ...a ticket for any type of issue please visit the ticketing page on our website https www e consystems com create ticket asp RMA To know about our Return Material Authorization RMA policy please visit the RMA Policy page on our website https www e consystems com RMA Policy asp General Product Warranty Terms To know about our General Product Warranty Terms please visit the General Warranty Terms page...

Страница 23: ...22 e CAM50_CU96 Getting Started Manual Revision History Rev Date Description Author 1 0 08 January 2020 Initial draft Camera Team ...

Отзывы: