background image

INSTALLATION 

MANUAL

855-680-9595

NEED HELP?

STEP

 6

STEP

 7

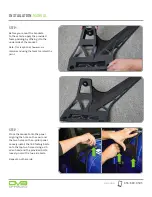
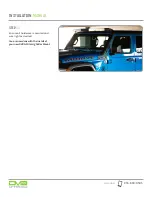
Before you mount the brackets 
to the vehicle, apply the provided 

foam padding by affixing it to the 

underside of the bracket. 

Note: This is optional; however, we 
recommend using the foam to protect the 
paint. 

Place the bracket onto the panel 
aligning the hole on the cowl and 
the two holes on the a-pillar panel. 
Loosely install the T40 factory bolts 
onto the top two holes. Using a #5 
allen head and the provided bolts, 
loosely install the two side bolts. 

Repeat on other side. 

Содержание LBJL-07

Страница 1: ...le for any bodily injury or harm to you or your vehicle as a result of an improper install Proper installation of this kit required knowledge of the factory recommended procedures for removal and installation of original equipment components We recommend that the factory shop manual and any special tools needed to service your vehicle be on hand during the installation Installation of this kit wit...

Страница 2: ...r your light using your T40 torx bit remove all four bolts located on the a pillar and cowl once all bolts are out you may pull off the a pillar panel Repeat for opposite side removing the hardware only STEP 2 Starting with the passenger side begin by removing the antenna using your 10mm wrench This will prevent any damage to your paint when removing the a pillar panel 2 M8x30mm Allen Head Bolts 2...

Страница 3: ...e vehicle Run the wire for the light along the side of the windshield as if the light was mounted Place the wiring into the cowl area toward desired direction STEP 5 Once the wires are in place reinstall the factory a pillar panel ensuring the wires are routed in between the panels ...

Страница 4: ...side of the bracket Note This is optional however we recommend using the foam to protect the paint Place the bracket onto the panel aligning the hole on the cowl and the two holes on the a pillar panel Loosely install the T40 factory bolts onto the top two holes Using a 5 allen head and the provided bolts loosely install the two side bolts Repeat on other side ...

Страница 5: ...rovided with your light mount the light bar and secure Note We are using a DV8 Elite 52 Dual Row Light bar BE52EW500W Reinstall your antenna using a 10mm wrench STEP 9 Run the wire behind the bracket along the side of the windshield and using a T40 and 5 allen head tighten both bracket to vehicle until secure ...

Страница 6: ...INSTALLATION MANUAL 855 680 9595 NEED HELP STEP 11 Ensure all hardware is secured and wire light as desired You are now done with the install of your new DV8 A Pillar Light Bar Mount ...

Отзывы: