- 18 -
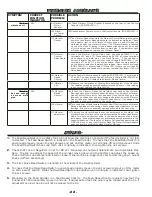
P I N F E E D P R O B L E M S
SYMPTOM
CORRECT
FUNCTION
INDICATOR
POSSIBLE
PROBLEM
ACTION
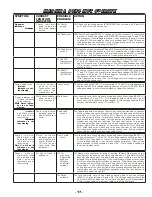
First pulse
indicator is not
functioning.
First pulse indicator
turns on with
the first machine
cycle. Stays on
until main power
is turned off.
First pulse
reed
switch.
The First pulse reed switch sends power to the coil of the first pulse relay.
To check the reed switch, remove the wire that goes to terminal#4 on the
Dwell Delay Timer and then jump terminals #7 to #24 or #33 to #34.
With this jumper in place cycle the machine. If the machine feeds check
the reed switch position (First pulse reed switch should be mounted
to the middle off the dwell cylinder). If reed switch position is correct
replace First pulse reed switch.
First pulse
indicator is
functioning.
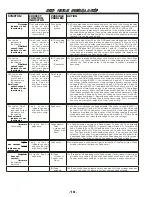
Dwell reed
switch input
indicator is not
functioning
Dwell reed switch
input indicator
turns on with
the first machine
cycle. Stays on
until main power
is turned off.
(A) First pulse
relay. (Coil)
(A) The first pulse relay (K2 on the DRP panel) should engage on the first
machine cycle and should stays engage until power is turned off. To
check the first pulse relay jump terminals #7 to #24 or #33 to #34.
With this jumper in place and the power on check the voltage (24VAC+/-)
on the DRP panel at TB10 terminals #1 and #2. If voltage is present
and the relay is engaged (Indicator on relay is on) proceed to step (B).
If the voltage is present and the relay is not engaged (No indicator on
the relay) replace the First pulse relay.
First pulse
indicator is
functioning.
Dwell reed
switch input
indicator is not
functioning.
Dwell reed switch
input indicator
turns on with
the first machine
cycle. Stays on
until main power
is turned off.
(B) First pulse
relay.
(Contacts)
(B) If the relay is engaged (Indicator on the relay is on) check the voltage
(24VAC+/-) at the terminals #6 and #4. If the voltage is not present
replace the First pulse relay. If the voltage is present proceed to
next step.
First pulse and
Dwell reed
switch input
indicators are
functioning.
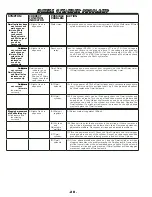
Dwell reed
switch output
indicator is not
functioning.
Dwell reed switch
output indicator
turns on with
the first machine
cycle. Goes off
and then back on
with every cycle.
Dwell reed
switch
The Dwell reed switch is the upper of the two reed switches located on the
side of the Dwell cylinder. The Dwell reed switch initiates the feed timer.
To check the Dwell reed switch first cycle the machine once and then
check the voltage (24VAC+/-) at terminals #4 and #6. If the voltage is
not present recheck symptom. If this voltage is present now check the
voltage (24VAC+/-) at the terminals #4 and #5. Terminals #4 and #5
should go from 24VAC to 0 and back to 24VAC with every cycle. If this
is correct the Dwell reed switch is functioning properly. If the voltage
reading is incorrect check the Dwell reed switch position. To check the
Dwell reed switch position first loosen the reed switch setscrews. Slide
the reed switch down and check the voltage at terminal #4 and #5.
The voltage should read 0. Now slide the reed switch up until terminals
#4 and #5 have 24VAC and then lock the setscrews. If this procedure
cannot be accomplice replace the Dwell reed switch.
First pulse, Dwell
reed switch
input and output
indicators are
functioning.
Feed solenoid
indicator is not
functioning
F e e d s o l e n o i d
indicator goes on
and then back off
with every cycle.
Feed timer
The Feed timer initiates the Feed solenoid. Check the voltage (24VAC+/-)
at the terminal #2 and #5. The voltage at terminal #2 and #5 should
go from 0 to 24VAC and back to 0 on every cycle. If this voltage reading
is incorrect replace the Feed timer. If the voltage reading is correct
proceed to next section. (This voltage is only present for 150ms. Some
voltmeters may not react fast enough to see this voltage)
All indicators are
Functioning.
All lights flash in
sequence.
Feed solenoid,
Feed
cylinder, and
Pusher with
Pawl.
The Feed solenoid controls the Feed cylinder. To test the Feed solenoid
check the voltage (24VAC+/-) at terminals #2 and #5. Terminals #2
and #5 should go to 24VAC and back to 0 on every cycle. If correct
turn power and air off. Now try to move the Pusher with Pawl in and
out. The Pusher with Pawl should move easily. If so, replace the Feed
solenoid. If not, check for jammed Weld pins in the Feed channel or for
a damaged Feed cylinder. Also check the Feed speed control for proper
adjustment. (Located on the air line going to the Feed cylinder)
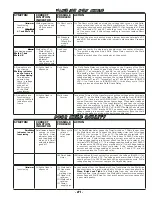
Feed cylinder does
not retract.
Feed solenoid
indicator on
constantly.
F e e d s o l e n o i d
indicator goes on
and then back off
with every cycle.
Feed timer.
Remove the push-on connector from terminal #4 of the Feed timer. If Feed
cylinder retracts replace the Feed timer.
Feed cylinder
does not
retract.
All indicators are
functioning
correctly
All lights flash in
sequence
(A) Feed
cylinder or
Pusher with
Pawl.
(A) Turn power off and inspect the Feed cylinder for air leaks. If there is no
air leaks turn the air off and slide the Pusher with Pawl in and out. The
Pusher with Pawl should go in and out with just a slight restriction.
(B) Feed
solenoid.
(B) To check the Feed solenoid turn the power off. If the cylinder does not
retract and step (A) above is correct replace Feed solenoid.


