


Page 25
PRO DQ
g2
Installation and User’s Manual
•
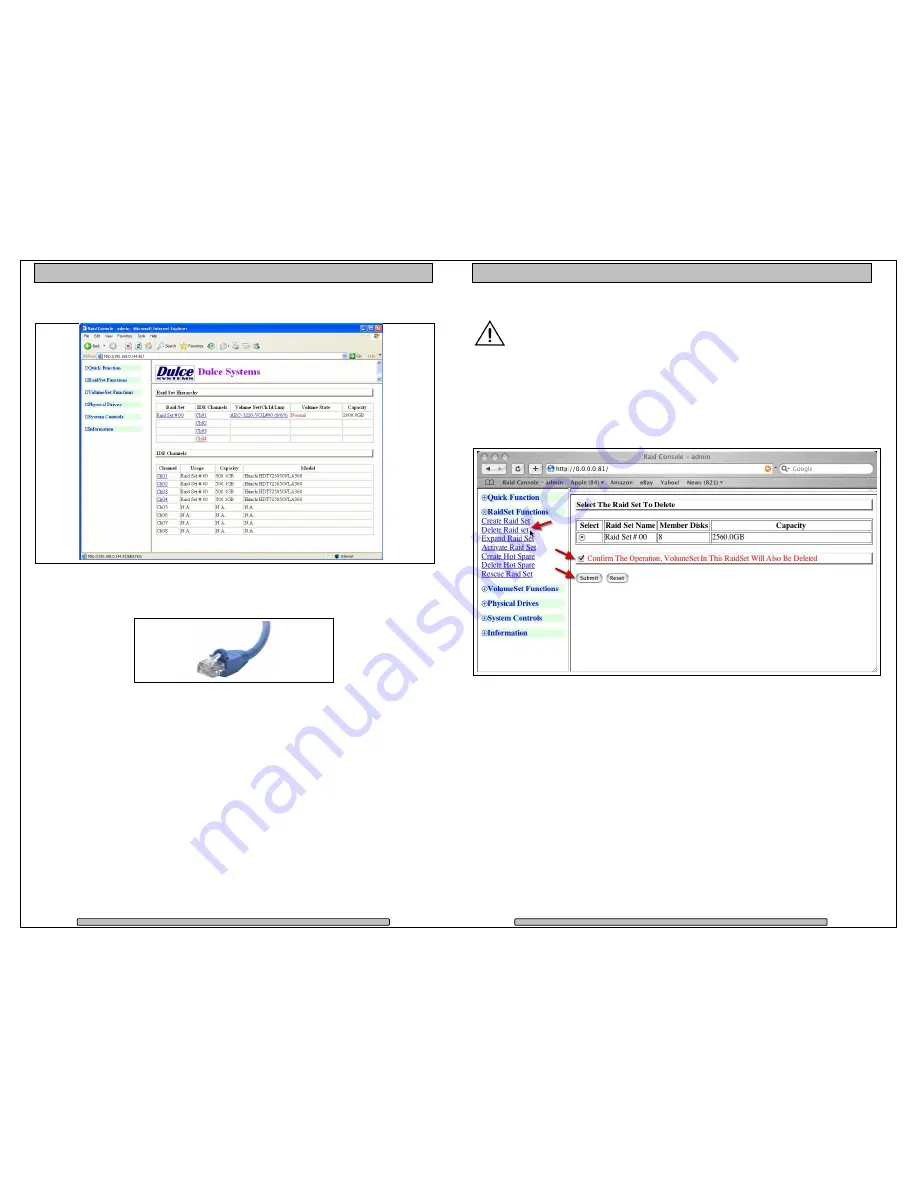
Welcome screen of RAID Console after successful login:
5.1.3. Built-in Ethernet
If the PRO DQ’s Ethernet port is connected to the network, and you know the IP
address of the PRO DQ, you can use any computer on the network via any web
browser to connect to the RAID Console and manage the PRO DQ.
You can discover and manage the PRO DQ’s IP address by using the local
computer that is connected to the PRO DQ, launch the appropriate RAID
Console. The Ethernet Configuration page is at System Controls > EtherNet
Config.
Page 26
PRO DQ
g2
Installation and User’s Manual
5.2.
Change RAID Mode – Deleting / Creating
This procedure will erase all data on the PRO DQ.
Changing the RAID mode requires the current RAID Set to be deleted
first, then create a new RAID Set with the new RAID mode.
5.2.1. Delete the RAID Set
From the RAID Console GUI. On the left side menu bar click on
•
RaidSet Functions > Delete Raid Set
•
Select the Raid Set and check the Confirm box
•
Click Submit to delete the RAID Set


