background image

D

D

D

L

L

L

P

P

P


P

P

P

r

r

r

o

o

o

j

j

j

e

e

e

c

c

c

t

t

t

o

o

o

r

r

r


U

U

U

s

s

s

e

e

e

r

r

r

s

s

s


M

M

M

a

a

a

n

n

n

u

u

u

a

a

a

l

l

l


 13 


I

TEM


L

ABEL


D

ESCRIPTION


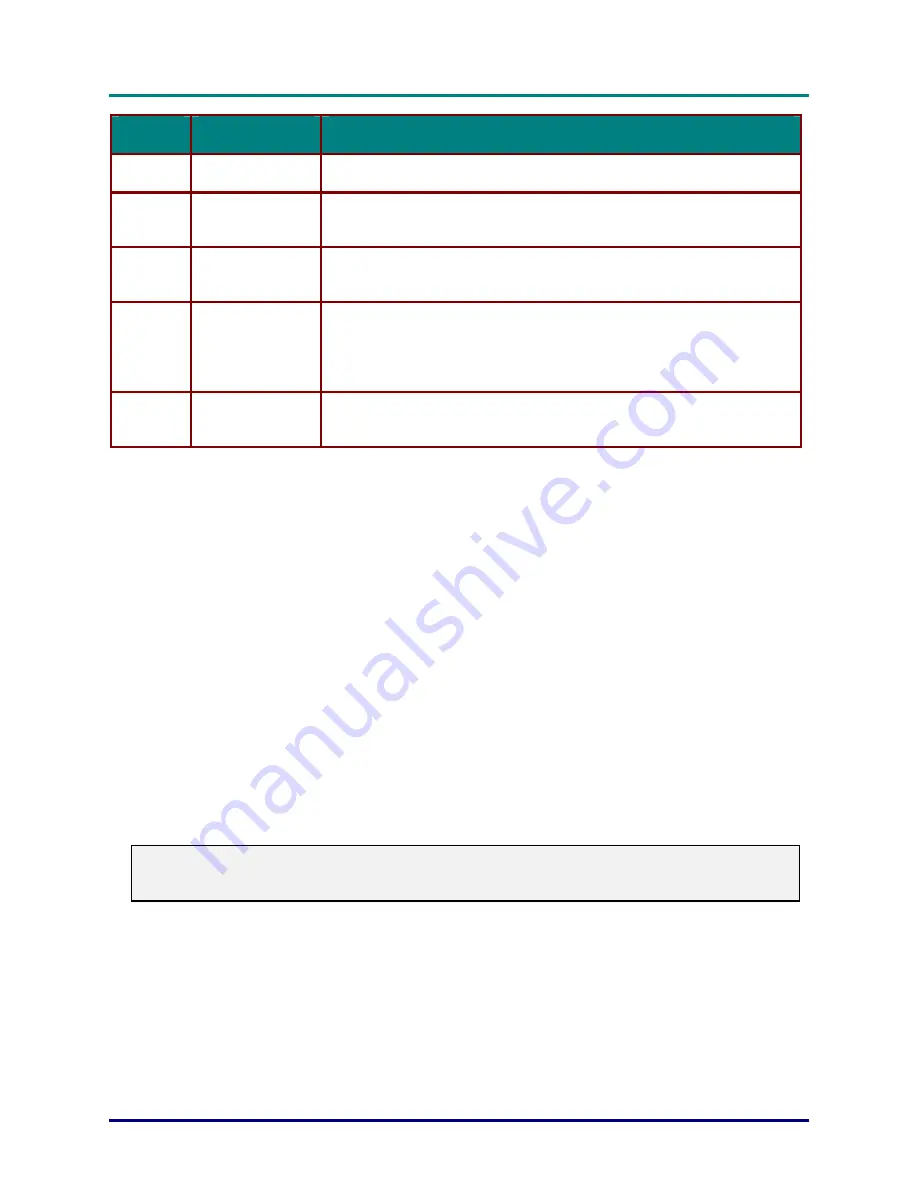
9.  

AC Socket 

Connect the supplied power cord 

10.  

Input Video 4 

Connect a RCA component cable to Y/Pb/Pr connectors 
Connect a RCA audio cable to L/R Audio Connectors 

11.  

Input Video 2 

Connect a composite video cable to the Video connector 
Connect a RCA audio cable to L/R Audio Connectors 

12.  

Input Data 3 

Connect a 5-connector BNC (RGB + VSync + HSync) cable to a pattern 
generator or advanced video converter. 
Connect a DB15-to-5BNC cable from a computer 
Connect an audio cable from a computer to Audio-In 

13.  

Input Data 2 

Connect the supplied DB15-DB15 cable from a computer to RGB-In 
Connect an audio cable from a computer to Audio-In 

The connectors you choose on the projector may depend on available corresponding connectors on 
the devices you are connecting to.  

Connect a computer to the projector through one of the Input Data 1/2/3 connections. The order for a 
better signal is as follows: 

1.  Input Data 1 is a digital signal and offers the best connection to your computer.  

2.  Input Data 3 is an analog signal; use a DB15-to-5BNC cable for the connection. 

3.  The Input Data 2 analog signal uses a standard RGB (DB15-DB15) computer cable. 

Connect a video device to the projector through one of the Input Video 1/2/3/4 connections. The order 
for a better signal is as follows: 

1.  Input Video 1 is a digital signal and offers the best connection to your video device.  

2.  Input Video 4 uses a component cable (3 RCA connectors; red/green/blue) for the most supe-

rior analog connection. 

3.  Input Video 3 uses an S-video cable. S-video provides a sharper image than composite video. 

4.  Input Video 2 uses a composite video (yellow RCA connector) connection.  


Warning:


As a safety precaution, disconnect all power to the projector and connecting devices before making 
connections. 

Содержание ImagePro 8947

Страница 1: ...t to the contents hereof and specifically disclaims any implied warranties of merchantability or fitness for any particular purpose The manufacturer reserves the right to revise this publication and to make changes from time to time in the content hereof without obligation of the manufacturer to notify any person of such revision or changes Trademark Recognition Kensington is a U S registered trad...

Страница 2: ...ing Alerts you to situations that may damage the unit create a hazardous environment or cause per sonal injury Throughout this manual component parts and items in the OSD menus are denoted in bold font as in this example Push the Menu button on the remote control to open the Main menu Remote Control Some remote controls have a laser for pointing out items on a screen DANGER Do not point the laser ...

Страница 3: ...ontains a metal halide lamp which contains mercury Dispose of it as required by lo cal ordinances and regulations The USA restricts or prohibits the disposal of some or all mercury containing lamps in the municipal waste stream Please visit www lamprecycle org for more information on specific state disposal re quirements and recycling facilities The following states have laws that deal with inform...

Страница 4: ...es Flexible setup allows for front rear and ceiling projections Line of vision projections remain square with advanced keystone correction for angled projections Input source automatically detected About this manual This manual is intended for end users and describes how to install and operate the DLP projector Wher ever possible relevant information such as an illustration and its description has...

Страница 5: ...g the OSD 19 SETTING THE OSD LANGUAGE 20 PICTURE MENU 21 Picture Menu Functions Available for Connected Source 23 ADVANCE MENUU 24 Advance Menu Functions Available for Connected Source 25 SETUP MENU 27 Setup Menu Functions Available for Connected Source 29 AUDIO MENUU 31 Audio Menu Functions Available for Connected Source 31 WINDOW MENU 32 COLORMGR MENU 34 SERVICE MENU 35 NETWORK MENUU 37 MAINTENA...

Страница 6: ...vi SPECIFICATIONS 49 SPECIFICATIONS 49 Input Connectors 50 Output Connectors 50 Control Connectors 50 Optional Lens 50 PROJECTION DISTANCE V S PROJECTION SIZE FOR STANDARD LENS 51 TIMING MODE TABLE 52 PROJECTOR DIMENSIONS 55 REGULATORY COMPLIANCE 56 FCC WARNING 56 CANADA 56 SAFETY CERTIFICATIONS 56 EN 55022 WARNING 56 ...

Страница 7: ...ack the projector and check that the following items are included DLP PROJECTOR WITH LENS CAP REMOTE CONTROL WITH TWO AAA BATTERIES POWER CORD COMPUTER CABLE DB15 DB15 CD ROM THIS USER S MANUAL QUICK START GUIDE Contact your dealer immediately if any items are missing appear damaged or if the unit does not work Caution Avoid using the projector in dusty environments ...

Страница 8: ...nd LEDs on page 3 2 Focus Focuses the projected image 17 3 Lens zoom Enlarges the projected image 4 See Side View Connectors on page 4 5 16 Height adjusters Turn to adjust level of projector 6 14 Lens Remove lens cap before use 7 10 Front IR receiver Receiver for IR signal from remote control Important Ventilation openings on the projector allow for good air circulation which keeps the projector l...

Страница 9: ... resolution 3 19 Menu Opens and exits the OSD 4 Press repeatedly to select data source RGB DVI D RGBHV 14 Source Data 5 14 Source Video Press repeatedly to select video source Video S Video Y Pb Pr HDMI 6 32 Volume Open the Audio menu 7 22 User Mode Open the User mode menu Power 8 Temp 9 10 Lamp 1 See Projector LED Descriptions on page 5 Lamp 2 11 12 19 Enter Confirm settings in OSD menus 13 Open ...

Страница 10: ...ojec tor through network 2 Wired Remote Connect a wired remote control 3 USB Mouse Connect the USB cable from a computer 4 RS232 This is a service port for firmware upgrades 5 6 Input Data 1 Connect a DVI D computer cable from a computer Connect an audio cable from a computer to Audio In 12 Audio Out Connect an audio cable to external speakers 7 RGB Out Connect a RGB cable to an external monitor I...

Страница 11: ...onnector Connect a RCA audio cable to L R Audio Connectors 12 Input Data 3 Connect a 5 connector BNC RGB VSync HSync cable Connect an audio cable from a computer to Audio In 13 Input Data 2 Connect a RGB cable from a computer to RGB In Connect an audio cable from a computer to Audio In 12 Projector LED Descriptions LED ON SEE PAGE 14 OFF SEE PAGE 14 FLASHING SEE PAGE 46 Power System ready Power of...

Страница 12: ...r r r s s s M M Ma a an n nu u ua a al ll Rear View 3 2 1 6 ITEM LABEL DESCRIPTION SEE PAGE 38 Cover screw Loosen to remove lamp cover 1 10 Rear IR receiver Receiver for IR signal from remote control 2 Security Lock Secure to permanent object with a Kensington Lock system 3 44 ...

Страница 13: ...ust level of projector 2 Ceiling support holes Contact your dealer for information on mounting the projector on a ceiling 3 Caution For ceiling installations use approved mounting hardware and M4 screws with a maximum screw depth of 6 mm 1 4 inch To allow for proper ventilation keep a distance of 50 cm 20 inches from walls and ceiling For permanent installations follow local codes See Ceiling Inst...

Страница 14: ...escent lighting turned on Certain high frequency fluo rescent lights can disrupt remote control operation 2 Be sure nothing obstructs the path between the remote control and the projector If the path be tween remote control and the projector is obstructed you can bounce the signal off certain reflective surfaces such as projector screens 3 The buttons and keys on the projector have the same functi...

Страница 15: ...3 Keystone Press to open the keystone menu 14 Menu Open and close the On Screen Display OSD 15 Laser Press to use the laser pointer 16 Up Page Up OSD selection up to function PC page up key when PD PU shift enabled and connected USB cable to a PC 17 Vol Decrease volume select menu sub item and decrease values 18 Mouse pad Move the mouse pointer when connected USB cable to a PC 19 Vol Increase volu...

Страница 16: ...PC LED flashes when using the remote control in PC mode Note The remote control can only interface with a computer for PC mouse function when connected to the computer through a USB cable connection Remote Control Operating Range The remote control uses infrared transmission to control the projector It is not necessary to point the remote directly at the projector Provided you are not holding the ...

Страница 17: ...eries 1 Remove the battery compartment cover by sliding the cover in the direction of the arrow 2 Insert the supplied batteries taking note of the polarity as shown here 3 Replace the cover Caution 1 Only use AAA alkaline batteries 2 Dispose of used batteries according to local ordinance regulations 3 Remove the batteries when not using the projector for prolonged periods ...

Страница 18: ...M LABEL DESCRIPTION Input Video 1 Connect a HDMI cable from a HDTV 1 LAN Control Connect a LAN cable for controlling projector through network 2 Wired Remote Connect a wired remote control 3 USB Mouse Connect the USB cable from a computer 4 RS232 This is a service port for firmware upgrades 5 Input Data 1 Connect a DVI computer cable from a computer or video source with HDCP function 6 Connect an ...

Страница 19: ...esponding connectors on the devices you are connecting to Connect a computer to the projector through one of the Input Data 1 2 3 connections The order for a better signal is as follows 1 Input Data 1 is a digital signal and offers the best connection to your computer 2 Input Data 3 is an analog signal use a DB15 to 5BNC cable for the connection 3 The Input Data 2 analog signal uses a standard RGB...

Страница 20: ...ss the Power button See LED Error Messages on page 46 The projector splash screen displays and connected devices are detected If the connected device is a PC press the appropriate keys on the computer key board to switch the display output to the projector Check the user manual of the PC to determine the appropriate Fn key combination to change display output 4 If more than one input device is con...

Страница 21: ...the projector press the Power button The projector prepares for shut down and a Wait a moment please message appears 6 When the Power Off Press Power again message appears press the Power button The projector turns off Caution Do not unplug the power cord until all the LEDs stop flashing indicating the projector has cooled down 15 ...

Страница 22: ...t is perpendicular to the screen Be sure cables are not in the way or can not cause the projector to be knocked over C C B B A 1 To raise the level of the projector lift the projector A and rotate the height adjusters B The height adjusters drop down C 2 To lower the level of the projector rotate the height adjusters in the opposite direc tion 3 Or user may press the lens shift button on the remot...

Страница 23: ... resize the projected im age and screen size A display pattern appears on the screen to indicate the border of the display window adjust until the projected image matches the display pattern border 2 Use the Focus control to sharpen the projected image A display pattern appears on the screen adjust until the cross hair is sharp 3 Use the Keystone but tons to correct image distortion ...

Страница 24: ...r r r U U Us s se e er r r s s s M M Ma a an n nu u ua a al ll Adjusting the Volume 1 Press the Volume but ton The volume control ap pears on the display 2 Use the Volume but tons to adjust the volume level 3 Press the Mute button to turn off the volume 18 ...

Страница 25: ...r buttons or the buttons on the top of the projector to navigate and make changes to the OSD The button in the center of the projector cursor buttons corre sponds to the Enter button on the remote control Down Page Down Up Page Up Vol Vol Enter Mouse R PD PU Shift Menu Laser Keystone 1 To open the OSD press the Menu button 2 Press the cursor button to move through the menus 3 Press the cursor butt...

Страница 26: ...ctor while reading this section Set the OSD lan guage to your preference before continuing The default language is English 1 Press the Menu button The Picture menu appears button until Setup is highlighted 2 Press the cursor button to highlight Language 3 Press the cursor button until the language you want is highlighted 4 Press the cursor 5 Press the Menu button twice to close the OSD 20 ...

Страница 27: ...change in the Picture menu are saved in Memory that you have selected Brightness Press the cursor button to adjust the brightness Range 0 100 50 Contrast Press the cursor button to adjust the contrast Range 0 100 50 Sharpness Press the cursor button to adjust the display sharpness Range 0 100 50 Saturation Press the cursor button to adjust the video saturation Range 0 100 50 Tint Press the cursor ...

Страница 28: ...process Use this set ting to correct skin color as desired 0 Press the cursor button to adjust the Fleshtone Range 0 100 On Film mode Film is a digital video recording with the original recording encoded at 24 fps frame per second i e full motion video The projector can convert film source to progressive video at 60 fps with NTSC and PAL60Hz or at 50 fps with PAL50Hz and SECAM The result is high d...

Страница 29: ... Picture Menu Functions Available for Connected Source Function RGB RGBHV DVI D Y Pb Pr Video S Video HDMI Brightness Contrast Sharpness Saturation Tint Gamma Color Temp Color space Video format Color Balance Red Green Blue Flesh tone correction Film mode 3D Comb Filter White Peaking Reset available to connected source ...

Страница 30: ...tected Phase Press the cursor button to adjust the A D sampling phase Range 0 100 Auto detected H size Press the cursor button to adjust the size of the display horizontally Range 0 100 50 V size Press the cursor button to adjust the size of the display vertically Range 0 100 50 3 Video S video Y Pb Pr Overscan Use overscan to trim an unwanted blank border from the onscreen image Press the cursor ...

Страница 31: ... devices When disabled you have to manually select the source On Freeze frame Freeze frame allows you to pause onscreen video Off Press the cursor button to enable or disable Freeze frame Video AGC Press the cursor button to enable or disable Video AGC When enabled the automatic gain control for the video source is auto adjusted to match the video standard On Black level Press the cursor button to...

Страница 32: ...to o or r r U U Us s se e er r r s s s M M Ma a an n nu u ua a al ll 26 Function RGB RGBHV DVI D Y Pb Pr Video S Video HDMI Overscan Auto sync Auto search Freeze frame Blank color Video AGC Black level Digital zoom Reset available to connected source ...

Страница 33: ...e from the following languages English French German Italian Spanish Swedish Chinese Simplified Chinese Traditional Japanese Korean Portuguese English Press the cursor button to choose from four projection methods Projection Desktop mount front of screen Desktop front Desktop mount rear of screen Ceiling mount front of screen Ceiling mount rear of screen Press Enter to activate lens shift The foll...

Страница 34: ...mode Eco mode uses less power and extends lamp life but decreases lamp brightness Normal OSD settings Press the cursor button to display the hidden OSD settings submenu Position Press the cursor button to position the OSD on screen Range Left Right Center Down Up Center 50 Press the cursor button to set menu screen translucency Range 0 100 Transparency Timeout sec Press the cursor button to determ...

Страница 35: ...ut Fan control Press the cursor button to toggle between Normal and High altitude fan speeds Normal Set Fan control to High in altitudes over 3 000 meters 10 000 feet Reset Resets all items in the Setup menu to default values Setup Menu Functions Available for Connected Source Function RGB RGBHV DVI D Y Pb Pr Video S Video HDMI Language Projection Lens shift Motorized focus Motorized zoom H keysto...

Страница 36: ...o oj jje e ec c ct tto o or r r U U Us s se e er r r s s s M M Ma a an n nu u ua a al ll 30 Function RGB RGBHV DVI D Y Pb Pr Video S Video HDMI Logo display Logo select Logo capture Fan control Reset available to connected source ...

Страница 37: ...button to adjust the audio volume level Range 0 100 50 Treble Press the cursor button to adjust the audio treble level Range 0 100 50 Bass Press the cursor button to adjust the audio bass level Range 0 100 50 Balance Press the cursor button to adjust the audio volume level Range 50 50 0 Mute Press the cursor button to enable or disable mute Off Reset Resets all items in the Audio menu to default v...

Страница 38: ... change values for settings 32 ITEM DESCRIPTION DEFAULT Single Display window Press the cursor button to choose from three settings Single one window PIP Picture In Picture Side by side POP two equal sized windows beside each other Note When Single is selected only the Main window source item is available Main window source Press the cursor button to choose the input device for the main window Las...

Страница 39: ...0 100 depending on the timing resolution of the main win dow Note This item is not available for Side by side mode Press Enter to swap the current sources for the active windows Source swap 0 PIP alpha blend PIP alpha blend allows you to adjust translucency between the main window and the PIP window Press the cursor button to adjust the PIP alpha blend Range 0 100 Reset Resets all items in the Win...

Страница 40: ...ColorTemp is set to High brightness 34 ITEM DESCRIPTION DEFAULT Color select Press the cursor button to select a color Use the Lightness Chroma and Hue settings to adjust each color as desired Range red green blue cyan magenta yellow Lightness Press the cursor button to adjust the lightness of the selected color Range 0 100 50 Chroma Press the cursor button to adjust the saturation of the selected...

Страница 41: ...rs Lamp 1 has been in use for ECO and Normal mode These items are display only Lamp2 hours Press the cursor button to see the number of hours Lamp 2 has been in use for ECO and Normal mode Auto power off Press to enable or disable automatic shut down of lamp after the specified time of inactivity Range Off 5 60 minutes 5 minutes 0 Break time Set the length of time for break during meeting Projecto...

Страница 42: ...lly set to the default 000000 Use the remote control to enter a new alphanumeric pass word When enabled settings in the Setup and Service menus cannot be changed Set Password To set a password press the cursor button to select a field press the cursor button to change values Select OK and press Enter to confirm Change Password To change the password press the cursor button to select a field press ...

Страница 43: ...ose DHCP Dynamic Host Configuration Protocol if your router automati cally assigns temporary IP addresses If you choose Static you must manually assign an IP address Subnet mask Default gateway and DNS server IP address Press the cursor button to select a field press the cursor button to change values Subnet mask Press the cursor button to select a field press the cursor button to change values De...

Страница 44: ...Important 1 The lamp contains a certain amount of mercury and should be disposed of according to local or dinance regulations 2 Avoid touching the glass surface of the new lamp Doing so may shorten its operation life Warning Be sure to turn off and unplug the projector at least an hour before replacing the lamp Failure to do so could result in a severe burn A A B 1 Loosen the captive screws on the...

Страница 45: ...or r r U U Us s se e er r r s s s M M Ma a an n nu u ua a al ll A A A A B B 4 Lift the module handle up B 39 5 Pull firmly on the module handle to remove the lamp module When installing the new lamp 1 Reverse the above steps to install the new lamp module ...

Страница 46: ...r ro o oj jje e ec c ct tto o or r r U U Us s se e er r r s s s M M Ma a an n nu u ua a al ll A C A B 2 To replace the cover Align the cover at A then push down and slide the cover into place B Tighten the captive screw C 40 ...

Страница 47: ... Refer to the following 1 Press the Menu button to open the menu 2 Press the cursor button to move to the Service menu 3 Press the cursor button to move down to Lamp hours reset 4 Press the cursor or Enter button A message screen appears 5 Press the cursor buttons in this order 41 6 Press the cursor button to select Lamp 1 or Lamp 2 and press Enter 7 Press the cursor button to select Exit and pres...

Страница 48: ...projector interior when cleaning have the projector serviced Cleaning the Lens You can purchase optic lens cleaner from most camera stores Refer to the following to clean the pro jector lens 1 Apply a little optic lens cleaner to a clean soft cloth Do not apply the cleaner directly to the lens 2 Lightly wipe the lens in a circular motion Caution 1 Do not use abrasive cleaners or solvents 2 To prev...

Страница 49: ...m ment contact Kensington 2853 Campus Drive San Mateo CA94403 U S A Tel 800 535 4242 http www Kensington com Ceiling Installation We recommend when installing the projector on a ceiling mount follow the manufacturer s instruc tions and ensure qualified personnel install the projector Ask your dealer for details on purchasing ceiling mount kits and support cables Securing the Mount to the Ceiling W...

Страница 50: ...e metal support cables The cables should be attached to the projector bracket and secured to the ceiling with expansion screws Support cable Caution For ceiling installations use approved mounting hardware and M4 screws with a maximum screw depth of 6 mm 1 4 inch To allow for proper ventilation keep a distance of 50 cm 20 inches from walls and ceiling For permanent installations follow local codes...

Страница 51: ...e projector is turned on Ensure all connections are securely attached Ensure the attached device is turned on Ensure a connected PC is not in suspend mode Ensure a connected notebook computer is configured for an external display This is usu ally done by pressing an Fn key combination on the notebook Tips for Troubleshooting In each problem specific section try the steps in the order suggested Thi...

Страница 52: ...en fan error 9 Blower fan DMD Image Problems Problem No image appears on the screen 1 Verify the settings on your notebook or desktop PC 2 Turn off all equipment and power up again in the correct order Problem The image is blurred 1 Adjust the Focus on the projector 2 Press the Auto button on the remote control or projector 3 Ensure the projector to screen distance is within the 10 meter 33 feet s...

Страница 53: ...you have replaced the lamp recently try resetting the lamp connections 5 Replace the lamp module 6 Put the old lamp back in the projector and have the projector serviced Problem The lamp goes off 1 Power surges can cause the lamp to turn off Press the power button twice to turn off the projector When the Power LED stop flashing press the power button 2 Replace the lamp module 3 Put the old lamp ba...

Страница 54: ...rs 3 Have the projector serviced Having the Projector Serviced If you are unable to solve the problem you should have the projector serviced Pack the projector in the original carton Include a description of the problem and a checklist of the steps you took when trying to fix the problem The information may be useful to service personnel For servicing return the projector to the place you purchase...

Страница 55: ... inches based on standard projection lens Brightness uniformity Typical 85 minimum 75 Projection lens Motorized zoom and focus Auto Lens shift Zoom ratio 1 22 1 Vertical horizontal keystone correction 40 Projection methods Desktop front rear ceiling front rear Data compatibility IBM PC or compatibles VGA SVGA XGA SXGA UXGA Mac SDTV EDTV HDTV 480i p 576i p 720p 1080i 1080p RGBHV only Video compatib...

Страница 56: ...ent Video Y Pb Pr RCA x3 HDMI Digital Video x1 Input Audio 1 RCA R L RCA Jack R L x 3 for Video S Video Component Input Audio 2 Mini jack Mini Jack x 3 for Data RGB RGBHV DVI D Output Connectors Data output DB 15 Loop through x1 Audio output Mini jack for analog x1 Control Connectors USB Type B x1 RS 232 DB 9 x1 Network Control RJ45 RJ45 for assets management w embedded web server Optional Lens Mo...

Страница 57: ...66 21 49 66 4 20 m 2 91 m 2 33 m 1 75 m 2 39m 1 91 m 1 43 m 13 78 114 75 91 80 68 85 93 95 75 16 56 37 4 70 m 3 26 m 2 61 m 1 96 m 2 67 m 2 14 m 1 60 m 15 42 128 42 102 73 77 05 105 13 84 10 63 08 5 20 m 3 61 m 2 89 m 2 17 m 2 95 m 2 36 m 1 77 m 17 06 142 08 113 66 85 25 116 31 93 05 69 79 6 20 m 4 30 m 3 44 m 2 58 m 3 52 m 2 82 m 2 11 m 20 34 169 40 135 52 101 64 138 68 110 95 83 21 7 20 m 5 00 m...

Страница 58: ... Pb Pr Video S video VGA 640x350 85 VGA 640x400 85 VGA 720x400 85 VGA 640x480 60 VGA 640x480 72 VGA 640x480 75 VGA 640x480 85 SVGA 800x600 56 SVGA 800x600 60 SVGA 800x600 72 SVGA 800x600 75 SVGA 800x600 85 XGA 1024x768 60 XGA 1024x768 70 XGA 1024x768 75 XGA 1024x768 85 XGA 1024x768 43 1152x864 75 SXGA1280x1024 60 SXGA1280x1024 75 SXGA1280x1024 85 UXGA1600x1200 60 UXGA1600x1200 65 UXGA1600x1200 70 ...

Страница 59: ...Apple 640x480 66 Apple 640x870 75 Apple 640x480 67 Apple 832x624 75 Apple 1024x768 60 Apple 1024x768 75 MAC Apple 1152x870 75 1080p 60 1080i 60 1080p 50 1080i 50 1080p 30 1080p 25 1080p 24 1035i 60 720p 60 720p 50 720p 30 720p 25 720p 24 480p 60 480i 60 576p 50 Data 576i 50 480i 60 480p 60 480i 60 480P 60 576i 50 576p 50 720p 60 720p 50 1080i 60 1080i 50 1080p 30 1080p 25 HDMI 1080p 24 ...

Страница 60: ...b Pr Video S video 720x240P 60 1440x240P 60 1440x480P 60 2880x480i 60 720x288P 50 1440x288P 50 1440x576P 50 HDMI 2880x576i 50 1080p 60 1080i 60 1080p 50 1080i 50 1080p 30 1080p 25 1080p 24 1035i 60 720p 60 720p 50 720p 30 720p 25 720p 24 480p 60 480i 60 576p 50 Component YUV 576i 50 NTSC M 60 NTSC J 60 NTSC4 43 60 PAL 50 PAL M 60 PAL N 50 PAL 60 60 Composite SECAM 50 ...

Страница 61: ...D D DL L LP P P P P Pr r ro o oj jje e ec c ct tto o or r r U U Us s se e er r r s s s M M Ma a an n nu u ua a al ll Projector Dimensions 41 2 cm 16 2 inches 19 3 cm 7 6 inches 47 4 cm 18 7 inches 55 ...

Страница 62: ... with the instruction manual may cause harmful interference to radio communica tions Operation of this equipment in a residential area is likely to cause harmful interference in which case the user will be required to correct the interference at his own expense Changes or modifications not expressly approved by the parties responsible for compliance could void the user s authority to operate the e...

Отзывы: