9
Charging the Battery
1. Make sure the parking brake is engaged.
2. Make sure the main switch is OFF.
3. Open the charging port cover.
4. Insert the charging plug into the charging socket
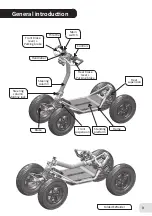
located in the front right corner of the EZRaider standing platform.
5. Connect the charger supply cable to a proper electrical socket.
6. A red LED confirms the battery is charging, a green LED indicates the battery is full.
7. After finishing the charging process, disconnect the charger from the electrical
socket, and afterwards, disconnect the charging plug from the EZRaider.
8. Close the charge port cover.
Warning!
1. Do not stand on the standing platform while charging.
2. When connecting the charger to the battery, sparks may be emitted.
3. The EZRaider uses a lithium-based battery, and a matched charger. Do not use
batteries and chargers that are not supplied by DSRaider.
4. The charger is enclosed in an aluminum box, which helps dissipate excess heat.
To prevent overheating, do not cover the charger while charging.
5. The charger should be located in a dry, well-ventilated area.
6. Pay attention to the polarity of direct current wires:
Brown – positive (+), Blue – negative (-).
7. If the charge takes too long, and the LED indicator does not turn green, make
sure that the charger is powered on, and that the EZRaider charging plug is
well inserted into the charger outlet. If these steps do not correct the problem,
contact your DSRaider customer support representative, or an authorized
DSRaider dealer.
8. Do not disassemble the charger. When repair or service is required, contact an
approach an authorized DSRaider dealer.
9. More information on charging can be found in the user manual that is supplied
with the charger.


