


Instructions for use CRISTALLO
2
11
Drive Medical GmbH & Co. KG | As per: 27.07.2020 | Errors and alterations excepted
EN
Indication
INDICATION:
Walking aid for outdoor and indoor use to compensate
for or improve limited walking ability. Insured parties are
to be provided with walking aids with the intention of
compensating for or at least improving the user’s limited
walking ability (expansion of radius of activity or mobility).
Persons with limitations of hand/arm functions require
particular adjustments/designs of handles or handrests/
armrests. Movable walking aids may not be suitable for
persons with balance disorders; in individual cases, this
should be tested out. Where appropriate, an attendant
must be present. The rollator is to be used only for nor-
mal, everyday activities.
CONTRAINDICATION:
The rollator is not suitable for use in the case of: per-
ception disorders, severe loss of balance, inability to sit
down.
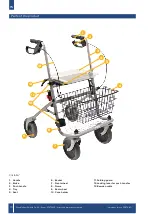
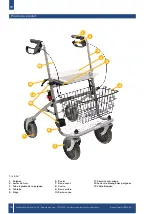
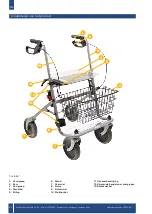
Scope of delivery
1 x
Rollator
1 x
Basket
1 x
Tray
1 x
Cane holder
1 x
Instructions for use
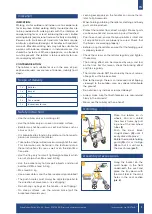
Safety instructions
• Use the rollator only as a walking aid!
• Use the rollator only on an even and solid surface.
• Rollator may not be used as a seat in vehicles, such as
a bus or train!
• It is prohibited to stand on the rollator or to transport a
person or animal on the rollator.
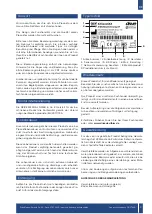
• Take note of the permitted maximum weight of the user.
This information can be found in the technical data in
these instructions for use as well as on the identifica-
tion plate.
• Use the tray only for small, lightweight objects which
are not sharp or hot. Max. load: 5.0 kg
• Use the basket only to transport objects and do not
overload it! Max. load: 5.0 kg
• Max. load 5,0 kg
• Use on escalators and the like is expressly prohibited!
• The push handles must always be adjusted parallel to
the direction of movement – risk of tipping!
• Do not hang any bags on the handle – risk of tipping!
• On steep surfaces, use the service brake (pull the
brake lever towards you).
• Leaning excessively on the handles can cause the rol-
lator to tip backwards.
• When folding/unfolding the rollator, clothing and body
parts can be pinched.
• Protect the rollator from direct sunlight. Product parts
can become hot and cause skin injuries if touched.
• Prior to each use, ensure that your rollator is intact and
all adjustable parts are properly secured. Check that
the brakes are working properly!
• Before using the rollator, ensure that the folding guard
is properly locked.
• Check the screws on the rollator regularly and tighten,
if necessary.
• The braking effect can be impaired by wear and tear
on the tires. For this reason, check the braking effect
and tires regularly.
• The rollator should NOT be carried by the seat, remov-
able parts or the brake cables.
• Due to the design, there is an increased risk of tipping-
sideways! In the outdoor area, pay special attentionto
the ground!
• Do not drive any inclines or ramps sideways!
• Always make sure that both forearms are securelyand
firmly in the armrests!
• Never use the rollator with one hand!
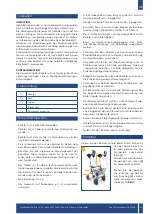
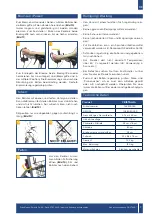
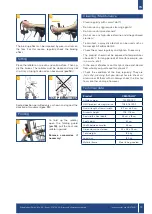
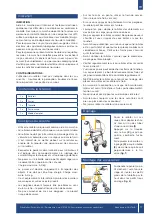
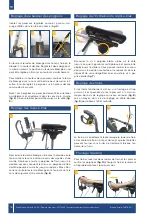
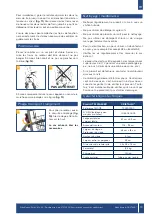
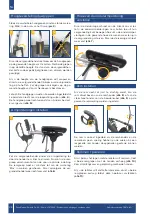
Unfolding
Place the rollator on its
wheels. You can unfold
the chassis frame by pull-
ing one of the rear wheel
tubes
(1)
.
Push the cross brace
straight down
(2)
until it
easily clicks into place.
Rotate the movable folding
guard
(3)
as far as it will go
(3)
so that it is vertical to
the cross brace (
pic. 1
).
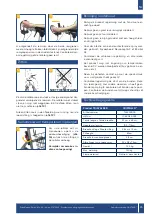
Assembly of accessories
Hang the basket on the
small hooks in the front
underneath the seat and
place the tray down with
the small feet in the small
holes in the seat section
(
pic. 2
).


