3. Hardware Installation
3. Hardware Installation
This section will guide you to install the router through hardware connection
and configure the router’s settings through web browser.
Before starting to configure the router, you have to connect your devices
correctly. (For the hardware connection, we take
“ac”
model as an example.)
3.1 Network Connection
3.1 Network Connection
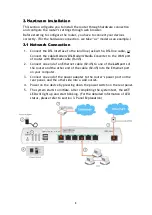
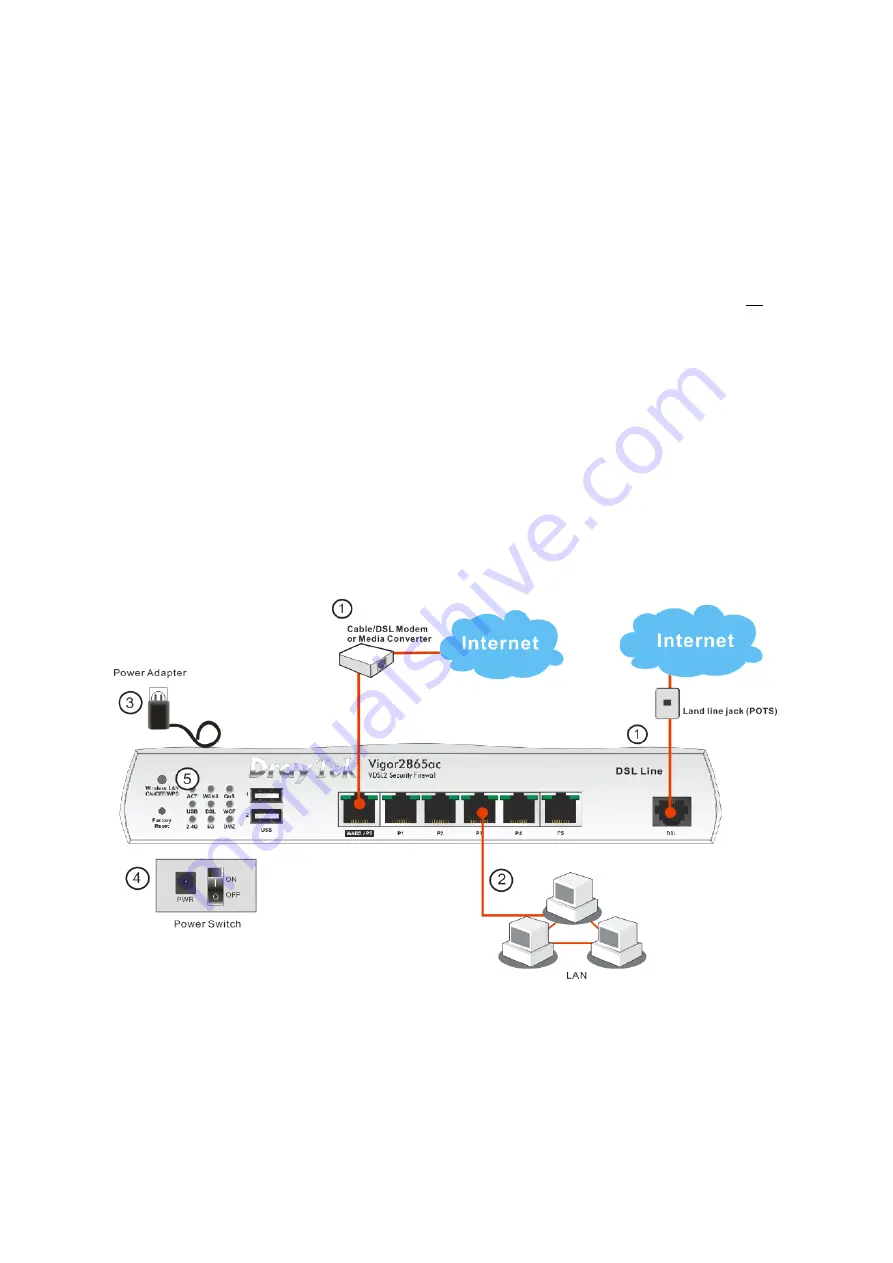
1. Connect the DSL interface to the land line jack with a DSL line cable,
or
Connect the cable Modem/DSL Modem/Media Converter to the WAN port
of router with Ethernet cable (RJ-45).
2. Connect one end of an Ethernet cable (RJ-45) to one of the
LAN
ports of
the router and the other end of the cable (RJ-45) into the Ethernet port
on your computer.
3. Connect one end of the power adapter to the router’s power port on the
rear panel, and the other side into a wall outlet.
4. Power on the device by pressing down the power switch on the rear panel.
5. The system starts to initiate. After completing the system test, the
ACT
LED will light up and start blinking. (For the detailed information of LED
status, please refer to section 3. Panel Explanation)
8
Содержание Vigor2865ac
Страница 2: ...Date April 28 2020 ii ...


