background image

- 5 -

GETTING TO KNOW YOUR
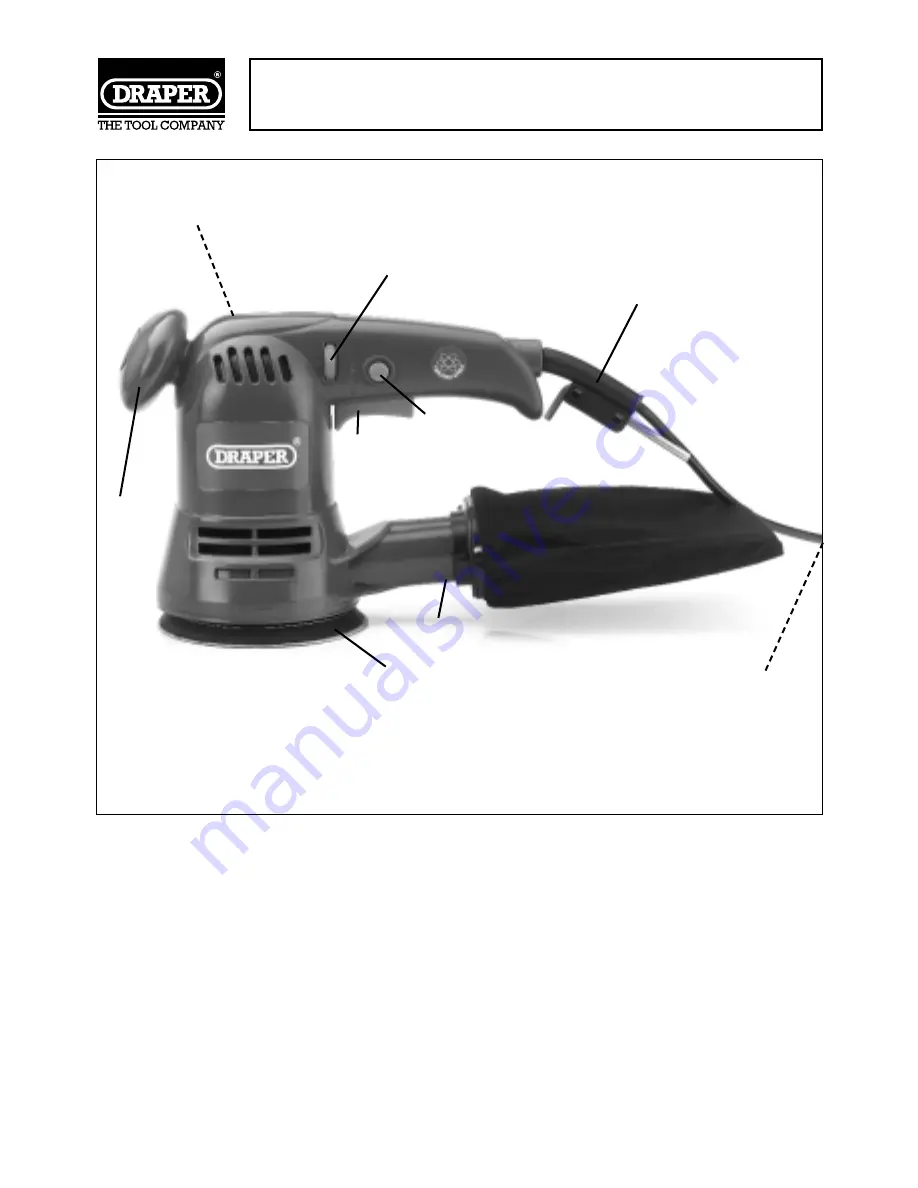
RANDOM ORBIT SANDER

✪✌

Fig.2.

✫✌

✬✌

✭✌

✮✌

✮✕✌

✯✌

✰✌

✱✌

A. On/Off Trigger.

B. Lock Button.

C. Electronic variable speed control.
D. Dust outlet.
E. BS Moulded Plug and cable.

E1.

Cable sheath.

F.

Sanding pad.

G.

Front handle.

H.

Rating plate.

Содержание 63124

Страница 1: ...e We recommend that this manual is read before any operation of the machine before performing any kind of adjustment to the machine and prior to any maintenance tasks By following all the general safe...

Страница 2: ...We Draper Tools Ltd Hursley Road Chandler s Ford Eastleigh Hampshire SO53 1YF England Declare under our sole responsibility that the product Stock No 63124 Part No PT125V Description Random Orbital Sa...

Страница 3: ...ed Draper warranty repair agent This guarantee applies in lieu of any other guarantee expressed or implied and variations of its terms are not authorised Your Draper guarantee is not effective unless...

Страница 4: ...are available from your Draper Tools stockist If the fitted plug is not suitable it should be cut off and destroyed The end of the cable should now be suitably prepared and the correct type of plug fi...

Страница 5: ...as cutters etc 16 AVOID ACCIDENTAL STARTING Make sure the switch is in the OFF position before plugging the machine into the power supply 17 NEVER LEAVE MACHINE RUNNING UNATTENDED Turn power off Do no...

Страница 6: ...G TO KNOWYOUR RANDOM ORBIT SANDER Fig 2 A On Off Trigger B Lock Button C Electronic variable speed control D Dust outlet E BS Moulded Plug and cable E1 Cable sheath F Sanding pad G Front handle H Rati...

Страница 7: ...the surface being sanded DUST EXTRACTION The PT125V comes with a dust collection bag for use on smaller workpieces Make sure that the bag is emptied as soon as it is full as dust removal will slow and...

Страница 8: ...plied to the sander the sanding plate will rotate slower but the random orbit motion will remain the same The finish will be similar to an orbital sander NOTE The sander must be used for dry work only...

Страница 9: ...emove the four cross slot screws Fig 8 from the sanding pad To remove the sanding plate assembly use the hexagon key to remove bolt Fig 9 To replace simply reverse the removal instructions WARNING DO...

Страница 10: ...nd that the disposal operation is carried out by specialized personnel following authorized guidelines In all circumstances Do not abandon in the environment Do not dispose of together with solid urba...

Страница 11: ...10 NOTES...

Страница 12: ...355 Fax 023 8026 0784 http www draper co uk e mail sales draper co uk Published by Draper Tools Ltd No part of this publication may be reproduced stored in a retrieval system or transmitted in any for...

Отзывы: