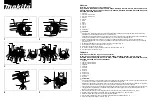
9.8 FITTING A CUTTING/SANDING DISC
ACCESSORY – FIG.9:
– Following the steps outlined in section 9.6, fit the
sanding/cutting disc mandrel
into the chuck of
the flexible drive shaft.
– Remove the screw using the plain slot screwdriver
incorporated in the spanner handle tip
.
– Remove one of the spacing washers from the end.
– Insert the screw through the cutting disc, the washer
and secure into the holder (do not overtighten).
9. ASSEMBLY
18
FIG.9
FIG.9
9.9 FITTING A POLISHING DISC ACCESSORY –
FIG.10:
– Following the steps outlined in section 9.6, fit the
polishing disc mandrel
into the flexible drive
shaft.
– Using either the large
or small
polishing
discs, attach the disc to the mandrel by simply
screwing it centrally onto the mandrel.
– The thread of the mandrel
will securely bind
into the fibrous body of the disc.
FIG.10
9.7 FITTING A SANDING DRUM ACCESSORY –
FIG. 8:
– Following the steps outlined above in section 9.6, fit
either of the large
or small
sanding drum
mandrels into the flexible drive shaft .
– Remove the screw using the plain slot screwdriver
incorporated in the spanner handle tip
, this
helps the rubber to relax.
– Slide a sanding disc
onto the mandrel.
– To secure, tighten the screw and the rubber drum
will swell, gripping the drum (do not overtighten).
FIG.8
– Insert the mandrel or accessory. Do not force.
– Using the spindle locking key
, slot the key into the aperture located on the hand grip
of the flexible drive shaft.
– Using the spanner
, tighten the chuck cover
. If the accessory seems loose, reduce
the collet size to ensure the bit is secured correctly.
Note:
Do not overtighten the chuck cover.


