16
9. ASSEMBLY
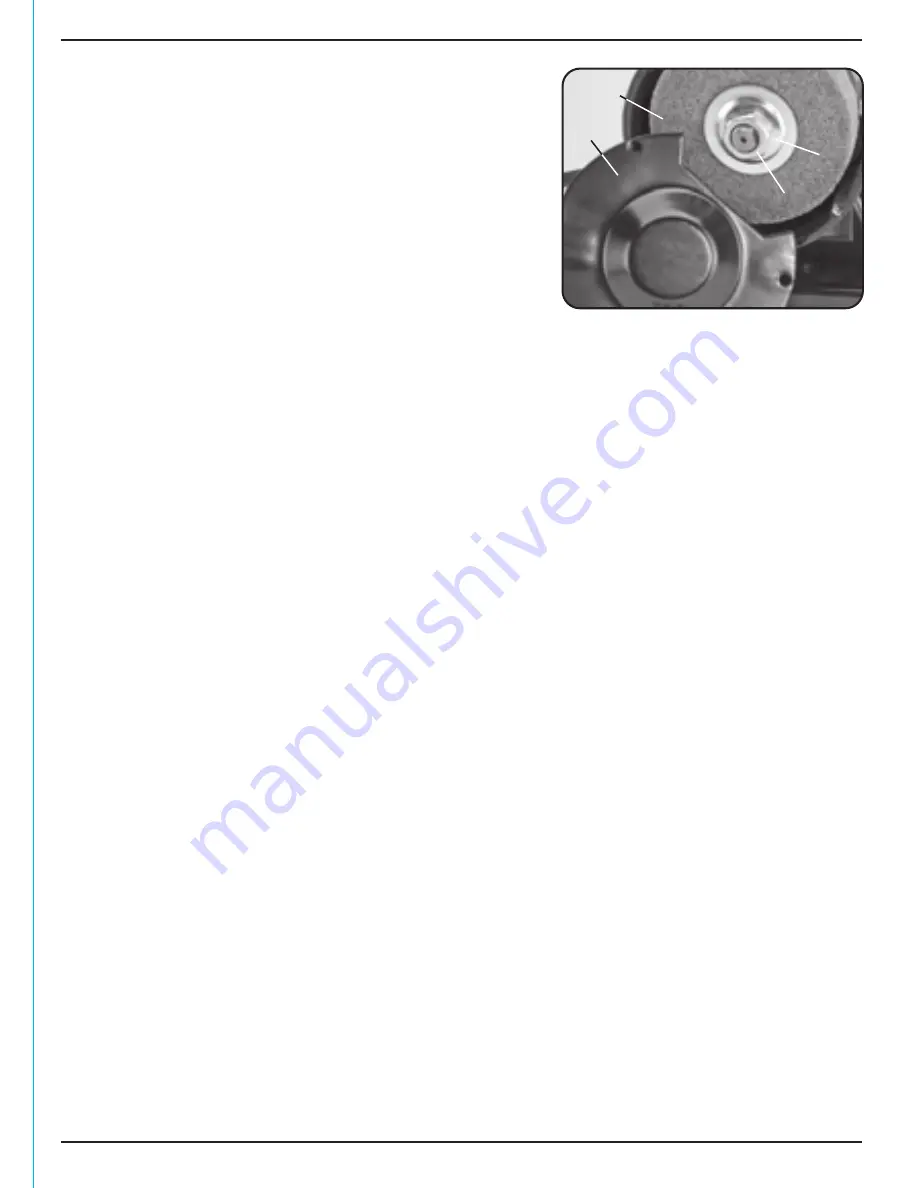
FIG.3
9.4 FITTING/REPLACING THE GRINDING &
POLISHING WHEELS – FIG.3:
Note:
Remove the plug from the socket before
carrying out adjustment, servicing or maintenance.
Warning
! Do not use damaged grinding wheels.
– Switch the grinder off and disconnect the power
supply. Remove the screws, spring clips and washers
holding the wheel guard
, and remove the cover
.
– Holding the other wheel by hand, remove the
locking nut
and flange
. Slide off the old
grinding wheel.
Use only grinding wheels recommended by the manufacturer which has a marked speed
equal or greater than the speed marked on the nameplate of the tool and have a maximum
dimension no greater than:
– 75mm diameter, 20mm thickness with a corresponding bore size of 10mm.
Abrasive products shall be subjected to a visual inspection as received before mounting.
In addition, a ring test shall be executed for vitrified wheels with D>80mm.
Damaged abrasive products should be destroyed.
Note:
The left hand grinding wheel locking nut has a left handed thread. When fitting a new
grinding wheel, always check that the stated max. RPM on the wheel exceeds the RPM of the
bench grinder. Also, inspect the new wheel for any damage, such as flaws or cracks. If the
wheel appears satisfactory, fit it to the grinder.
– Replace the flange and locking nut securely. Do not overtighten to avoid damage to the
wheel. Re-assemble the guard fully prior to carrying out testing.
– Each time after mounting, the wheel should be test run for a reasonable time.
Warning!
The specified maximum operating speed of the wheel must not be exceeded.
A bench grinder is designed for hand grinding operations only, such as sharpening drill bits,
chisels and screwdrivers or removing excess metal from work pieces.
A coarse grit abrasive wheel could be used for rough metals, to remove large amounts of
metal or where a smooth finish is not important.
A fine grit abrasive wheel could be used for sharpening tools or grinding close to size. A fine
grit wheel removes metal more slowly and therefore gives the work piece a smooth finish
and does not generate enough heat to anneal the cutting edges.
Note:
Remove the plug from the socket before carrying out adjustment, servicing or
maintenance.
– Check that the eyeshields have been secured in the correct position and that the grinding
wheel lock nuts are tight.
– When grinding, always keep the work piece moving across the face of the wheel.
Grinding against the same part of the wheel will cause uneven wear of the wheel face.
– When necessary, dress the abrasive wheels using a wheel dressing tool. After dressing,
adjust the tool rests and spark deflectors as necessary to maintain a 1.5mm clearance
from the wheel.


