


14
Connecting via Wired Ethernet Connection
The steps below show how to connect to the HDPQ DataNode via a
wired Ethernet connection.
Step Action
1
Connect an Ethernet cable between your Windows
®
-enabled
computer and the Ethernet port at the rear panel of the
instrument. An Ethernet cross-over cable may be needed if the
computer cannot auto-detect direct cabling.
2
Connect the power source at the rear panel of the instrument.
3
Power ON the computer and then press the power switch of the
HDPQ DataNode located at the rear panel to turn the
instrument ON.
4
In order to complete the Ethernet connection, the computer IP
address needs to be changed to be in the same range as the
HDPQ DataNode address.
Once the computer is fully running and the IP address has been
configured, open the Internet browser and enter the following
into the web browser:
http://192.168.0.30/index.html
.
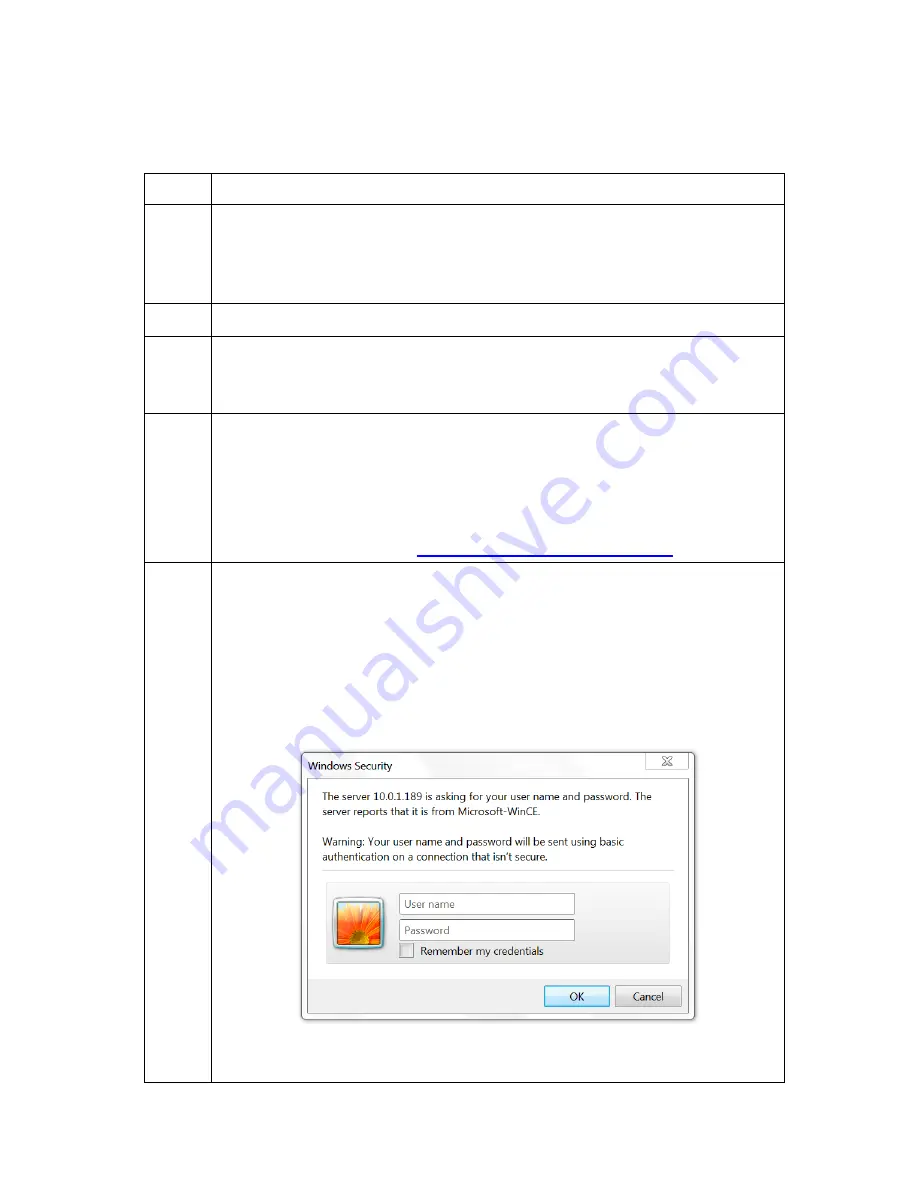
5
If communications to the instrument are working properly, the
window below will be displayed prompting you to enter the user
name and password.
Enter the default User name:
admin
Enter the default Password:
Dranetz
User name and password are case sensitive, and must be
entered as shown.
When done entering the user name and password, click on the
OK
button.
Содержание HDPQ-DN-MZP
Страница 24: ...24 Connecting the Input Pods to the HDPQ DataNode...
Страница 39: ...39 This page intentionally left blank...
Страница 40: ...40...


