12
12
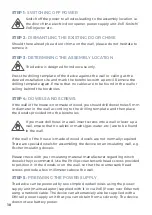
Be sure to use
four insulated,
shielded and
twisted wires of
a network cable
in accordance
with the Cat.5
standard or
better. Only four
wires of the
network cable
will be used.
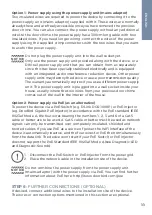
Connecting the unit to a network
You can connect the device to your existing network
via WiFi, or alternatively use a network cable (Ethernet).
For reasons of network stability, we principally recom-
mend using a network cable, as WiFi is sensitive to
interference (range, house walls acting as shields, relia-
bility of performance, third party WiFi networks, wireless
transmitters causing interference in the area, etc.).
The device can be powered by PoE or using the power
supply unit provided. If you use PoE as a source of power,
the WiFi interface of the device remains inactive.
Use only a network cable with RJ45 plug that meets the
Cat.5 standard or a better one.
Connect the network cable to your PoE-Switch or
PoE-Injector that is connected to your Internet router.
Then connect it to the device.
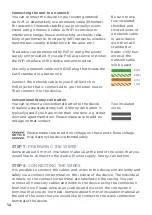
Conventional Storey-call button
You can connect a conventional button to the device
to realize a separate storey-call. A Storey-call button is
typically used if you have more than one door, e.g. street
door and apartment door. Please make sure to add no
voltage on that contact.
Please make sure to add no voltage on these ports. Extra voltage
may destroy the device immediately.
STEP 7: PREPARING THE WIRES
Remove about 5 mm of insulation material at the end of the wires that you
would like to connect to the device (Power supply, Storey-call button).
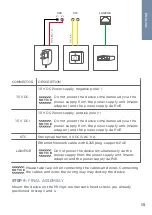
STEP 8: CONNECTING THE WIRES
It is possible to connect the cables and wires to the device conveniently and
safely via a connection terminal on the reverse of the device. The individual
contacts on the connection terminal are labelled on the casing. You can
connect all necessary cables and wires to the device using the connection
terminal now. Please remove any cables and wires on the connection
terminal that you do not need. Remove about 5 mm of insulation material at
the end of the wires that you would like to connect to the screw connection
terminal of the device.
Two insulated
wires.
6 (R-)
3 (R+)
2 (T-)
1 (T+)
NOTICE
Содержание A1061 Series
Страница 52: ...www doorbird com ...


