background image

5

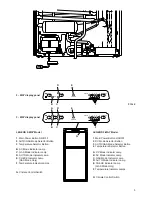
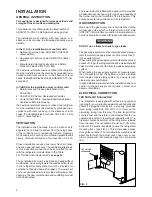
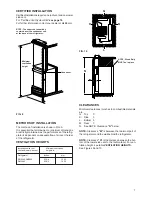
12 Volts DC Connection

This refrigerator model require a continuous 12 volt DC
supply to maintain the automatic energy system.
The connection is made to the positive (+) and negative (-)
terminals located at the rear of the refrigerator. (See
FIG. 1). Correct polarity must be observed when con-
necting to the DC supply.
Do not use the chassis or vehicle frame as one of the
conductors. Connect two wires at the refrigerator and
route to the DC supply.

12 Volts DC Connection 3-Way model

The distance the current must travel from the battery to
the refrigerator dictates the AWG wire size to be used.
Should the wire be too small for the distance, a voltage
drop will result.
The voltage drop affects the wattage output of the 12 volt
cartridge heater and resultant refrigerator performance.
The 12 volt DC heater is fused with a 30 amp. in-line  fuse.

Recommended wire sizes are shown below.

The wires from the battery to the refrigerator must be of
large enough size to handle the load. The connections
must be clean, tight and free from corrosion. If not, a
resulting voltage drop will cause a decreased cooling
capacity.

INSTALLING REFRIGERATOR IN
ENCLOSURE

NOTE:

DO NOT install the appliance directly on
carpeting. Carpeting must be removed or
protected by a metal or wood panel beneath
the appliance, which extends at least full
width and depth of the appliance.

NOTE: A wood strip must be in place across the upper
opening of the enclosure. The top frame of the refrigera-
tor will be anchored to the wood strip with screws.
See FIG. 10.
The refrigerator must be installed in a substantial enclo-
sure and must be level. When installing the refrigerator
in the enclosure, all areas within the recess in which the
refrigerator is installed must be sealed.
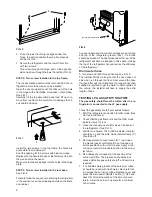
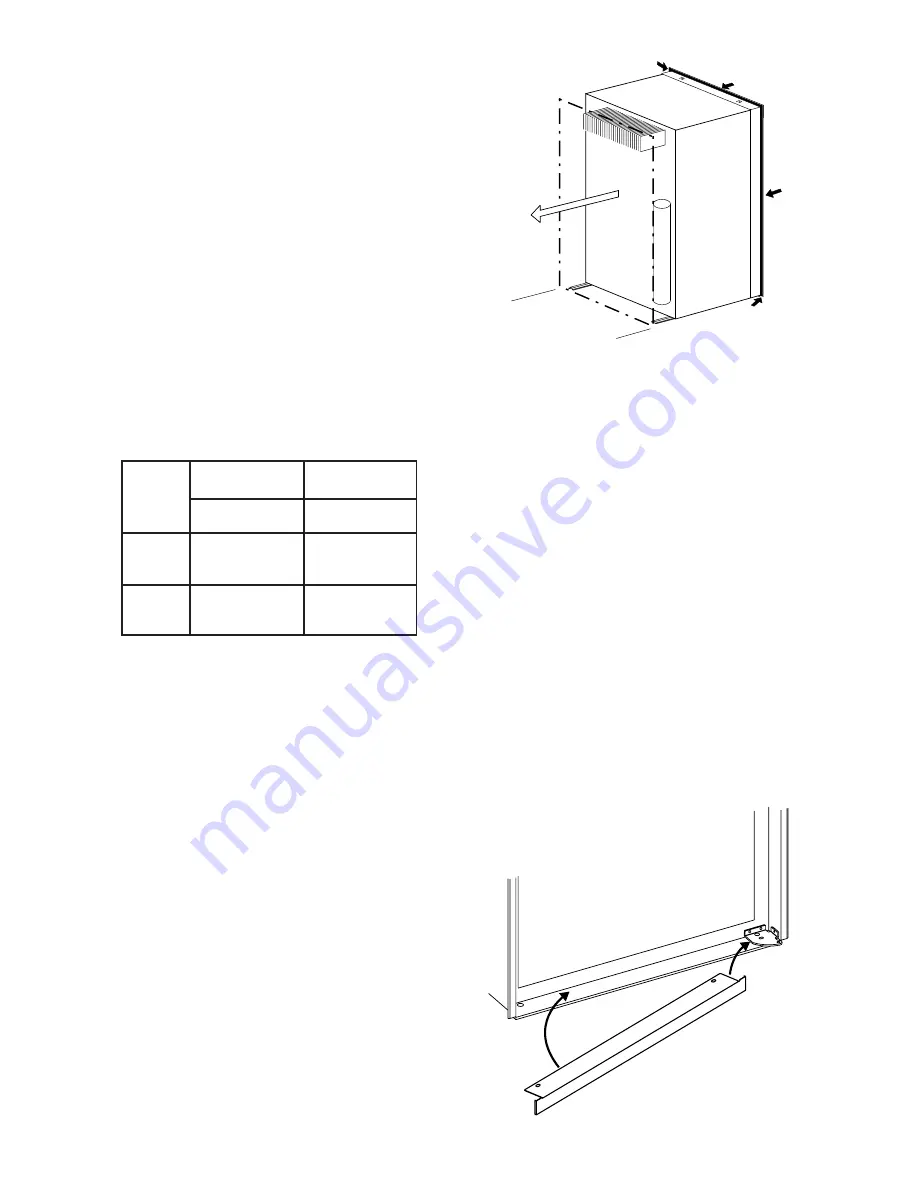
Make sure that there is a complete seal between the
front frame of the refrigerator and the top, sides and
bottom of the enclosure. A length of sealing strip is ap-
plied to the rear surface of the front frame for this pur-
pose, see FIG. 4.

MAXIMUM TOTAL CONDUCTOR WIRE LENGTH

(in feet and meters)

RM2662, RM2862

RM2663

Wire length

2-Way

3-Way

min. wire

min. wire

size

size

17 ft.

14 AWG

10 AWG

5 m

27 ft.

12 AWG

8 AWG

8 m

The sealing should provide a complete isolation of the
appliance’s combustion system from the vehicle interior.
NOTE: Be careful not to damage the sealing strip when
the refrigerator is put in place.

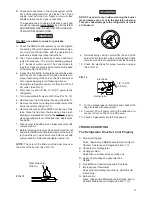
Securing the Refrigerator

After the refrigerator is put in place, (ensuring a com-
bustion seal at the front frame), the refrigerator is to be
secured in the enclosure with six screws (not included).
The screws have to be installed in the following order:

STEP 1: Two screws installed through the front base,
which includes the lower front strip installation.

The refrigerator is provided with a lower front strip
(shipped as a loose part). The front strip is to be attached
after the refrigerator is set into the cutout opening.

1. Install the lower front strip by sliding it under the

bottom hinge plate, as shown in FIG. 5. The hinge
plate can be on the right or left side depending on
the door swing.

2

1

FIG. 5

FIG. 4

Содержание RM2662

Страница 1: ...his or any other appliance WARNING Improper installation adjustment alteration service or maintenance can cause injury or property damage Refer to this manual For assistance or additional information...

Страница 2: ......

Страница 3: ...icator Lamp GAS Mode Only F Temperature Indicator Lamps G Climate Control Switch LEGEND 2 WAY Model 1 Main Power Button ON OFF 2 AUTO GAS Mode Selector Button 3 Temperature Selector Button B AC Mode I...

Страница 4: ...t be provided for ventilation of heavier than air fuel gases The lower vent of the recommended kits is provided with proper size openings The flow of combustion and ventilating air must not be obstruc...

Страница 5: ...The top frame of the refrigera tor will be anchored to the wood strip with screws See FIG 10 The refrigerator must be installed in a substantial enclo sure and must be level When installing the refri...

Страница 6: ...rigerator is connected to the LP gas supply To test the gas safety shutoff proceed as follows 1 Start the refrigerator and switch to GAS mode See start up instructions 2 Check that the gas flame is li...

Страница 7: ...to the roof material For ven tilation height see table VENTILATION HEIGHTS See Figures 9 and 10 METHODS OF INSTALLATION The method of installation is shown in FIG 9 It is essential that all maximum or...

Страница 8: ...l as the rolling and pitching movement of the vehicle will pass to either side of level keeping the liquid ammonia from accumulating in the evaporator tubing OPERATION Before starting the refrigerator...

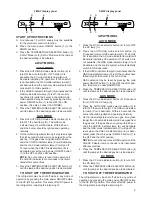
Страница 9: ...including the interior light START UP INSTRUCTIONS A A continuous 12 volt DC supply must be available for the electronic control to function B Press the main power ON OFF button 1 to the DOWN position...

Страница 10: ...open If the problem is still not corrected con tact a service center for assistance If the control is switched to AC or DC 3 way models only operation while the CHECK indicator lamp is on it will func...

Страница 11: ...ood compart ment To prevent food from drying out keep it in covered dishes containers plastic bags or wrapped in aluminum foil Ice cubes can be made in the freezer compartment For faster ice making th...

Страница 12: ...Before working on the refrigerator make sure the AC voltage and DC voltage leads are disconnected Shut off the gas supply at the LP tank Disconnect the gas supply line at the rear of the refrigerator...

Страница 13: ...agraph E item 1 13 WARNING DO NOT use a flame to check for gas leaks C Check the AMES control system by connecting dis connecting 120 volt AC power start stop the engine etc Compare the operation with...

Страница 14: ...roper adjust ments and unfavorable installation conditions Contact service point or distributor service dept for assistance CHANGING DOOR HINGES FROM ONE SIDE TO THE OTHER The refrigerator is equipped...

Страница 15: ...15...

Страница 16: ...ter 325W 120V 17 37 57 09 7 B Heater 215W 12V 200 74 19 21 7 A B C Jet No 58 293 06 97 07 9 A B C Burner with conductor 293 20 93 03 8 A B C Handle black 293 21 06 01 2 A B C Lamp cover 293 25 75 05 9...

Страница 17: ...side at the desired position Slide the wire shelf to the left The right hand side of the shelf will come loose Slide the shelf into the holes on the right hand side Lower the right hand side of the wi...

Страница 18: ...18 RM2662 RM2862 RM2663...

Страница 19: ...19...

Страница 20: ...20 MO FO 0448...

Отзывы: