background image

1

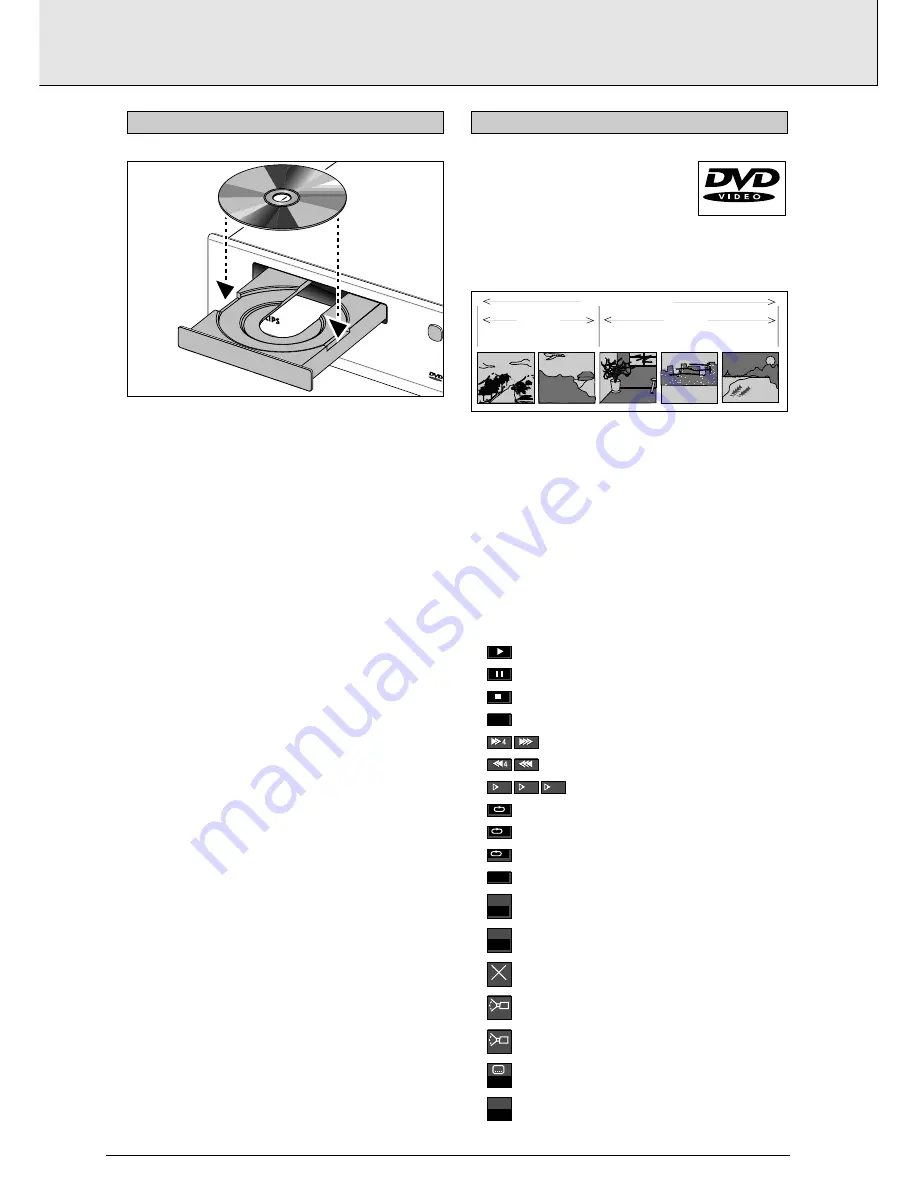
Press OPEN/CLOSE on the front of the player. The disc tray
opens.

2

Lay your chosen disc in the tray, label side up. Make sure it
is sitting properly in the correct recess.

3

Gently push the tray, or press OPEN/CLOSE, to close the
tray.

- With Autoplay on (the factory setting) play starts. 
- With Autoplay off, the (play) screen for the type of disc

inserted appears on the OSD, and information about the
disc’s contents and total playing time appear on the
display. 

- To turn Autoplay off or on, see Settings.

NOTE

- Since it is usual for DVD movies to be released at different

times in different regions of the world, all players have
region codes, and discs can have an optional region code. If
you insert a disc of a different region code to your player,
you will see the region code notice on the screen. The disc
will not play, and should be removed.

You will recognize DVD-Video discs by the   
logo. Depending on the material on the disc
(a movie, video clips, a drama series, etc.) 
it may have one or more Titles, and each
Title may have one or more Chapters. Play stops at the end of
each Title. To make access easy and convenient, your player
lets you move between Titles, and also between Chapters.

NOTE

- During play, various icons will appear on the TV screen for

about 2 seconds to confirm that a function has been
selected. You can get rid of these icons by pressing OSD.

- At any time during play, you can press OSD to call up the

Play Banner, which shows you which functions are active,
for about 2 seconds. To keep the Play Banner on the screen,
hold down OSD for a couple of seconds. To get rid of the
Play Banner, press OSD again.

- List of icons:

..........................................Play

..........................................Pause

..........................................Stop

..........................................A-B repeat

..................................Search forward

..................................Search backward

..........................Slow forward

..........................................Repeat disc

..........................................Repeat title

..........................................Repeat chapter

..........................................Chapter shuffle

..........................................Title indication

..........................................Chapter indication

..........................................Disable function

..........................................Angle

..........................................No alternative angle

..........................................Subtitle language

..........................................Audio language

ENG

AUDIO

no

1

1

3

7

CHAPT

004

TITLE

02

chapter

shuffle

C

T

1/8

1/4

1/2

A - B

TITLE 1

TITLE 2

CHAPTER 1

CHAPTER 2

CHAPTER 1

CHAPTER 2

CHAPTER 3

DVD-VIDEO DISC

PLAYING A DVD-VIDEO DISC

DVD 960

     D

VD / 

VIDEO CD / CD PLA

YER

OP

INSERTING A DISC

english

12

GETTING STARTED

PLAYING A DVD-VIDEO DISC

Содержание DVD Video

Страница 1: ...EG2 data compression technology to register an entire movie on a single 5 inch disc DVD s variable bitrate compression running at up to 9 8 Mbits second captures even the most complex pictures in thei...

Страница 2: ...DVD Video player Remote Control Handset with separately packed batteries Power cord Euroconnector cable 1 way video CVBS cable 2 way audio cable User Manual If any item should be damaged or missing p...

Страница 3: ...6 7 8 9 DVD 960 DVD VIDEO CD CD PLAYER OPEN CLOSE PLAY PAUSE STOP TIME TOTAL 1 2 3 4 5 6 7 8 9 10 11 12 13 14 15 CD TRACK 1 2 3 4 5 7 6 8 1 Power supply 2 ON OFF 3 S Video 4 Component video YUV Video...

Страница 4: ...wn 4 Cursor left 1 Cursor up 3 TITLE title menu On Off TV POWER TV DVD selector DVD Standby TV Audio MUTE c MENU root menu On Off Cursor right 2 ENTER acknowledge menu selection NEXT P search forward...

Страница 5: ...2 Connect the audio Left and Right channel sockets on the rear of the player to the corresponding sockets on the TV using the cable supplied Alternatively you can use the same cable to connect the au...

Страница 6: ...t use the RF Modulator option for home theatre If the audio format of the digital output does not match the capabilities of your receiver the sound will be muted For this connection which produces the...

Страница 7: ...d beam When there are corresponding keys on the front panel they can also be used 1 Switch on the TV and select the video input for your DVD Video player 2 To enjoy sound through your stereo system tu...

Страница 8: ...e or more Titles and each Title may have one or more Chapters Play stops at the end of each Title To make access easy and convenient your player lets you move between Titles and also between Chapters...

Страница 9: ...r the chapter number using the numerical keys NOTE If the number has more than one digit press the keys in rapid succession For more information about chapters see Checking the contents of DVD Video d...

Страница 10: ...9 as desired SHUFFLE This shuffles the playing order of chapters within a title if the title has more than one Press SHUFFLE briefly during play appears on the screen for about 2 seconds As each chap...

Страница 11: ...tions press SUBTITLE repeatedly To turn the subtitles off hold SUBTITLE down again SCAN Plays the first 10 seconds of each title on the disc Press SCAN for about 1 second To continue play at your chos...

Страница 12: ...You can resume play from the point at which you stopped Press Resume twice The resume feature applies not only to the disc in the player but also to the last four discs you have played Simply re inser...

Страница 13: ...rward play To select Jog Shuttle press JOG PAUSE The key lights up and the player goes into Pause mode Jog With the Shuttle ring in the center position turn the Jog disk clockwise to view still pictur...

Страница 14: ...stereo system only using keys on the remote control and or front panel PLAYING A DISC With Autoplay on play starts when you close the disc drawer With Autoplay off press 2 The disc starts to play if...

Страница 15: ...N NOTE FTS Favourite Track Selections are compiled and played using the OSD ensure that the TV is on Playing an FTS program If Auto FTS is set to on play of the FTS program starts immediately If Auto...

Страница 16: ...choose provided this is available on the disc in play If not speech will revert to the first spoken language on the disc The subtitles will be in the language you choose provided this is available on...

Страница 17: ...at the digital output If you are connecting equipment with a digital input change the setting to ALL If your equipment doesn t include a digital decoder e g digital speakers set the digital output to...

Страница 18: ...arental Control on the OSD by pressing r The OSD will ask for your pin code 5 The disc is now authorized and will play in the normal way without the pin code To cancel your authorization repeat steps...

Страница 19: ...TED SOUND FROM HIFI AMPLIFIER Check that the player s audio L R output is not connected to the amplifier s phono input NO RETURN TO START UP SCREEN WHEN DISC IS REMOVED Reset by switching the player o...

Страница 20: ...layer to exit the Diagnostic Program 4 ERROR indicates that your player needs repair Contact your dealer or the Philips Customer Care Center PCCC 5 PASS indicates that the Diagnostic Program has found...

Отзывы: