30
Ordercode: 101281
D1 Videomixer
06)
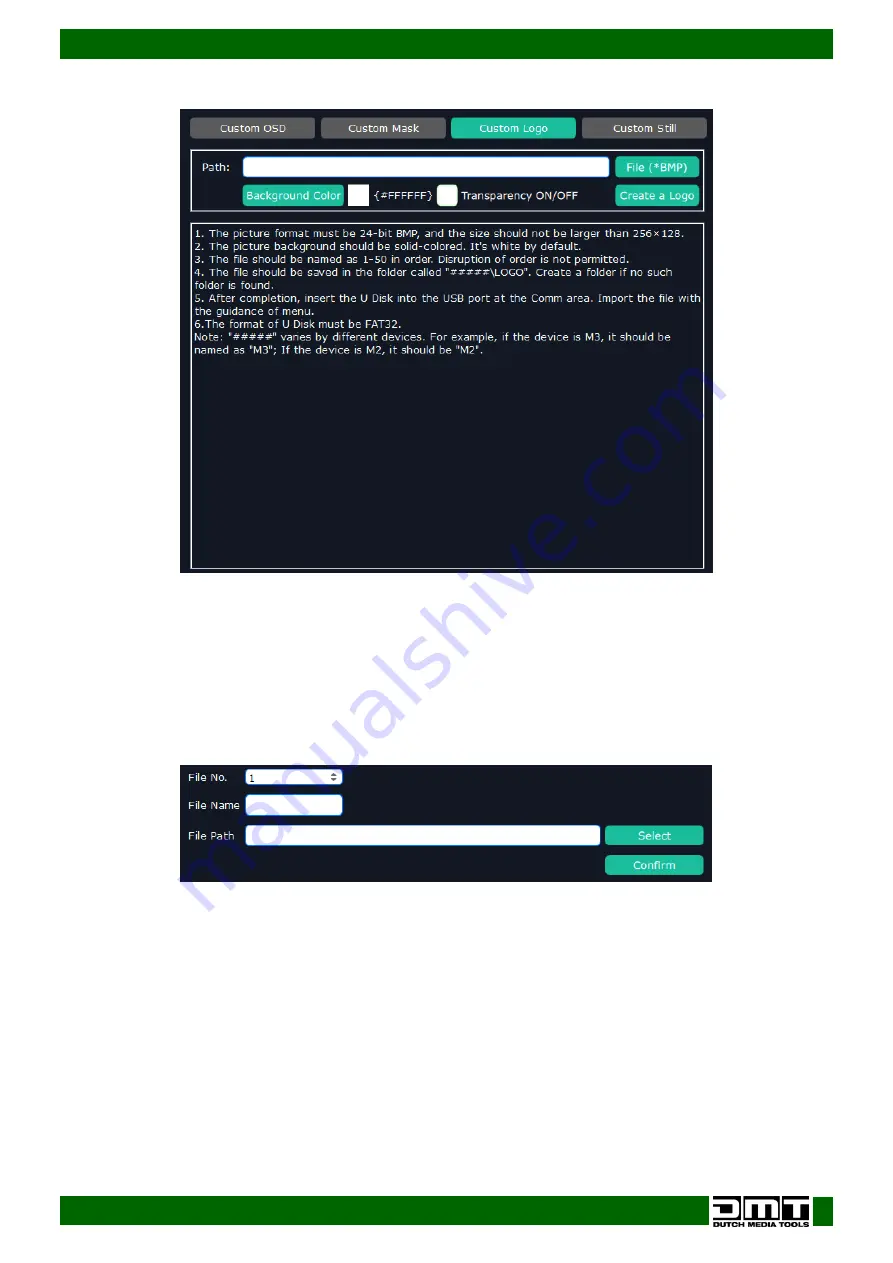
Click on “Toolbox” tab (at the top of the screen) and then on “Custom Logo”. The display will show:
07)
Using any raster graphics editor (e.g. MS Paint), create your desired logo and save it on your PC.
The properties of a custom logo should be as follows:
●
The picture format must be 24-bit BMP and the size should not be larger than 256x128 pixels.
●
The picture background should be solid-colored (it is white by default).
08)
In XTOOL software, click on “File (*BMP)” and select the previously created logo file.
09)
Check “Transparency ON/OFF” option.
10)
Click on “Background Color” and select the desired background color.
11)
Click on “Create a Logo”. The display will show:
12)
Choose the correct file number (File No). The adjustment range is 1–50. When saving multiple logos,
save them in the ascending order. It is not allowed to skip numbers.
13)
Type in the name of your logo (File Name).
14)
Click on “Select” and choose the “#####*\LOGO” folder on the microSD card. Create such folder,
if it does not exist.
Note: * “#####” stands for the card’s drive letter on your PC, e.g. “J:/LOGO”.
15)
Click on “Confirm” to create a logo. The software will show “Created!”
16)
The logo is now saved on the microSD card as LOGO_xxx.bin file, where “xxx” stands for the logo
number.
17)
Remove the microSD card from the PC, place it in the D1 Videomixer and replace the previously
removed module.
18)
Turn the D1 Videomixer on.
19)
Select and edit the logo. For more information, see 9. Logo, page 21.
Содержание D1 Videomixer
Страница 11: ...10 Ordercode 101281 D1 Videomixer Menu Overview ...
Страница 12: ...11 Ordercode 101281 D1 Videomixer ...
Страница 13: ...12 Ordercode 101281 D1 Videomixer ...
Страница 34: ...33 Ordercode 101281 D1 Videomixer Dimensions ...
Страница 35: ...34 Ordercode 101281 D1 Videomixer ...
Страница 36: ... 2020 DMT ...


