


PARTS AND SERVICE MANUAL
FOR
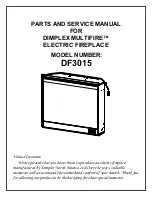
DIMPLEX MULTIFIRE™
ELECTRIC FIREPLACE
MODEL NUMBER:
DF3015
Valued Customer,
We are pleased that you have chosen to purchase an electric fireplace
manufactured by Dimplex North America Ltd.Over the years, valuable
memories will occur around the warmth and comfort of your hearth. Thank you
for allowing our product to be the backdrop for those special moments.


