background image

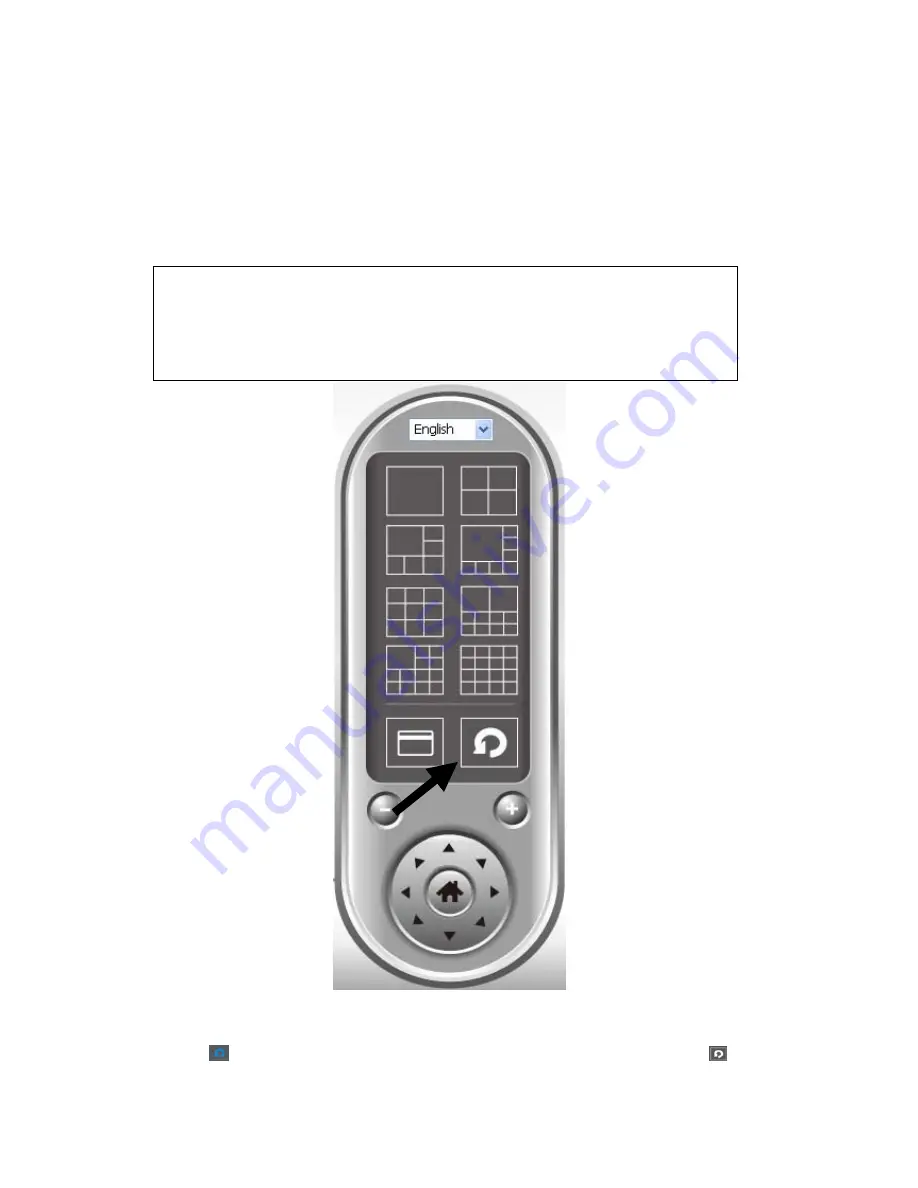
3.2.4 Scan 

If you have more than one camera configured, and you wish to switch the 
displaying image between cameras, you can click ‘Scan’ button to switch 
between all configured cameras. 


NOTE: If a camera is configured but disconnected, it will still be displayed in a 

scan sequence (you’ll see nothing and you’ll see ‘Disconnected’ text displayed at 

the upper-left corner of display image). 


Click ‘Scan’ button once to activate scan function (scan icon will become 
blue 

), click again to stop scanning (scan icon will become white 

). 

Содержание DN-16041-1

Страница 1: ...Digital Pan Tilt Dual Mode IP Camera DN 16041 1 DN 16042 1 User Manual...

Страница 2: ...Using Web Management Interface 19 2 1 Camera Settings 19 2 2 1 Motion Detection 22 2 2 2 Mute Audio 25 2 2 3 About 26 2 2 PTZ Settings 27 2 3 LAN Settings 31 2 3 1 IP Address 31 2 3 3 Dynamic DNS 34...

Страница 3: ...1 Configure cameras 80 3 2 1 1 1 Camera tab 81 3 2 1 1 2 Schedule Recording 84 3 2 1 1 3 Audio 87 3 2 1 1 4 Motion Record 88 3 2 1 2 General Settings 90 3 2 1 2 1 General tab 90 3 2 1 2 2 E Mail Sett...

Страница 4: ...ra Before you start to use this IP camera please check the package contents If anything is missing please contact the dealer of purchase and return the package to claim for missing contents Item Name...

Страница 5: ...t have to set a new network cable between the IP camera and monitoring computer Worry about the content will be intercepted by unauthorized person when the video is transmitted over the air That s al...

Страница 6: ...ption WEP WPA Supports DHCP and PPPoE protocol you can also assign a fixed IP address to the camera also Supports Dynamic DNS used to allocate the IP camera s Internet address when the ISP you re usin...

Страница 7: ...mponents Front View LAN LED WLAN LED Power LED Camera Focus Ring LAN LED Indicates LAN activity WLAN LED Indicates Wireless LAN activity Power LED Indicates power status Camera Video camera with lens...

Страница 8: ...ds to reset the camera settings to factory default value Power Jack Connect to power adapter for power supply LAN Jack Connect to your local area network by network cable Speaker Out Connect to extern...

Страница 9: ...Back View Tripod Connector Connects to any standard tripod camera wall holder MAC Address Label Shows the MAC address of this IP camera Useful when you can t locate the camera on the network...

Страница 10: ...n Off Network cable is disconnected On Network cable is connected LAN Flash Transferring data via LAN port Off No wireless LAN activity WLAN On Transferring data via wireless LAN Off Camera is not pow...

Страница 11: ...wer connector to the power jack located at the bottom of the IP camera 4 Connect the Ethernet cable to your local area network and connect the other end to the LAN jack of this IP camera NOTE You can...

Страница 12: ...If you wish to assign another IP address to this IP camera you have to log onto the web configuration interface of the camera first If the left three fields of the IP address of your computer is not 1...

Страница 13: ...2 Double click Network Connections icon 3 Right click Local Area Connection and click Properties...

Страница 14: ...4 Select Internet Protocol TCP IP then click Properties...

Страница 15: ...of this IP camera and you forget it there re 2 methods to recover it a Press and hold the Reset button located at the bottom of this IP camera to clear all settings of the IP camera and reset the IP...

Страница 16: ...the user name and password Default user name is admin in lower case and password is 1234 Click OK to continue after user name and password has entered If you re rejected maybe the password has been mo...

Страница 17: ...e following messages at the top of Internet Explorer This IP camera requires a special ActiveX control A K A Plugin to work Please click on the message and select Install ActiveX Control When you re p...

Страница 18: ...lay capability that this IP camera requires or you don t have Microsoft DirectX installed Please download Microsoft DirectX from Microsoft s website http www microsoft com and try again In some cases...

Страница 19: ...amera Settings The first menu after you logged onto web management interface is Camera and this is the only menu you can see the real time image from camera You can always back to this menu by clickin...

Страница 20: ...a network telephone and you can talk to the people there Please note that your voice will only be transmitted during the time you press and hold the Speak to IPCam button When you release the button y...

Страница 21: ...Add After you named the position name you can press to store the preset position Goto After you select an existing position and click the screen will go to the selection preset position immediately R...

Страница 22: ...d record all motions only for the area you defined and ignore all other areas you don t need to record To setup motion detection please select MPEG4 as encoding format and right click on the image A p...

Страница 23: ...can define a new motion detection region by mouse cursor 1 Click and hold left mouse button at the start point of rectangle on the image 2 Drag the mouse cursor to define a rectangle 3 When you think...

Страница 24: ...ion area you defined use a higher sensitivity setting Threshold When the threshold is lower the IP camera will take a picture only when a numerous motion is detected If you want the IP camera to recor...

Страница 25: ...connection you can mute audio for a while To mute audio please select MPEG4 as encoding format and right click on the image A pop up menu will appear Click Mute Audio to mute audio A check will appear...

Страница 26: ...ide you with the version number of current IP camera plugin which is useful when you need online support To see version information right click on the image A pop up menu will appear Select About and...

Страница 27: ...set position image Add Press Add button to create new Guard Tour Edit Press Edit button to modify the existing Guard Tour Start Stop Press Start Stop button to start or stop Guard Tour Remove Select e...

Страница 28: ...list button 3 Modify the Guard Tour list 4 You can modify the View Time and View Order or remove which position 5 After modified all items then press Save button to save all parameters 6 Press Close...

Страница 29: ...2 Click on Camera Item and view the Guard Tour process After 10 seconds Item Description Position1 Position2...

Страница 30: ...Cruise Tour Path There are four paths of Cruise Tour That means device can follow different tour path for cruising Apply After select the Cruise Tour Path please press Apply button to finish...

Страница 31: ...ecify TCP IP parameters in this menu if you want to change IP address use PPPoE Dynamic DNS and activate UPnP function You can access this menu by clicking LAN on the top of web management interface 2...

Страница 32: ...server ask network administrator or your ISP for help Secondary DNS Specify the IP address of backup DNS server here When primary DNS is unreachable IP camera will use the IP address specified here as...

Страница 33: ...t Enable to activate PPPoE function of this IP camera select Disable to disable it User Name Input the PPPoE username assigned by your ISP here Password Input the PPPoE password assigned by your ISP h...

Страница 34: ...how to apply a new account can be found on dyndns org s website The descriptions of every setting in this menu will be given below Item Description Enable DDNS Select Enable to activate Dynamic DNS f...

Страница 35: ...don t have to remember the IP address of this IP camera Simply open Network neighbor and it s there The descriptions of every setting in this menu will be given below Item Description Enable UPnP Sel...

Страница 36: ...Click the message to open My Network Places and you ll see the IP camera You can double click the icon to launch Internet Explorer and log onto IP camera s web management interface directly...

Страница 37: ...can access to the picture taken by the IP camera at http 192 168 2 3 loginfree jpg This function is for convenience only and anyone who knows this filename will be able to see the picture taken by yo...

Страница 38: ...Parameters If you wish to use wireless network instead of wired network connection you have to set wireless LAN parameters here You can access this menu by clicking LAN on the top of web management i...

Страница 39: ...ess point but your computer has wireless network card Set to Infrastructure when you have wireless access point and you have computers with wired network connection Available Networks Here shows all w...

Страница 40: ...eless access point above it s SSID will be filled in this field automatically However if the SSID is not displayed the wireless access point you selected choose to hide it s SSID you have to know it s...

Страница 41: ...automatically and you should not modify it or you will not be able to connect to the wireless access point you selected Available options are None WEP TKIP and AES The options available here will vary...

Страница 42: ...key format you can use all alphanumerical characters and is case sensitive Default Key Select the default key set that is IP camera should use against the wireless access point when WEP encryption is...

Страница 43: ...2 5 Audio Video You can specify the video and audio parameters of this IP camera here...

Страница 44: ...n below Item Description Default Video Format Specify default video encoding format of this IP camera here Available options are MPEG4 and MJPEG Default Video Mode Specify default video mode of this I...

Страница 45: ...rk bandwidth Video Quality Specify video encoding rate of MPEG4 video encoder by either CBR or VBR CBR available options are from 200Kbps to 2Mbps VBR available options are from highest to lowest Grea...

Страница 46: ...and QQVGA but requires more network bandwidth Video Quality Specify video encoding quality of MJPEG video encoder There are five levels of video quality from highest to lowest Higher video quality pro...

Страница 47: ...this menu will be given below Item Description Audio Function Choose Enable to enable audio function of this IP camera or choose Disable to disable it Microphone Volume Specify the microphone volume...

Страница 48: ...ion is detected This is very convenient since IP camera will guard the environment automatically for you and you don t have to look at the monitor all the time You can access this menu by clicking E M...

Страница 49: ...rk administrator or ISP Sender E Mail Address Input the Email address of mail sender this will help you to identify the Email sent by this IP camera by sender s Email address NOTE Some mail server wou...

Страница 50: ...nput the password of SMTP server here if your SMTP server requires the use of authentication Click Apply to save settings and make the new settings take effect After that you can click Send a test ema...

Страница 51: ...to use here Remote Folder Input the remote folder name on the FTP server here If nothing is specified here all uploaded image files will be placed in FTP server s root directory Please ask FTP server...

Страница 52: ...y to use passive mode Click Apply to save settings and make the new settings take effect After that you can click Upload a test file to send a file to the FTP server you set here so you can make sure...

Страница 53: ...iven below Item Description Enable Motion Detection Select Enable to start motion detection and select Disable to disabled it Next Event Detected Interval Specify the time interval between two motion...

Страница 54: ...ction and select No to disable this function E Mail Subject Set the subject of Email being sent here This will help you to distinguish the Email sent by this IP camera from others Send snapshot file t...

Страница 55: ...like password and time setting You can also upgrade the firmware of this IP camera to make new functions available on this IP camera You may also clear all settings or reboot the IP camera here You ca...

Страница 56: ...era in the same network Default name begins with IC plus the last 6 characters of the MAC address of this IP camera You can modify the name to the one you can remember and meaningful to you but never...

Страница 57: ...to set here Date time format is YYYY MM DD HH MM SS Time is in 24 hour format You can click Synchronize to PC time to use the time of the computer you re using Example 24th August 2007 2007 08 24 and...

Страница 58: ...R CLOSE WEB BROWSER DURING UPGRADE Reset Clear all settings in the camera Please think again before you do this and then click this button to reset all settings NOTE IP address will be reset to defaul...

Страница 59: ...you don t want other people know the camera is transferring data You can click this button again to switch LED lights on again...

Страница 60: ...This menu provides all information about this IP camera like firmware version system uptime date time and network information You can access this menu by clicking Status on the top of web management...

Страница 61: ...the image and can not change any system setting When they want to click menus other than Camera they will see the following message informing that they don t have permission to do that This IP camera...

Страница 62: ...r name and password so you can select disable to disallow a user from logging in temporarily without erasing it s account information Login Specify the user name here Please use alphanumerical charact...

Страница 63: ...All activities of this IP camera will be logged and you and enter Log menu to view these logs You can access this menu by clicking Log on the top of web management interface Click Refresh to get lates...

Страница 64: ...res in Windows 2000 Server 2003 are similar 1 Insert the CD shipped along with the Internet Camera into your CD ROM drive The Autorun exe program should be executed automatically If not run Autorun ex...

Страница 65: ...em will start the installation procedures Click Next to continue installation 4 If you wish to install the software program in an alternate location click Change otherwise click Next to move on to the...

Страница 66: ...5 Click Install to start installing the program 6 The system will install the program automatically...

Страница 67: ...16 Chan camera viewer the system will start running viewer installation and the procedures are similar to the installation of administration utility 9 Administrator Utility will be run automatically a...

Страница 68: ...be correct or you cannot access to the camera The wizard program will detect the IP address status of your network automatically and suggest a free IP address for the Camera You can accept the sugges...

Страница 69: ...12 Click IP Cam Surveillance Software icon from desktop quick launch bar or start menu to start the IP camera surveillance software...

Страница 70: ...ameras can be connected simultaneously choose the camera you want to connect on the Camera Search list and click Select to add it into the channel you want to view then click ok Tip You can do the set...

Страница 71: ...vides a setting wizard which can guide users to add the camera to the network easily and promptly There are two ways to run the Administrator Utility as follows 1 Click Start select Programs IP Camera...

Страница 72: ......

Страница 73: ...rch Camera Click Search Camera to search cameras on the network Browse Camera via Web Click Browse Camera via Web to activate browser and auto connect to IP cam to get video Configure Camera Click con...

Страница 74: ...ick the Configure Camera a screen will pop up for you to enter the Administrator Name and Password The default value is as follows Name Admin Password 1234 If the name and password you enter are corre...

Страница 75: ...the camera for example 192 168 2 250 NetMask The Subnet Mask field must match the subnet setting on your LAN For example 255 255 255 0 Gateway The Gateway is used to forward frames to destinations in...

Страница 76: ...camera If you change the web port from 80 to 8080 you must type http 192 168 2 3 8080 to connect the camera through web browser 3 1 1 4 Security Security Camera Name New Password Confirm Password The...

Страница 77: ...olution before you use IP camera surveillance software or it won t start Before you start Here are descriptions for all components of IP camera viewer You can put the mouse cursor on a certain compone...

Страница 78: ...tton once to activate scan function scan icon will become blue click again to stop scanning scan icon will become white Zoom out Zoom out To see more objects This function is only available for suppor...

Страница 79: ...era is disconnected etc Close window stop surveillance Terminates IP camera surveillance software Minimize window Minimizes IP camera surveillance software window Video displaying area Displays the im...

Страница 80: ...wish to connect Please click System configure button and a popup menu will appear Please select Configure Cameras to configure cameras Note If you re prompted by a windows security alert which asks y...

Страница 81: ...3 2 1 1 1 Camera tab In this tab you can configure all cameras you wish to connect Up to 16 cameras can be connected simultaneously Here are the descriptions of all setting items...

Страница 82: ...n of purpose easily Model Displays the model of selected camera this field can not be changed IP Input the IP address of camera Username Input the user name of camera Web Port Input the web port of th...

Страница 83: ......

Страница 84: ...2 Schedule Recording In this tab you can setup scheduled video recording so you can record the video captured by all cameras you have by a pre defined schedule Here are the descriptions of all settin...

Страница 85: ...duration of this one time schedule the date and time of From and To then click OK to save settings Please note you must set a schedule that will be happened in the future you can not set a schedule in...

Страница 86: ...e calculated automatically and displayed in To field You can also click All Time Record button to define a recording schedule that will be executed every weekday from 12 00 00AM to 11 59 59PM Click OK...

Страница 87: ...etting items Item Description Channel Select the channel number you wish to set Mute Audio Check this box and the IP camera surveillance software will not play the audio captured by this camera Record...

Страница 88: ...e motion detection by this utility you have to enable motion detection function for the camera from WEB UI check chapter 2 6 for the setting WARNING For applications that security is highly concerned...

Страница 89: ...tion that camera will record when a motion has been detected from dropdown menu in seconds Invoke alarm when motion is triggered Send an alarm when a motion has been detected by the camera Send mail w...

Страница 90: ...set system wide settings of this IP camera surveillance software in this menu 3 2 1 2 1 General tab All general settings like file storage directory and recording spaces can be set here ere are the de...

Страница 91: ...file size of every video file When the size of file exceeds this value IP camera surveillance software will open another file to record the video Scan Time Define the time period to pause between ever...

Страница 92: ...g tab If you want to use motion detection function and wish to get an email that contains the image captured by the camera please setup your email related parameters here first Here are the descriptio...

Страница 93: ...k administrator SMTP port Specify the port number of the SMTP server you wish to use here By default and the setting of most of SMTP servers it s 25 SMTP Auth Select Enable if your SMTP server require...

Страница 94: ...3 2 1 2 3 Security If you don t want other people to access this IP camera surveillance software you can set a password to protect it You ll need to input the password every time you wish to use this...

Страница 95: ...ption Enable Requires password authentication when this software starts Disable Password authentication is not required when this software starts Password Input the password you wish to use here Confi...

Страница 96: ...3 2 1 2 4 About This tab shows the version number of the IP camera surveillance software you re using...

Страница 97: ...urveillance software provides 8 kinds of display layout Every layout displays different number of camera and camera arrangement you can click the icon that presents a specific kind of layout and the v...

Страница 98: ...1 1 Camera only Displays the video of 1 camera only 01 Layout style 2 4 Cameras Displays the video of up to 4 cameras 01 02 03 04 Layout style 3 6 Cameras Displays the video of up to 6 cameras 02 01...

Страница 99: ...e video of up to 8 cameras 02 03 01 04 05 06 07 08 Layout style 5 9 Cameras Displays the video of up to 16 cameras 01 02 03 04 05 06 07 08 09 Layout style 6 10 Cameras Displays the video of up to 10 c...

Страница 100: ...tyle 7 13 Cameras Displays the video of up to 13 cameras 02 03 01 04 05 06 07 08 09 10 11 12 13 Layout style 8 16 Cameras Displays the video of up to 16 cameras 01 02 03 04 05 06 07 08 09 10 11 12 13...

Страница 101: ...creen mode If you want to use all available spaces on your monitor to display surveillance image you can click Full Screen button to switch display mode to full screen mode To exit full screen mode pr...

Страница 102: ...en all configured cameras NOTE If a camera is configured but disconnected it will still be displayed in a scan sequence you ll see nothing and you ll see Disconnected text displayed at the upper left...

Страница 103: ...ze of a certain object to see its detail Please select a camera in video displaying area by clicking on its image then click button to see more objects that fall in the scope of camera s view or click...

Страница 104: ...camera points to to see different places that fall in the scope of camera s view Please select a camera in video displaying area by clicking on its image and then click the directions you wish the cam...

Страница 105: ...can take a snapshot of selected camera and save it to Snapshot sub folder of pre defined data directory Click snapshot button once to take a snapshot you can take as much snapshot as you want before...

Страница 106: ...starts you ll see a message displayed in message displaying box like 1 1 10 00 00 Camera 2 Start Manual which means camera 1 starts recording manually on 1 1 at 10 00 00 To stop recording click Start...

Страница 107: ...ch all videos file that falls in a specific period of time and Motion Search search all videos recorded by motion detection function and falls in a specific period of time Please define the start and...

Отзывы: