Performance Mode
When you first apply power to the GNX1, it will power up in Performance mode.This is the top level mode and the
mode used while you are performing.While in Performance mode, the Display will show the currently selected Preset’s
name and number. The vertical LEDs on the Matrix will indicate the Effects which are active in the selected Preset.
From Performance mode, you have access to all of the Presets within the GNX1 with your choice of assigning the
Footswitches to either Preset Mode or FX Mode.
Preset Mode
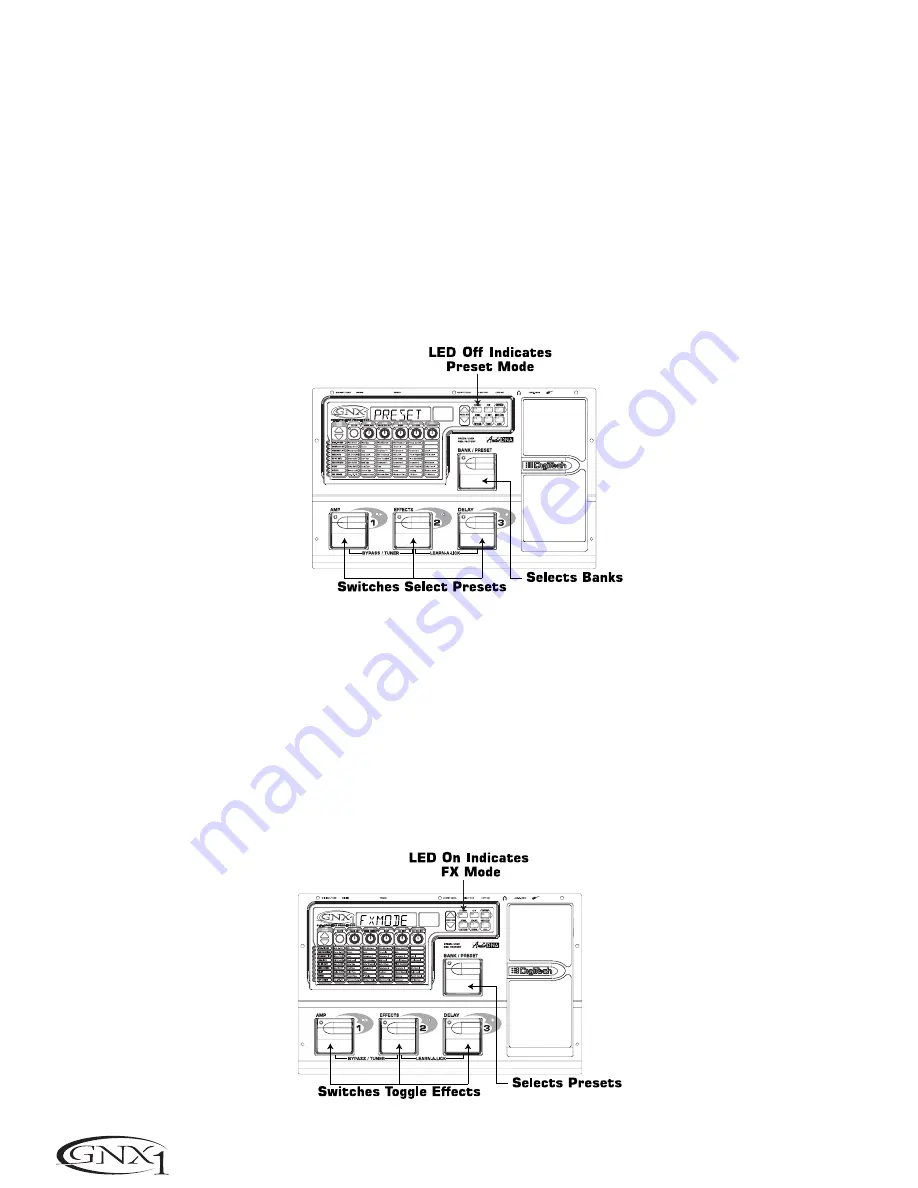
Preset Mode is the default mode from the factory. In Preset mode, the 1-3 Footswitches will call up Presets in the
currently selected Bank.The Bank Switch is used to select the 16 User/Factory Banks. Successive presses of the
Bank/Preset switch will advance forward through all User/Factory Banks. Pressing and holding the Bank/Preset switch
will scroll backwards through all User/Factory Banks. Once the desired Bank has been selected, the LEDs in the 1-3
Footswitches will flash indicating that a Preset within that bank needs to be selected in order to activate the Bank. If
no Preset selection is made within 5 seconds,The GNX1 will return to the last Bank and Preset that had been active.
FX Mode
FX mode is another mode of operation which can be used during a performance.The FX Mode button (located to
the right of the Display) is used to switch between Preset and FX Modes.When the FX mode is active, the FX Mode
button will light.In FX Mode, the 1-3 Footswitches toggle the designated Effects. Depending on which effects are
active in the current Preset, these switches may have one or more LEDs lit indicating the status of these effects.
Footswitch 1 toggles between the Green, Red, and Yellow amp channels. Footswitch 1 will light either green, red, or
yellow indicating whether the Green Channel, Red Channel, or a Warped combination of the Green and Red
Channels is active. Footswitch 2 turns on and off the Chorus/Mod Effects Module. Footswitch 3 turns on and off the
Delay.The Bank/Preset switch is used to change Presets. Successive presses of the Bank/Preset switch will advance
forward through all Factory and User Presets. Pressing and holding the Bank/Preset switch will scroll backwards
through all Factory and User Presets.
8
S
ECTION
O
NE
- I
NTRODUCTION


