27
Replacement
①
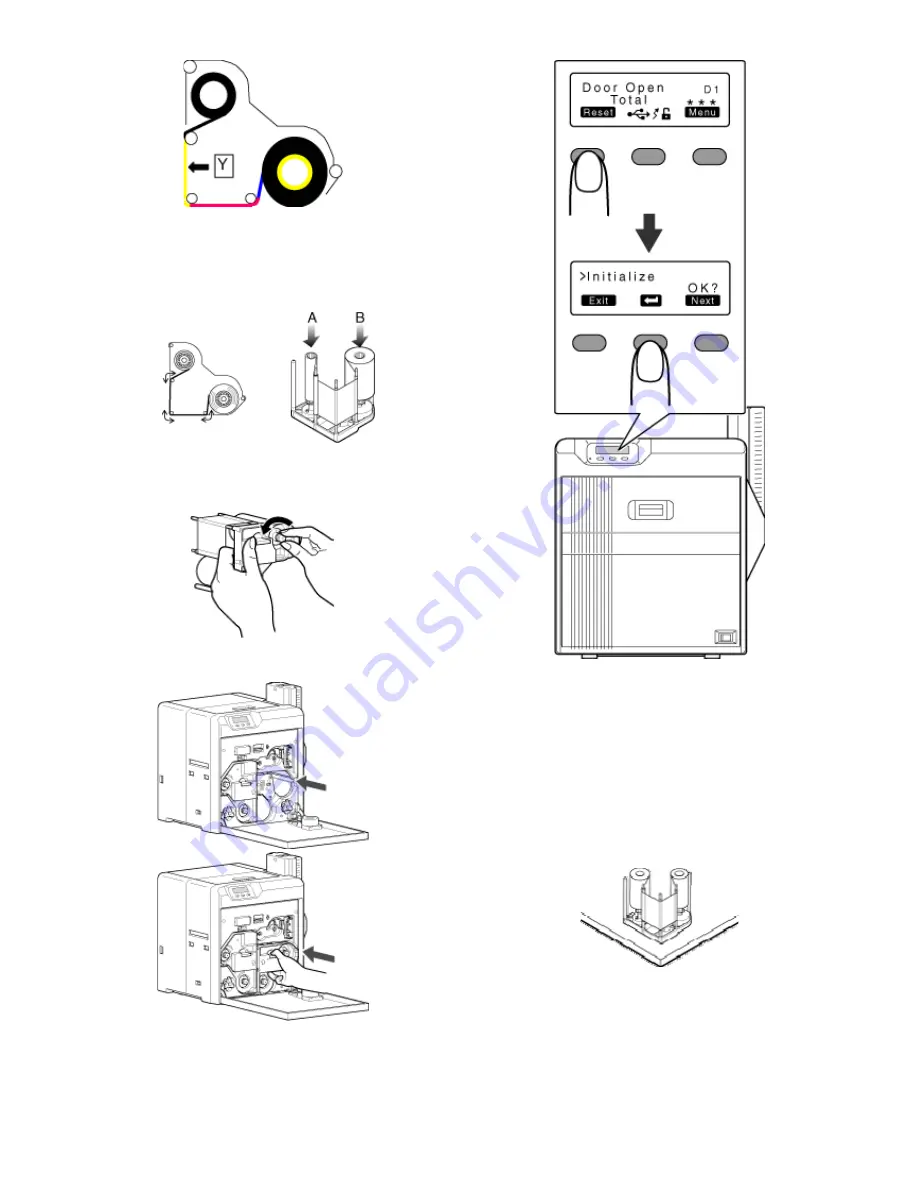
With the inked surface facing outward, align the yellow side of the
unused ribbon with the arrow on the cassette, and unwind it along
the three shafts.
②
Insert the ink ribbon firmly into the bobbin holders with the ribbon set
to the far end of the guides.
●
A: take-up side (black)
●
B: unused side (yellow)
4
Remove any slack in the ink ribbon.
①
Hold the cassette.
②
Turn the knob in the direction indicated by the arrow.
5
Insert the cassette all the way in along the guide rail until a “click”
sound is heard. Close the printer door.
6
Press
[
Reset
]
DB
to reset the printer.
"Initializing printer when attaching the cassette"
(
A
page 16
)
Ink ribbon is broken
●
Repair the ink ribbon.
Print this page
Note:
●
If the security lock function is turned on, turn off the function from the
computer to unlock the printer. After closing the door, turn on the func-
tion again from the computer.
●
Stand the cassette on a flat surface as illustrated in the diagram. Avoid
doing so on a floor as dust attached to the retransfer film may cause
printing errors.
●
Do not touch the inked surface (the side that faces outward when in-
stalled) with your hand. Touching it may cause printing errors. Put on
the supplied gloves when handling the ink ribbon.
●
When handling the cassette, hold it with both hands. Accidentally drop-
ping the cassette may damage it or result in injuries.
●
When installing a used ink ribbon, align the yellow side of the unused
ribbon with the arrow indicated on the label of the cassette. If the posi-
tion of the yellow side is not properly aligned, the print may turn out
light.
Содержание EDIsecure X ID 8300
Страница 14: ...14 Operation ...
Страница 15: ...15 Operation ...


