MENU
( )
( )
T( )
W( )
DC
VIDEO
ELC
V.PHASE
27
COLOR VIDEO CAMERA
26
COLOR VIDEO CAMERA
25
COLOR VIDEO CAMERA
24
COLOR VIDEO CAMERA
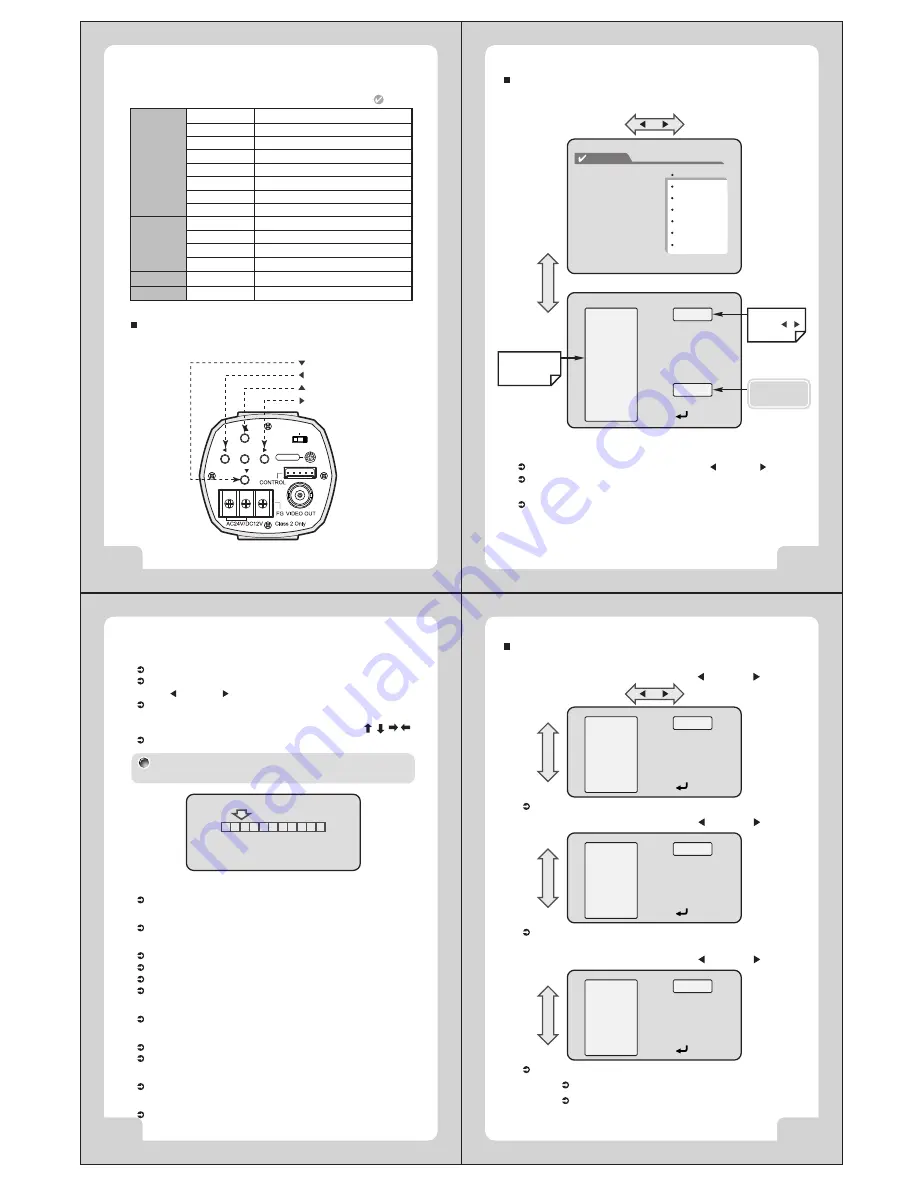
Use five setup Menu buttons on Rear side of the camera.
DOWN Button (WIDE)
LEFT Button
UP Button (TELE)
RIGHT Button
MENU
AREA
MASK
START X
END X
START Y
END Y
INITIAL
EXIT
PRIVACY
1 ~ 4
ON, OFF
ON, OFF
CAMERA ID
ZONE LABEL
VERSION
INITIAL
OFF STATE
DISPLAY
INITIAL
ON, OFF
ON, OFF
ON STATE, OFF STATE
EIXT
Setting Up The Menu
Press the MENU button to access the GENERAL mode.
Main Menu- GENERAL
1. CAMERA ID
Set 'CAMERA ID' to the desired mode using LEFT( ) or RIGHT( ) button.
Press the MENU button to display the 'GENEARL' and move the arrow
indicator to 'CAMERA ID' using the T or W button.
If the 'CAMERA ID' feature is set to 'ON', the name will be displayed on
the monitor. (Main 'DISPLAY' MENU)
/
TE
LE
/ W
ID
E
MENU
GENERAL
AWB
AE
D & N
WDR
PRIVACY
DISPLAY
INITIAL
EXIT
GENERAL
CAMERA ID
ZONE LABEL
NEGA / POSI
SHARPNESS
MIRROR
FREEZE
PROTOCOL
GENERAL
Move up and down
using the TELE/
WIDE button.
CAMERA ID
ZONE LABEL
NEGA / POSI
SHARPNESS
MIRROR
FREEZE
PROTOCOL
INITIAL
EXIT
Can be changed
using the /
button.
- P/D (Pelco-D)
- DEF (Default)
001
SET
POSI
7
NORMAL
OFF
P/D
ON
2. ZONE LABEL
You can enter up to 10 characters.
Move the curser to character-enter location by using the
LEFT( ) or RIGHT( ) button.
Select the desired character by using T , W button.
The factory default characters are
A~Z,a~z,0~9, ~, !, #, *, -, +, /, :, ;, ?, ., ", _, (, ), &, %, , , , ,
EXIT : RETURN to GENERAL MENU
3. NEGA/POSI
Select Nega/Posi.
4. SHARPNESS
Adjust the Sharpness of the screen.
5. MIRROR
NORMAL : Deactivation
MIRROR : Reverse turn Left or Right.
VERTICAL : Reverse turn Up or Down.
ROTATE : Rotate the Screen to 180.
6. FREEZE
Used when paused Video is needed.
7. PROTOCOL
P/D: Pelco-D
DEF: Default
8. INITIAL
INITIAL GENERAL MODE
9. EXIT
RETURN to MAIN MENU
UP/DN - CHAR SELECT
LE/RI - POSITION
MENU - EXIT
ZONE LABEL
If the 'DISPLAY MENU' feature is set to 'ZONE LABEL - ON', the
name will be displayed on the monitor.
Press the MENU button to access the AWB mode.
Main Menu- AWB
/
TE
LE
/ W
ID
E
AWB
WB MODE
RED CONT
BLUE CONT
PUSH AUTO
INITIAL
EXIT
AUTO
NOT USE
NOT USE
NOT USE
ON
1. Set 'AUTO' to the desired mode using LEFT( ) or RIGHT( ) button.
'WB' is automatically set up between 2500~9500.
TE
LE
/ W
ID
E
AWB
WB MODE
RED CONT
BLUE CONT
PUSH AUTO
INITIAL
EXIT
HOLD
NOT USE
NOT USE
OFF
OFF
If 'PUSH AUTO is selected as 'ON', it fixes up the value setting the
current WB.
2. Set 'HOLD' to the desired mode using LEFT( ) or RIGHT( ) button.
TE
LE
/ W
ID
E
AWB
WB MODE
RED CONT
BLUE CONT
PUSH AUTO
INITIAL
EXIT
USER
101
60
NOT USE
OFF
'WB' gains can be set by using RED CONT, BLUE CONT.
INITIAL AWB MODE.
3. Set 'USER' to the desired mode using LEFT( ) or RIGHT( ) button.
4. INITIAL
RETURN to MAIN MENU.
5. EXIT


