860-00324-00 Rev B 65
(1)
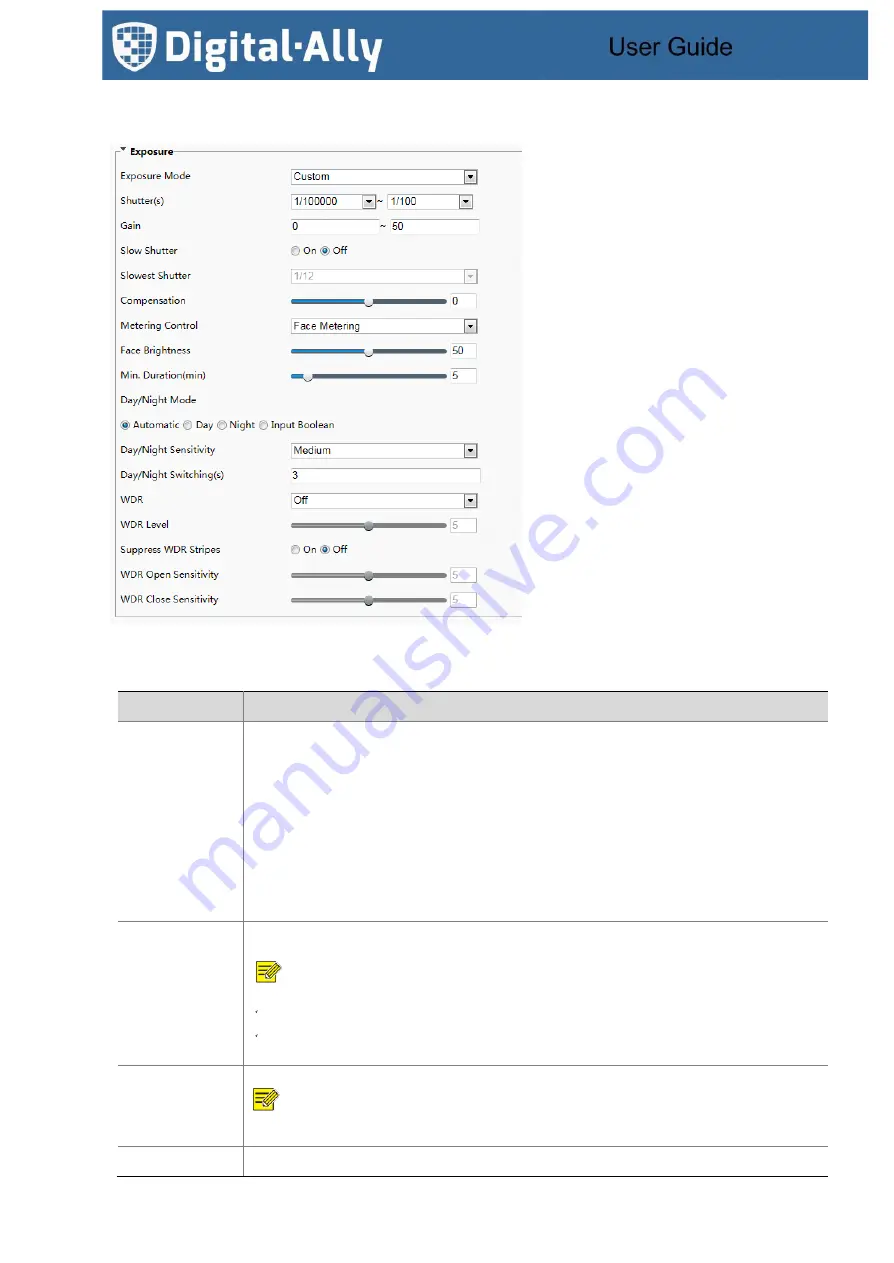
Click
Setup
>
Image
>
Image
and then click
Exposure
.
Figure7-34
Exposure Configuration Interface
(2)
Set parameters as required. The table below describes the exposure parameters.
Table7-17
Parameter Description and Configuration
Item
Description
Exposure Mode
Select a mode to achieve the desired exposure effect.
⚫
Automatic: The device automatically adjusts exposure based on the environment.
⚫
Custom: The user sets exposure as needed.
⚫
Shutter Priority: The device prefers to adjust the shutter to control the image quality.
⚫
Indoor 50Hz: The device reduces stripes by limiting shutter frequency.
⚫
Indoor 60Hz: The device reduces stripes by limiting shutter frequency.
⚫
Manual: The device allows fine-tuning image quality by setting shutter, gain and iris manually.
Low Motion Blur: The device controls the minimum shutter to reduce motion blur in face photos captured
in motion.
Shutter(s)
Shutter is used to control the light that comes into the lens. A fast shutter speed is ideal for scenes in
quick motion. A slow shutter speed is ideal for scenes that change slowly.
NOTE!
You can set a shutter speed when
Exposure Mode
is set to
Manual
or
Shutter Priority
.
If
Slow Shutter
is set to
Off
, the reciprocal of the shutter speed must be greater than the frame
rate.
Gain
Control image signals so that the device outputs standard video signals according to the light condition.
NOTE!
You can set this parameter only when
Exposure Mode
is set to
Manual
or
Gain Priority
.
Slow Shutter
Improves image brightness in low light conditions.
Содержание DTM-600
Страница 1: ...860 00324 00 Rev B 1 DTM 600 User Guide...
Страница 93: ...860 00324 00 Rev B 93...