


DK50018
-
Bluetooth accessory and switching decoder Bluetooth connection
DK50018
-
Bluetooth accessory and switching decoder
www.digikeijs.com
*R
-
Bus, B
-
Bus are registered trademarks of Modelleisenbhan GmbH. XpressNet and RS
-
Bus are registered trademarks of Lenz 19
www.digikeijs.com
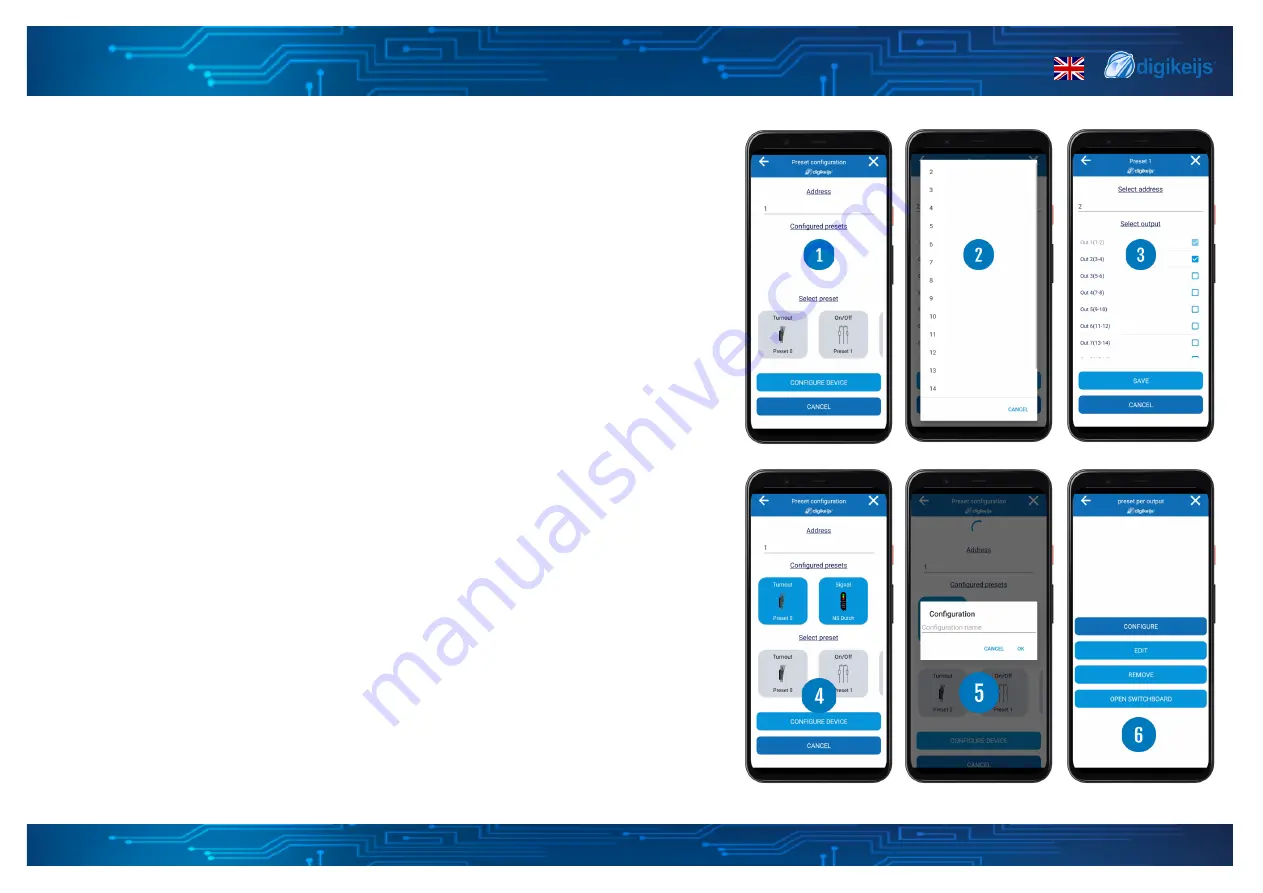
3.1.8 Load preset per output
Within the load preset per output section you can easily set up a specific preset per output.
In the past this could only be done by extensive cv programming but now you can very eas-
ily do this through the app and load preset per output process.
Step 1
Enter the start address you want to use, this can be any address number between 1 and
2048 but please keep in mind that every preset has a set number of needed addresses so
this could limit your start number when you go higher than number 2033. The app is smart
and will tell you when you need to change the start address. You can find more information
on the presets and set of addresses on the preset information page in this document.
Step 2
Select the preset you want (1), the preset screen will now open. You can select the address
you want to use within the range available based on the start address given in step 1. After
that you can select to which output the selected device is connected (3). If you want the
same addresses to control multiple outputs you can select multiple outputs, if you want
separate addresses per output you only select one and add multiple presets in the first
screen. When you have selected the address you want to use, the output which the device
is connected to you can select the Save button and you can setup the next preset. The app
is build in a way that you can only select the addresses, outputs and for signals the groups
that are still available and are not used yet.
Step 3
When you are done with setting up your presets per output please select the Configure de-
vice option (4). You will be asked to give the new configuration a name. (5) This can be any-
thing you want. When selecting OK the App will configure the device. When done the app
will show the configuration page (6), from there you can, configure the device again, edit
the configuration, remove the configuration or open the switchboard.


