User Manual
User Manual
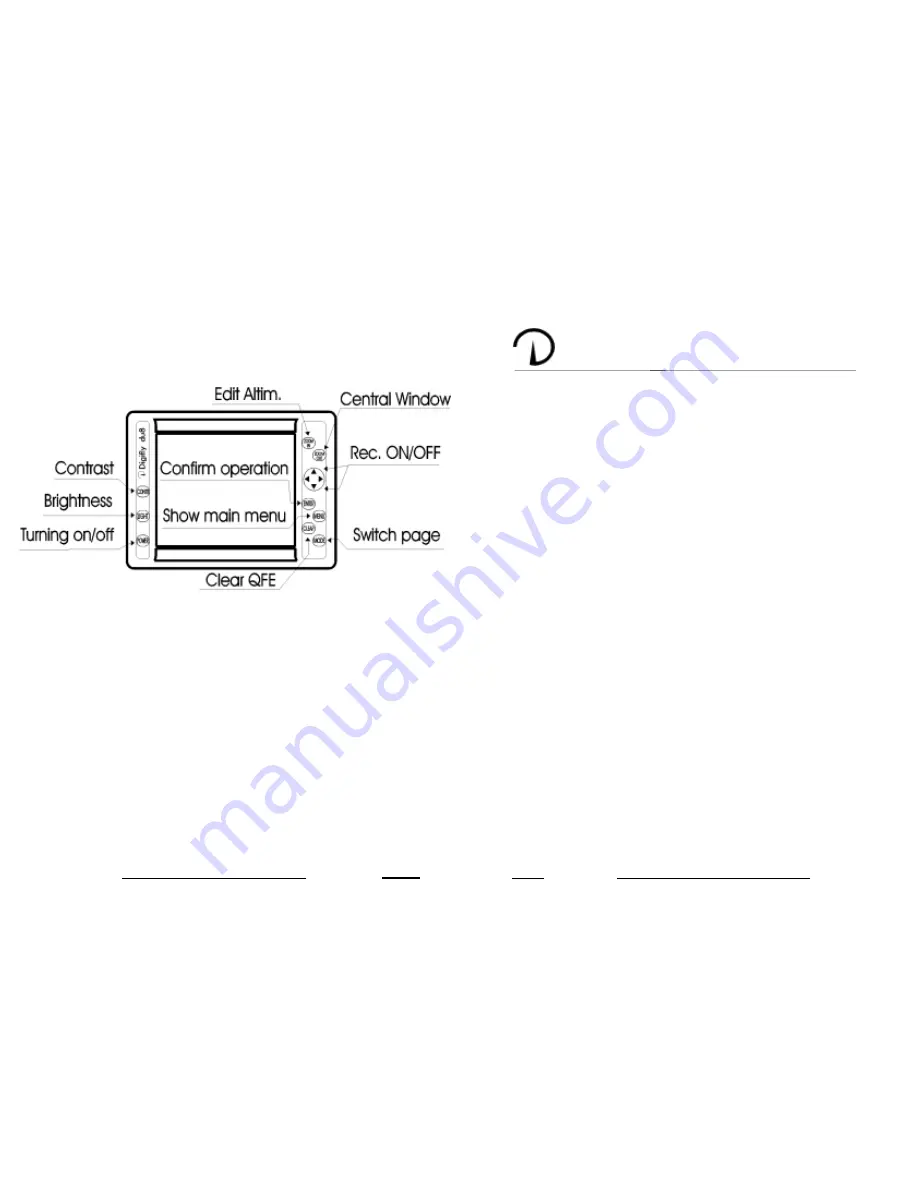
2.3 - The keyboard.
The following figure show the keyboard's main functions.
2.3.1 - Turning on / off.
Before turning on the instrument make sure that all connections were
made correctly. Make sure the engine is turned on before the instrument.
To turn on the DUx, press the POWER button. After a few seconds, the
Moving Map or Instrumentation page is viewed to search for the
connection and for the initial internal tests.
To turn off the DUx, press (and keep pressed for at least 2 seconds) the
POWER button again.
2.3.2 - Contrast.
To regulate contrast keep the button CONTR pressed until the contrast
menu appears. Now the regulation is executed with the UP-DOWN
ARROW buttons. Press CONTR again to quit the menu.
N.B. In the System Test page, contrast is regulated just pressing the
CONTR button.
chapter 4
SYSTEM TEST
To enter in the System Test Page press and keep pressed the key
POWER together with any other key. As soon as the key is released,
the following menu will appear on the screen:
SYSTEM TEST
(software version)
KEYBOARD TEST
INPUT DATA DISPLAY
INSTRUMENTATION
EEPROM TEST
CONNECTOR TEST
CLEAR RAM
CHOOSE PORT 1
RESERVED TEST
Pressing the UP-DOWN ARROW keys, the desired entry will be
selected. Activate it with the RIGHT ARROW key.
Pressing the ZOOM IN o ZOOM OUT keys, will be activated the
variometer or anemometer reset.
1) KEYBOARD TEST
This test verifies keyboard misfunctioning.
2) INPUT DATA DISPLAY
In this operation mode, the DUx screen becomes a terminal displaying
input data.
3) INSTRUMENTATION.
Allows to qualify the intrumentation page.
4-5) EEPROM TEST - CONNECTOR TEST.
Not usable by the user.
6) CLEAR RAM
Selecting this function, it is possible to delete DUx’s internal memory.
By a submenu you can clear alle the DATABASE or all the SETTINGS
7-8) CHOOSE PORT - RESERVED TEST
Not usable by the user.
4
17


