Chapter 3: Using Your System
27
OMS Example Setup
(Macintosh Only)
If you are using a Macintosh with a MIDI
interface, BRC, JL Cooper DataSync2, or an
Opcode Studio 64XTC, you must configure
these devices in OMS so that they can com-
municate properly with Pro Tools.
OMS is installed on your computer as part
of the standard Pro Tools installation. For
detailed instructions on installing and con-
figuring OMS, refer to the Pro Tools System
Installation Guide.
If you are not using a MIDI interface, BRC,
or synchronization peripheral with your
Pro Tools/ADAT system, you can skip this
section.
▲
The directions given here explain how to add
a MIDI device to OMS. This setup assumes
you have already configured your MIDI inter-
face, if you are using one. You must configure
the MIDI interface before configuring any OMS
devices.
To configure an OMS device:
1
Make sure that the peripheral and/or
MIDI interface is turned on and connected
properly to your system.
2
Launch Pro Tools.
3
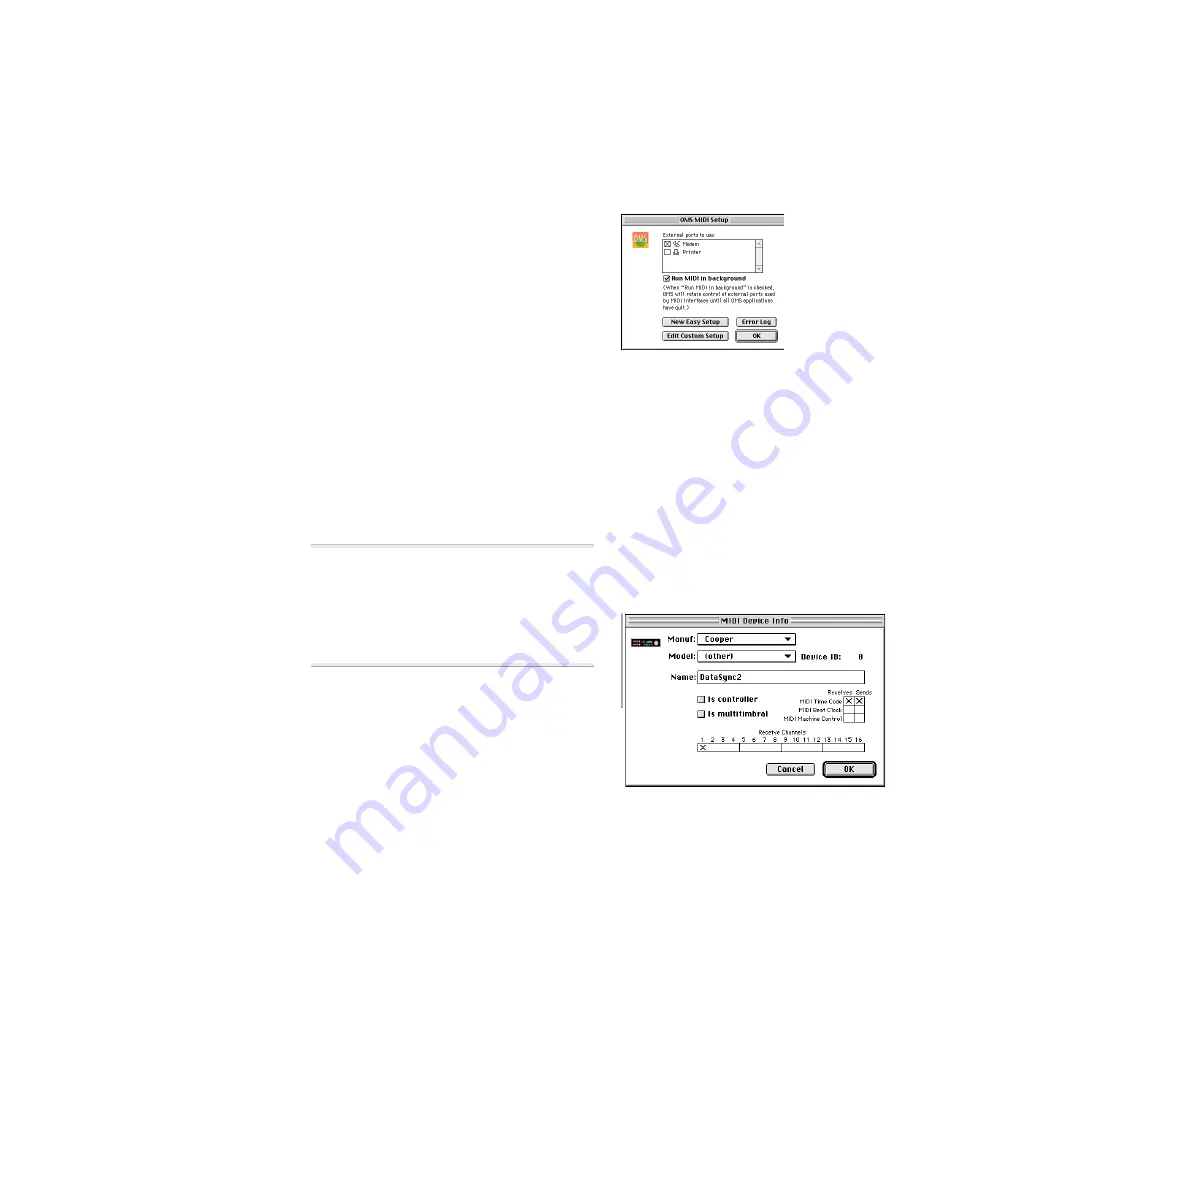
From the Pro Tools Setups menu, choose
the OMS MIDI Setup command. The OMS
MIDI Setup dialog appears, allowing you to
select the serial port(s) that your MIDI in-
terface is connected to. After you have cho-
sen the desired port(s), click OK.
4
Launch the OMS Setup application.
5
Choose Studio > New Device.
6
In the MIDI Device Info window, choose
the Manufacturer and Model names for
your device (if available) and name the de-
vice using the Name field.
7
Uncheck both Is Controller and Is Multi-
timbral.
8
Check both Receives and Sends MIDI
Time Code.
9
Click OK to close the MIDI Device Info
window, and save this document as your
current OMS Setup document.
OMS MIDI Setup dialog
Defining an OMS MIDI device
Содержание ADAT Bridge I/O
Страница 8: ...ADAT Bridge I O 4 ...
Страница 20: ...ADAT Bridge I O 16 ...
Страница 44: ...ADAT Bridge I O 40 ...
Страница 58: ...ADAT Bridge I O 54 ...
Страница 60: ...ADAT Bridge I O 56 ...
Страница 64: ...ADAT Bridge I O 60 ...
Страница 68: ...ADAT Bridge I O 64 ...


