


iDigi
Gateway
Development
Kit
Getting
Started
Guide
44
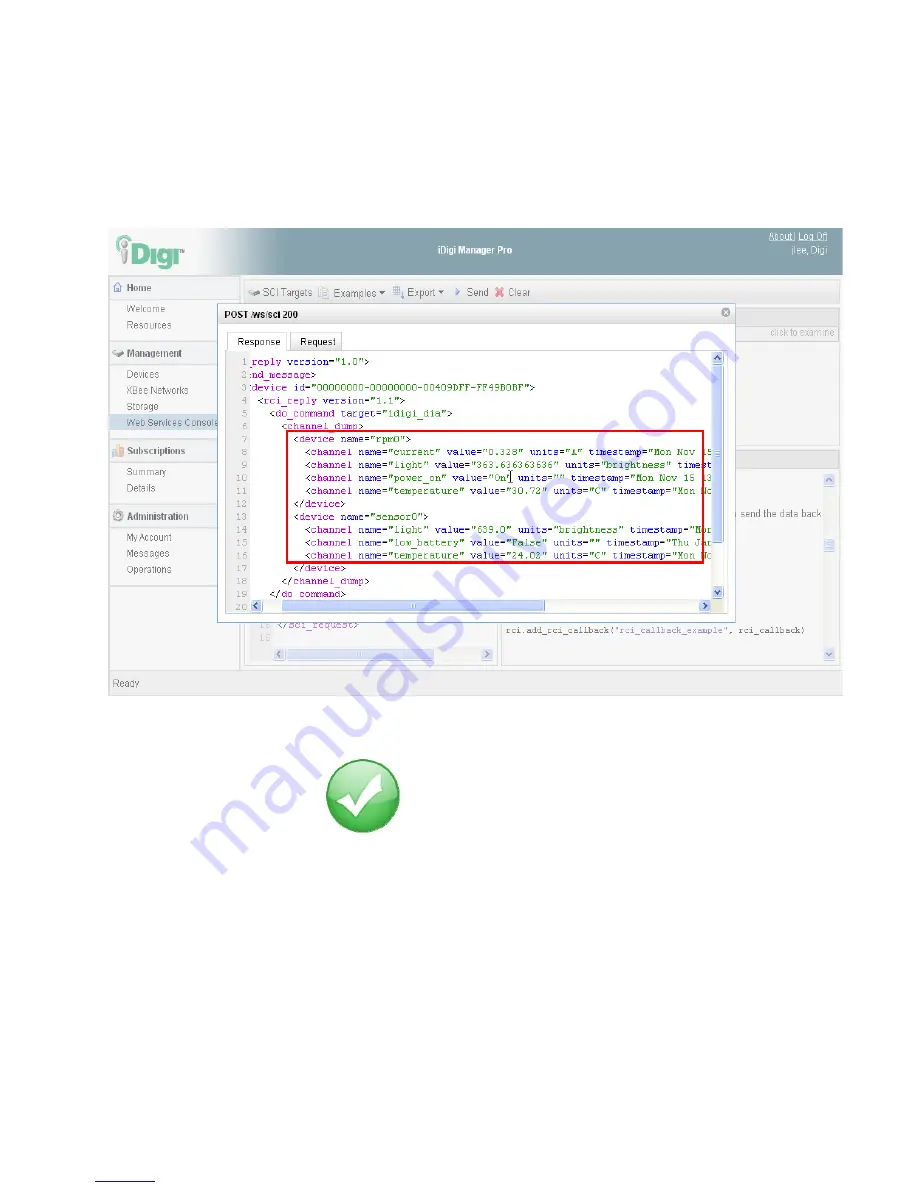
10.
Click
on
the
"POST
/ws/sci
200”
response
text
to
view
the
entire
response
from
the
ConnectPort
X4,
as
well
as
the
request
that
was
sent
to
generate
this
response.
The
channel_dump
response
shows
the
current
usage,
brightness,
power
‐
on
state,
and
temperature
readings
from
the
rpm0
(XBee
Smart
Plug)
device,
and
the
brightness,
battery
condition,
and
temperature
reading
from
the
sensor0
(XBee
Sensor)
device.
Figure
47:
Successful
Callback
Expanded
View
You
have
just
completed
Goal
#4:
Using
the
iDigi
Manger
Pro
Web
Services
Console
to
send
a
web
services
request
to
the
ConnectPort
X4,
retrieving
the
current
XBee
devices’
sensor
readings.
electronic components distributor


