background image

 7. PROGRAMMING  

The RBC MVA timer can be programmed to operate on any day of the week, odd 
days or even days. In cyclical mode the RBC can also operate from every 1 hour up to 
every 12 hours or from once a day up to every 30 days. The RBC has four start times 
per day and durations from 1 minute up to 5 hours and 59 minutes.
This section explains the programming features, and the steps necessary to assign 
irrigation schedules. To program the timer use the 

 to select the desired 

programming mode, the 

 to make the entry flash and the 


 buttons to 

change the value. 

NOTE:

 Only a flashing value can be changed. 

NOTE:

 If the last data entered stops flashing, press 

 again to resume 

programming and repeat the steps.

 8. SETTING CURRENT TIME AND DATE

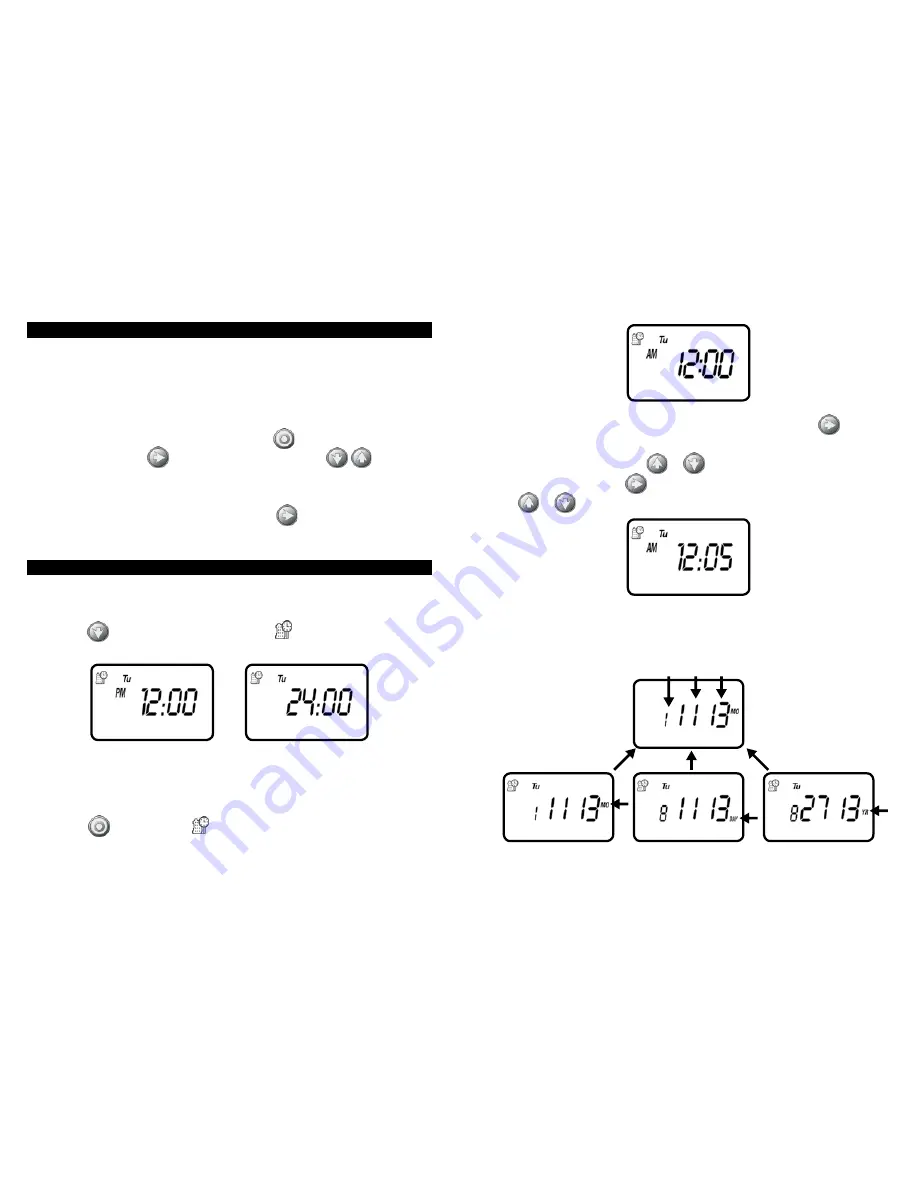
The timer can display the time in either a 12 or 24 hour format.  
To change the time format, from the home screen:

1.  Press the 

 button for three seconds until the 

 display switches format 

(AM/PM disappears).


SETTING THE CURRENT TIME AND DATE
To enable the timer to operate properly, the current time and date must  
be set. 

1. Press the 

 button, until the 

 icon appears along with the time and the day 

of the week.

2. If the current time has not been set or needs to be updated press 

 and the 

hour digit starts flashing.

3. To set the current hour, press 

 or 

 (note AM and PM designations).

4.  To set the minutes, press 

 again and the minute digit starts flashing. Press 

the 

 or 

 to set the current time in minutes.

5.  Repeat the steps to set the current date including, month, day and year. When 

the date is selected and updated, the day of the week will be updated at the 

same time to correspond with the date.

                                                MONTH   DAY  YEAR


8

9

Содержание RBC MVA

Страница 1: ...I N S T R U C T I O N M A N U A L RBC MVA Battery Powered Actuator with Watering Timer...

Страница 2: ...ries The timer is enclosed in a compact waterproof housing to protect it from the elements 3 COMPONENT IDENTIFICATION 1 Timer cover 2 Quick reference label 3 LCD Display displays the icon based applic...

Страница 3: ...LCD DISPLAY AND CONTROLS LCD Display 1 Time and Date Icon Indicates current time and day is displayed 2 Sensor Icon Appears when a rain sensor is active or when yellow wire loop has been cut and wate...

Страница 4: ...ion on the retainer clip see Figure B 4 Next place your thumb on one side of the retainer clip and with a pair of pliers grip the other side of the retainer clip and pull outwards away from your thumb...

Страница 5: ...the actuator flow control knob counter clockwise to allow flow and check the system to make sure that the sprinklers or the drip system is working properly Figure E 9 De activate the solenoid through...

Страница 6: ...RENT TIME AND DATE The timer can display the time in either a 12 or 24 hour format To change the time format from the home screen 1 Press the button for three seconds until the display switches format...

Страница 7: ...appears Monday is de selected 4 Press twice and W for Wednesday starts flashing 5 Press and the underscore under W Wednesday disappears Wednesday is de selected 6 Press twice and F Friday starts flash...

Страница 8: ...to review the program Option 4 Setting every X days Example setting the timer to water every 10 days 1 Press the button until the icon and the days of the week appear 2 Press and to skip all the days...

Страница 9: ...t to water on specific days of the week the screen also shows which days the timer will operate with an underline To delete a start time 1 Press until START 1 appears 2 Press until the start time appe...

Страница 10: ...time by re entering Rain Delay screen and changing the setting to OFF Press or until OFF appears 2 Press the button and 0 00 or the last run time programmed appears with hours flashing 3 To set a des...

Страница 11: ...display will revert to the current time screen To activate a manual watering without the use of the timer turn the solenoid a 1 4 turn counterclockwise To stop tighten the solenoid clockwise by hand...

Страница 12: ...in delay to off CAUSE Yellow sensor wires have been cut SOLUTION Re connect sensor wires together with waterproof connector The icon will only appear when sensor is active or if the wire has been cut...

Страница 13: ...hase and which on examination is found to contain defects in material and workmanship DIG CORPORATION SHALL IN NO EVENT BE LIABLE FOR ANY INCIDENTAL OR CONSEQUENTIAL DAMAGES OF ANY KIND THE SOLE OBLIG...

Страница 14: ...ou encounter any problem s with this product or if you do not understand its many features please refer to this operating manual first If further assistance is required DIG offers the following custom...

Страница 15: ...26 E www digcorp com e mail dig digcorp com 26 219 REV D 072116 Printed in the USA DIG is a Registered Service Mark of DIG Corp 1210 Activity Drive Vista CA 92081 8510 USA...

Отзывы: