background image

8

English

Overload Clutch

If the drill bit becomes jammed or caught, the drive to the drill 
spindle is interrupted by the overload clutch. Because of the forces 
that occur as a result, always hold the machine securely with both 
hands and take a firm stance.

Drilling Tools

The machine is intended for hammerdrilling in concrete, brick and 
stone. It is also suitable for drilling without impact in wood, metal, 
ceramic and plastic. 

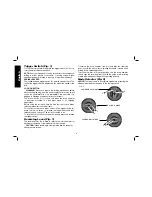
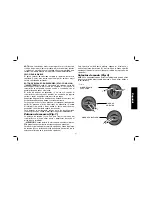
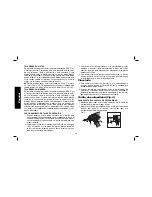
Drilling (Fig. 1)

WARNING: To reduce the risk of serious personal injury, 

turn tool off and disconnect tool from power source before 
making any adjustments or removing/installing attachments 
or accessories.

WARNING: To reduce the risk of personal injury, ALWAYS


ensure workpiece is anchored or clamped firmly. If drilling thin 
material, use a wood “back-up” block to prevent damage to the 
material.

Press mode selector button (F) and turn the mode selector (G) to the 
drill bit symbol for drilling, to the hammer symbol for hammering or to 
the hammerdrill symbol for hammerdrilling.  

DRILLING OPERATION

 1. For WOOD, use twist bits, spade bits, power auger bits or 

hole saws. For METAL, use high-speed steel twist drill bits or 
hole saws. Use a cutting lubricant when drilling metals. The 
exceptions are cast iron and brass which should be drilled 
dry. For MASONRY, use carbide-tipped bits or masonry bits. A 
smooth, even flow of dust indicates the proper drilling rate.

  2.  Always apply pressure in a straight line with the bit. Use enough 

pressure to keep the drill bit biting, but do not push hard enough 
to stall the motor or deflect the bit.

  3. Hold tool firmly with both hands to control the twisting action of 

the drill. 

WARNING

Drill may stall if overloaded causing a sudden twist. 

Always expect the stall. Grip the drill firmly with both hands to 
control the twisting action and avoid injury.

  4

. IF DRILL STALLS

, it is usually because it is being overloaded. 

RELEASE TRIGGER IMMEDIATELY

, remove drill bit from 

work, and determine cause of stalling. 

DO NOT CLICK 

TRIGGER OFF AND ON IN AN ATTEMPT TO START A 
STALLED DRILL – THIS CAN DAMAGE THE DRILL.

  5. To minimize stalling or breaking through the material, reduce 

pressure on drill and ease the bit through the last fractional part 
of the hole.

  6.  Keep the motor running when pulling the bit back out of a drilled 

hole. This will help prevent jamming. 

 7. With variable speed drills there is no need to center punch 

the point to be drilled. Use a slow speed to start the hole and 
accelerate by squeezing the trigger harder when the hole is 
deep enough to drill without the bit skipping out. 

DRILLING IN METAL 

An SDS Plus

®

 to round shank adaptor chuck is required. Ensure 

that tool is in drill-only mode. Start drilling with slow speed and 
increase to full power while applying firm pressure on the tool. A 
smooth even flow of metal chips indicates the proper drilling rate. 
Use a cutting lubricant when drilling metals. The exceptions are cast 
iron and brass which should be drilled dry. 

NOTE: 

Large [5/16" to 1/2" (7.9 mm to 12.7 mm)] holes in steel can 

be made easier if a pilot hole [5/32" to 3/16" (4 mm to 4.8 mm)] is 
drilled first.

DRILLING IN WOOD 

An SDS Plus

®

 to round shank adaptor chuck is required. Ensure that 

tool is in drill-only mode. Start drilling with slow speed and increase 
to full power while applying firm pressure on the tool. Holes in wood 

Содержание SDS Plus D25013

Страница 1: ...STRUÇÕES DE OPERAÇÃO CENTRO DE SERVIÇOS E CERTIFICADO DE GARANTIA ADVERTÊNCIA LEIA ESTAS INSTRUÇÕES ANTES DE UTILIZAR O PRODUTO Questions See us on the World Wide Web at www dewalt com Dudas Visítenos en Internet www dewalt com Dúvidas Visite nos na Internet em www dewalt com br INSTRUCTIVO DE OPERACIÓN CENTROS DE SERVICIO Y PÓLIZA DE GARANTÍA ADVERTENCIA LÉASE ESTE INSTRUCTIVO ANTES DE USAR EL PR...

Страница 2: ......

Страница 3: ...away while operating a power tool Distractions can cause you to lose control 2 ELECTRICAL SAFETY a Power tool plugs must match the outlet Never modify the plug in any way Do not use any adapter plugs with earthed grounded power tools Unmodified plugs and matching outlets will reduce risk of electric shock b Avoid body contact with earthed or grounded surfaces such as pipes radiators ranges and ref...

Страница 4: ...ery pack from the power tool before making any adjustments changing accessories or storing power tools Such preventive safety measures reduce the risk of starting the power tool accidentally d Store idle power tools out of the reach of children and do not allow persons unfamiliar with the power tool or these instructions to operate the power tool Power tools are dangerous in the hands of untrained...

Страница 5: ...cialist Improperly reconditioned chisels could cause injury Wear gloves when operating tool or changing bits Accessible metal parts on the tool and bits may get extremely hot during operation Small bits of broken material may damage bare hands Never lay the tool down until the bit has come to a complete stop Moving bits could cause injury Do not strike jammed bits with a hammer to dislodge them Fr...

Страница 6: ...ork To reduce your exposure to these chemicals work in a well ventilated area and work with approved safety equipment such as those dust masks that are specially designed to filter out microscopic particles Avoid prolonged contact with dust from power sanding sawing grinding drilling and other construction activities Wear protective clothing and wash exposed areas with soap and water Allowing dust...

Страница 7: ... unit off and disconnect machine from power source before installing and removing accessories before adjusting or changing set ups or when making repairs Be sure the trigger switch is in the OFF position An accidental start up can cause injury Side Handle Fig 1 WARNING To reduce the risk of personal injury ALWAYS operate the tool with the side handle properly installed and securely tightened Failu...

Страница 8: ...t the lock on button release mechanism is working freely For continuous operation press and hold the trigger switch A press the lock on button I release the trigger switch and then release the lock on button The tool will continue to run To stop the tool in continuous operation quickly press and release the trigger switch Reversing Lever Fig 1 The reversing lever H is used to reverse the rotary ha...

Страница 9: ...ripping the front part of the chuck and turning the tool on Damage to the chuck and personal injury may occur To insert bit insert shank of bit about 3 4 19 mm no further than 7 8 22 mm into chuck Push and rotate bit until it locks in place The bit will be securely held To release bit pull the chuck sleeve E back and remove the bit OPERATION WARNING Always observe the safety instructions and appli...

Страница 10: ...it 3 Hold tool firmly with both hands to control the twisting action of the drill WARNING Drill may stall if overloaded causing a sudden twist Always expect the stall Grip the drill firmly with both hands to control the twisting action and avoid injury 4 IF DRILL STALLS it is usually because it is being overloaded RELEASE TRIGGER IMMEDIATELY remove drill bit from work and determine cause of stalli...

Страница 11: ...ion If you find resistance during mode change turn the chisel slightly to engage the spindle lock Depth Rod Fig 4 TO ADJUST THE DEPTH ROD 1 Push in and hold the depth rod release button J on the side handle 2 Move the depth rod D so the distance between the end of the rod and the end of the bit equals the desired drilling depth 3 Release the button to lock rod into position When drilling with the ...

Страница 12: ...ool could be hazardous To reduce the risk of injury only DEWALT recommended accessories should be used with this product Recommended accessories for use with your tool are available at extra cost from your local dealer or authorized service center MAXIMUM RECOMMENDED CAPACITIES D25013 Masonry 7 8 22 mm Steel 1 2 13 mm Wood 1 1 8 30 mm OPTIMUM CAPACITY Masonry 5 32 1 2 4 mm 13 mm Repairs To assure ...

Страница 13: ...entes b No haga funcionar las herramientas eléctricas en atmósferas explosivas como ambientes donde haya polvo gases o líquidos inflamables Las herramientas eléctricas originan chispas que pueden encender el polvo o producir humo c Mantenga alejados a los niños y a los espectadores de la herramienta eléctrica en funcionamiento Las distracciones pueden provocar la pérdida de control 2 SEGURIDAD ELÉ...

Страница 14: ...l equilibrio y posiciónese adecuadamente en todo momento Esto permite un mejor control de la herramienta eléctrica en situaciones inesperadas f Use la vestimenta adecuada No use ropas holgadas ni joyas Mantenga el cabello la ropa y los guantes alejados de las piezas en movimiento Las ropas holgadas las joyas o el cabello largo pueden quedar atrapados en las piezas en movimiento g Si se suministran...

Страница 15: ... realice una operación en la cual la herramienta para cortar pudiera entrar en contacto con instalaciones eléctricas ocultas o con su propio cable El contacto con un conductor activo hará que las piezas metálicas de la herramienta que estén expuestas a él conduzcan electricidad y que el operador reciba una descarga eléctrica Use abrazaderas u otra manera práctica de fijar y sujetar la pieza de tra...

Страница 16: ...calentamiento Cuando se utilice más de un alargador para completar el largo total asegúrese que los hilos de cada alargador tengan el calibre mínimo La tabla siguiente muestra el tamaño correcto a utilizar dependiendo de la longitud del cable y del amperaje nominal de la placa de identificación Si tiene dudas sobre cuál calibre usar use un calibre mayor Ténsion Volts Longitud del cable en metros m...

Страница 17: ...tes al sistema respiratorio así como otras lesiones Siempre use protección respiratoria aprobada por NIOSH OSHA apropiada para su uso en condiciones de exposición al polvo Procure que las partículas no se proyecten directamente sobre su rostro o su cuerpo La etiqueta de la herramienta puede incluir los siguientes símbolos A continuación se indican los símbolos y sus definiciones V voltios A amperi...

Страница 18: ...ERTENCIA Para reducir el riesgo de lesiones corporales SIEMPRE opere la herramienta con el mango lateral debidamente instalado y ajustado El incumplimiento con lo anterior podría resultar en que el mango lateral se suelte durante la operación de la herramienta y que el operador pierda el control como consecuencia Sostenga la herramienta con ambas manos para maximizar control El mango lateral viene...

Страница 19: ...tenga el interruptor de gatillo A presione el botón de bloqueo en encendido I suelte el interruptor de gatillo y luego suelte el botón de bloqueo en encendido La herramienta seguirá funcionando Para detener la herramienta cuando esté en funcionamiento continuo presione y suelte el interruptor de gatillo rápidamente Palanca de reversa Fig 1 La palanca de reversa H se usa para invertir la marcha del...

Страница 20: ...protegidas ADVERTENCIA No intente ajustar o soltar las brocas ni ningún otro accesorio sujetando la parte frontal del broquero mandril y encendiendo la herramienta Esto podría dañar el broquero mandril y causar lesiones corporales Para insertar la broca inserte el vástago aproximadamente 19 mm 3 4 no más de 22 mm 7 8 en el broquero mandril Empuje y gire la broca hasta que encaje en la posición cor...

Страница 21: ...o brocas de sierra Para Metal utilice brocas helicoidales de acero para alta velocidad o brocas de sierra Emplee un lubricante para corte cuando taladre en metales Las excepciones son el hierro colado y el latón que se deben taladrar en seco Para MAMPOSTERÍA use brocas con puntas de carburo o brocas de mampostería Un flujo uniforme y suave de polvo indica que se está taladrando a la velocidad adec...

Страница 22: ...O PERCUTOR 1 Cuando taladree use la fuerza necesaria en el martillo para evitar que rebote excesivamente o que sobrepase la broca Si usa demasiada fuerza la velocidad de taladrado será menor se sobrecalentará la herramienta y el índice de taladrado será menor también 2 Taladree en forma recta manteniendo la broca en un ángulo recto en relación con la pieza No ejerza presión lateral en la broca mie...

Страница 23: ... de dejar la fábrica Lleve o envíe la herramienta a un centro de servicio certificado en dos a seis meses dependiendo del nivel de uso para que se le haga una limpieza e inspección minuciosa Las herramientas utilizadas constantemente en tareas de producción pueden requerir una lubricación más frecuente Las herramientas que no son utilizadas por períodos largos de tiempo deberían volverse a lubrica...

Страница 24: ...feras explosivas como na presença de líquidos inflamáveis gases ou poeira As ferramentas criam faíscas que podem inflamar a poeira ou os vapores c Mantenha crianças e visitantes afastados ao operar uma ferramenta As distrações podem fazer você perder o controle 2 SEGURANÇA ELÉTRICA a Os plugues da ferramenta devem ser compatíveis com as tomadas Nunca modifique o plugue Não use nenhum plugue adapta...

Страница 25: ...tivos pode reduzir riscos relacionados a poeira 4 USO E CUIDADOS DA FERRAMENTA a Não force a ferramenta Use a ferramenta correta para sua aplicação A ferramenta correta fará o trabalho melhor e mais seguro se utilizada dentro daquilo para a qual foi projetada b Não use a ferramenta se o interruptor não ligar e desligar Qualquer ferramenta que não pode ser controlada com o interruptor é perigosa e ...

Страница 26: ...os Sempre segure firmemente a ferramenta Nunca tente operar a ferramenta sem segurá la com as duas mãos Recomendamos que você use sempre a empunhadura lateral fornecida com a ferramenta Operar a ferramenta com apenas uma mão levará à perda de controle da ferramenta Também pode ser perigoso perfurar completamente o material ou encontrar materiais duros como por exemplo uma barra de reforço Aperte f...

Страница 27: ...ade Quanto menor o número do calibre maior será a capacidade do cabo Tensão Volts Comprimento do cabo de extensão em metros m 120 127V 0 7 7 15 15 30 30 50 220 240V 0 15 15 30 30 60 60 100 Faixa de Corrente nominal Ampéres Secção minima do cabo de extensão em milimetros quadrados mm2 0 6A 1 0 1 5 1 5 2 5 6 10A 1 0 1 5 2 5 4 0 10 12A 1 5 1 5 2 5 4 0 12 16A 2 5 4 0 Não Recomendado NOTA Não aqueça de...

Страница 28: ...ar pó que pode causar lesões respiratórias e de outros tipos sérias e permanentes Use sempre equipamentos adequados de proteção respiratória contra pó aprovados pelo NIOSH ou pela OSHA Direcione as partículas para longe do rosto e do corpo A etiqueta de sua ferramenta pode incluir os símbolos abaixo As definições de cada um deles são as seguintes V volts A ampères Hz hertz W watts min minutos corr...

Страница 29: ...unhadura lateral Fig 1 ATENÇÃO Para reduzir o risco de lesões corporais SEMPRE opere a ferramenta com a empunhadura lateral devidamente instalada Caso contrário a empunhadura lateral pode se soltar durante a operação da ferramenta e o operador pode perder o controle Segure a ferramenta com as duas mãos a fim de ter um controle máximo Este martelete rotativo já vem com uma empunhadura lateral monta...

Страница 30: ... trava está funcionando normalmente Para usar a ferramenta de modo contínuo aperte e segure o interruptor tipo gatilho A aperte o botão de trava I solte o interruptor tipo gatilho e em seguida solte o botão de trava A ferramenta continuará a funcionar Para parar a ferramenta quando estiver em funcionamento contínuo aperte rapidamente e solte o gatilho Alavanca de reversão Fig 1 A alavanca de rever...

Страница 31: ...erramenta e as brocas podem esquentar muito quando a ferramenta é usada As partículas pequenas de material quebrado podem causar danos às mãos descobertas ATENÇÃO Nunca tente apertar nem folgar uma broca nem nenhum outro acessório apertando a parte frontal do mandril e ligando a ferramenta Isto pode danificar o mandril e causar lesões corporais Para instalar uma broca insira a haste da broca aprox...

Страница 32: ...artelamento ou até o símbolo de martelo perfurador para os trabalhos de perfuração por percussão OPERAÇÃO DE PERFURAÇÃO 1 Para MADEIRA use brocas helicoidais brocas chatas brocas com hélice rápida ou serras copo Para METAL use brocas helicoidais de aço de alta velocidade ou brocas ocas Quando perfurar metais use um lubrificante para corte A exceção a esta regra são o ferro e o latão que devem ser ...

Страница 33: ...üentemente e limpe as aparas que se acumulam na broca a fim de evitar que a broca se esquente demasiadamente Para os orifícios maiores use brocas chatas brocas com hélice rápida ou serras copo Caso exista um risco de que a peça sendo trabalhada se estilhace use um bloco de madeira como suporte traseiro COMO USAR A FERRAMENTA COMO MARTELO PERFURADOR 1 Ao perfurar use somente força suficiente no mar...

Страница 34: ...ros produtos químicos abrasivos para limpar as peças não metálicas da ferramenta Estes produtos químicos podem enfraquecer os materiais plásticos utilizados nestas peças Use um pano umedecido somente com água e sabão neutro Nunca deixe que um líquido caia dentro da ferramenta Nunca coloque as peças da ferramenta em um líquido Lubrificação Sua ferramenta recebeu uma lubrificação adequada antes de d...

Страница 35: ...luindo inspeção e substituição da escova devem ser realizados por um centro de serviços autorizados da DEWALT ou outro pessoal técnico qualificado Use sempre peças de reposição idênticas A DEWALT possui uma das maiores Redes de Serviços do País Ligue 0800 7034644 ou consulte nosso site www dewalt com br para saber qual é a mais próxima de sua localidade ESPECIFICAÇÕES D25013 Voltagem 127 V 220 V F...

Страница 36: ... TRADE CENTER COLECTORA ESTE DE RUTA PANAMERICANA KM 32 0 EL TALAR DE PACHECO PARTIDO DE TIGRE BUENOS AIRES B1618FBQ REPÚBLICA DE ARGENTINA NO DE IMPORTADOR 1146 66 TEL 011 4726 4400 IMPORTED BY IMPORTADO POR BLACK DECKER DO BRASIL LTDA ROD BR 050 S N KM 167 DIST INDUSTRIAL II UBERABA MG CEP 38064 750 CNPJ 53 296 273 0001 91 INSC EST 701 948 711 00 98 S A C 0800 703 4644 SOLAMENTE PARA PROPÓSITO D...

Отзывы: