17
English
fully open position.
6. Close drain valve when finished.
Compressor Pump oil (Fig. 1)
CHeCkInG oIl
WARNING: Hot surfaces. Risk of burn. Aftercooler, pump head,
and surrounding parts are very hot, do not touch (see the Hot
Surfaces identified in Fig. 2). Allow compressor to cool prior to
servicing.
1. Ensure engine ON/OFF switch (C) is in the OFF Position.
2. Place unit on a flat level surface.
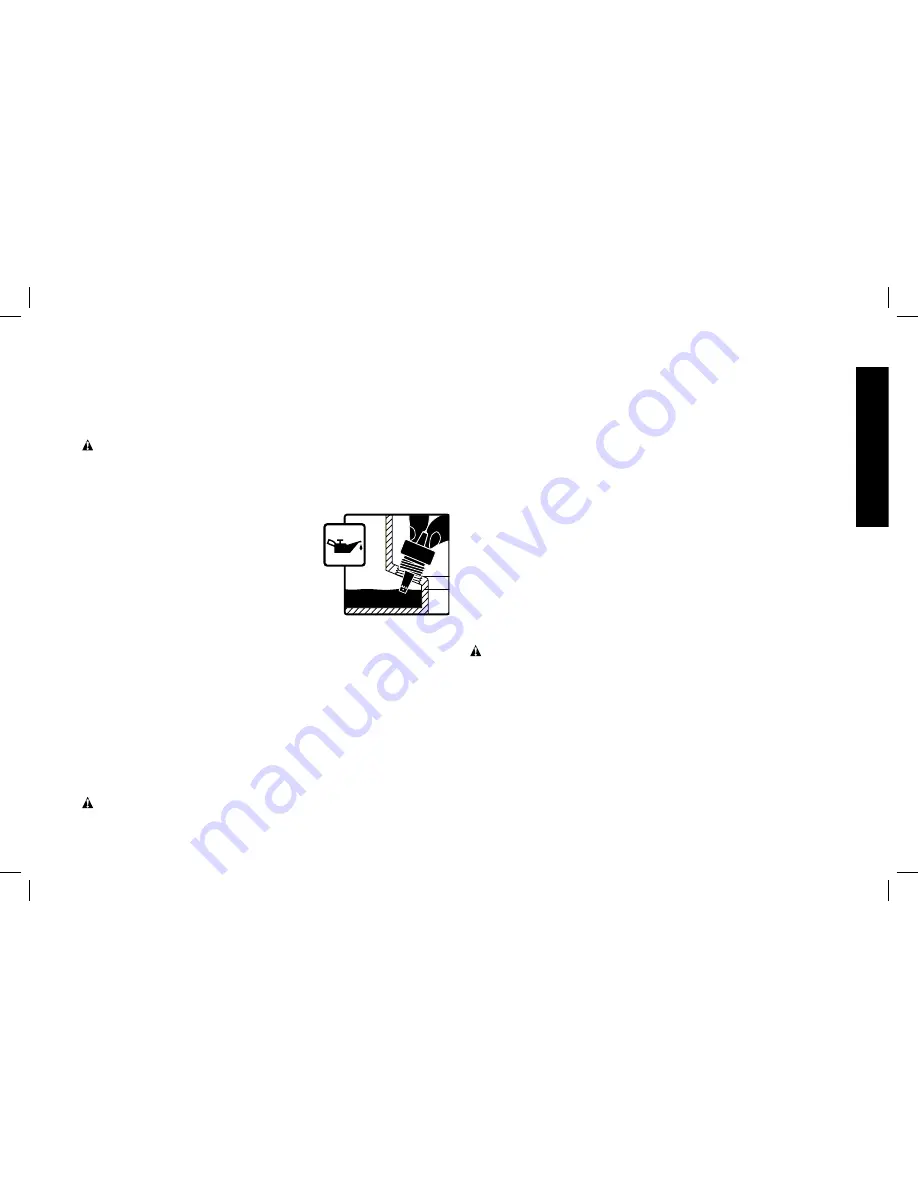
3. Remove dipstick (K) and wipe clean.
4. Insert and remove dipstick without
MAX.
oIl
MIN.
threading dipstick into crankcase as
shown in figure.
5.
Check the oil level on dipstick.
If oil level is at or below “Add”,
oil needs to be added. Add D
e
WALT
synthetic oil to the proper maximum level as shown in figure.
note: When filling the crankcase, the oil flows very slowly into the
pump. If the oil is added too quickly, it will overflow and appear to
be full.
NOTICE: Risk of property damage. Overfilling with oil will cause
premature compressor failure. Do not overfill.
6. Replace dipstick and tighten securely.
CHAnGInG oIl
note: Pump oil contains substances that are regulated and must
be disposed of in accordance with local, state and federal laws and
regulations.
WARNING: Hot surfaces. Risk of burn. Aftercooler, pump head,
and surrounding parts are very hot, do not touch (see the Hot
Surfaces identified in Fig. 2). Allow compressor to cool prior to
servicing.
1. Ensure engine ON/OFF switch (C) is in the OFF Position.
2. Allow the unit to cool.
3. Disconnect spark plug wire.
4. Drain air tank.
5. Locate a suitable container under pump drain plug (L).
6. Remove the dipstick (K) from crank case.
7. Remove the oil drain plug (L).
8. Allow ample time for all oil to drain out. (Tilting the compressor
towards the drain plug will assist in draining.)
9. Install the oil drain plug.
10. Fill pump with D
e
WALT synthetic compressor oil. Oil should not
exceed top raised line on side of crackcase. (Oil will be even
with bottom of threads in crankcase fill port.)
11. Install dipstick.
12. Reconnect spark plug wire.
Checking Belt tension (Fig. 1)
WARNING: Hot surfaces. Risk of burn. Aftercooler, pump head,
and surrounding parts are very hot, do not touch (see the Hot
Surfaces identified in Fig. 2). Allow compressor to cool prior to
servicing.
1. Ensure engine ON/OFF switch (C) is in the OFF position.
2. Allow the unit to cool.
3. Disconnect spark plug wire.
4. Drain air tank.
5. Remove two belt guard mounting screws on pump head.
6. Loosen but do not remove the four belt guard mounting screws
on the saddle.
Содержание DXCMH1608WB
Страница 25: ...25 English ...


