E-4
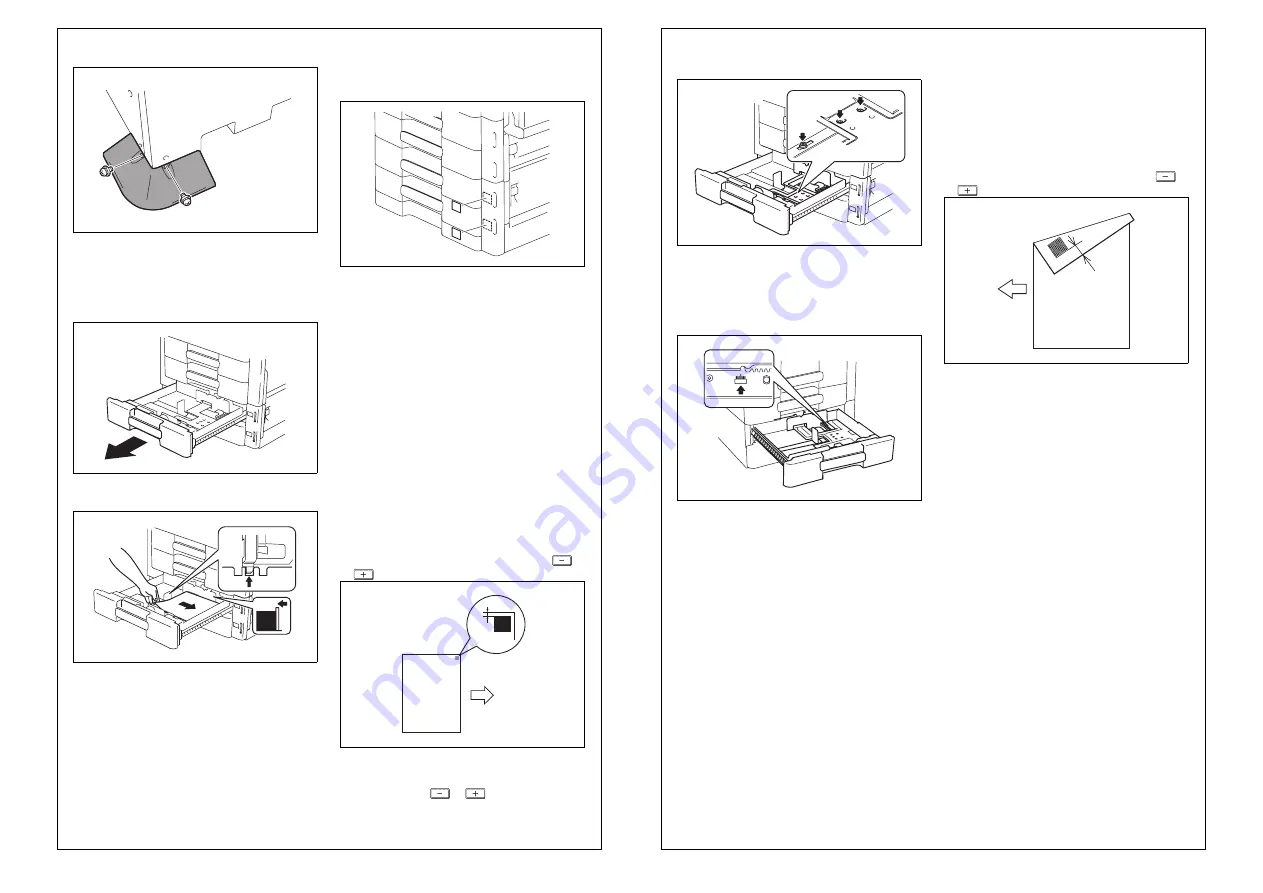
18. Install the supplied fixing leg cover B (left rear).
(Two supplied screws)
19. Plug the power cord into the power outlet.
III. Loading paper
1. Slide out the third and fourth drawers.
2. Load the paper stack so that it rests below the tab
fitted to the edge guide.
Note:
• Make sure that the top level of the paper stack
does not exceed the
▼
(MAX) paper level indi-
cator.
• Slide the edge guide tightly up against the edge
of the paper stack so that there is no gap
between them.
• With the trailing edge stop, fit its locking tab
properly into the slit at the correct paper size
position.
• Correct any curl in the paper before loading.
3. Slide the drawers back in.
IV. Affixing the paper size label
Affix the paper size label to the location shown in the
illustration.
(The size label is similarly put on the fourth.)
V. Checking and Adjusting the Paper
Reference Position
<Centering>
1. Turn on the machine’s sub and main power
switches.
2. Display the Service Mode screen (For details of
how to display the Service Mode screen, see the
Service Manual).
3. Touch “Machine.”
4. Touch “Printer Area.”
5. Touch “Centering.”
6. Touch “3rd.” and then press the Start key.
A test print will be produced.
7. Measure width A from the edge of the paper to
the pattern printed on the test print and check that
it falls within the specified range.
Specifications: 3.0 mm ± 1.0 mm
• Adjusting the paper reference position
If the measured width A falls outside the specified
range, enter the correction value using the
or
key.
8. Produce another test print and check to see if
width A falls within the specified range.
* If the use of the
or
key does not allow
the measurement to fall within the specified
range, perform the following steps.
A1V4IXC024DA
A0XWMXC015MB
A0XWMXC016MB
A1V4IXC078DA
4061IXC147DA
Paper exit
direction
A
9. Slide out the drawer and unload paper from it.
10. Loosen the three screws shown in the illustra-
tion.
11. Watching the graduations provided in the
drawer, move the edge guide in the rear.
• If width A is greater than the specified value,
move the edge guide toward the front.
• If width A is smaller than the specified value,
move the edge guide toward the rear.
12. Load paper and let the machine produce
another test print. Then, check width A.
* Make the adjustment until width A falls within the
specified range.
13. Tighten the screws which has been loosened in
step 10.
14. Perform the same check and adjustment proce-
dures for the fourth drawer.
<Centering (Duplex 2nd side)>
1. Touch “Centering (Duplex 2nd side).”
2. Touch “3rd.” and then press the Start key.
A test print will then be produced.
3. Measure width A of the test pattern on the back-
side of the test print produced and check that it
falls within the specified range.
Specifications: 3.0 mm ± 2.0 mm
• Adjusting the paper reference position
If the measured width A falls outside the specified
range, enter the correction value using the
or
key.
4. Produce another test print and check to see if
width A falls within the specified range.
5. Perform the same check and adjustment proce-
dures for the fourth drawer.
6. Touch “END.”
7. Touch “Exit” on the Service Mode screen.
8. Turn OFF and ON the Main Power Switch.
Note:
When displayed the Service Mode screen, be sure
to turn off the main power after exiting the Service
Mode screen and wait for 10 seconds or more
before turning on.
A0XWMXC018MB
A0XWMXC019MA
4061IXC152DA
Paper exit
direction
A


