


Solving Problems with Printing Quality
10-37
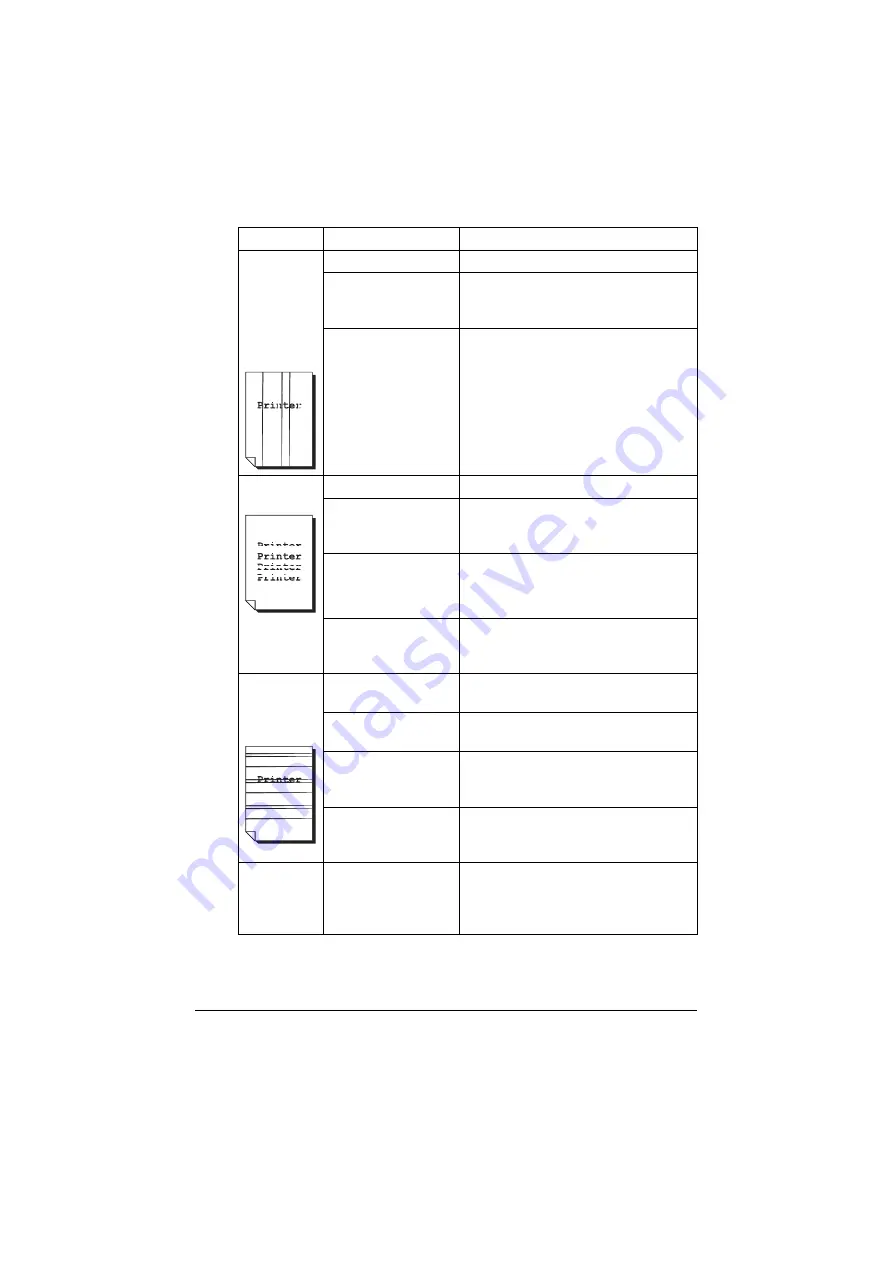
Abnormal
areas (white,
black, or
color)
appear in a
regular pat-
tern.
The laser lens is dirty. Clean the laser lens.
A toner cartridge may
be defective.
Remove the toner cartridges with the
color causing the abnormal image.
Replace it with a new toner cartridge.
One or more of the
imaging units is
defective.
Remove the imaging units and check
for damage. If it is damaged, replace
it.
Image
defects.
The laser lens is dirty. Clean the laser lens.
A toner cartridge may
be leaking.
Remove the toner cartridges and
check for damage. If it is damaged,
replace it.
A toner cartridge may
be defective.
Remove the toner cartridge with the
color causing the abnormal image.
Replace it with a new toner cartridge.
One or more of the
imaging units may be
defective.
Remove the imaging units and check
for damage. If it is damaged, replace
it.
Lateral lines
or bands
appear on
image.
The machine is not
level.
Place the machine on a flat, hard, level
surface.
The media path is
dirty with toner.
Print several sheets and the excess
toner should disappear.
One or more of the
toner cartridges may
be defective.
Remove the toner cartridges and
check for damage. If it is damaged,
replace it.
One or more of the
imaging units is
defective.
Remove the imaging units and check
for damage. If it is damaged, replace
it.
Colors look
drastically
wrong.
One or more of the
toner cartridges may
be defective.
Remove the toner cartridges and verify
that the toner is distributed evenly on
each cartridge roller, and reinstall the
toner cartridges.
Symptom
Cause
Solution
Содержание ineo+ 25
Страница 1: ...ineo 25 Dynamic balance www develop eu User Manual ...
Страница 2: ......
Страница 15: ...1 1Introduction ...
Страница 27: ...2 2Control Panel and Configuration Menu ...
Страница 46: ...Configuration Menu Overview 2 20 FAX TX OPERATION FAX RX OPERATION REPORTING SCAN SETTING ...
Страница 114: ...MEMORY PRINT Menu 2 88 ...
Страница 115: ...3 3Media Handling ...
Страница 149: ...4 4Using the Printer Driver ...
Страница 161: ...5 5Memory Direct ...
Страница 164: ...Memory Direct 5 4 ...
Страница 165: ...6 6Using the Copier ...
Страница 179: ...7 7Using the Scanner ...
Страница 211: ...8 8Replacing Consumables ...
Страница 242: ...Replacing Consumables 8 32 3 Open the fuser unit cover 4 Pull down the 2 levers 5 Remove the fuser unit ...
Страница 246: ...Replacing Consumables 8 36 ...
Страница 247: ...9 9Maintenance ...
Страница 252: ...Cleaning the Machine 9 6 3 Clean the media feed rollers by wiping them with a soft dry cloth 4 Close the tray ...
Страница 260: ...Cleaning the Machine 9 14 ...
Страница 261: ...10 10Troubleshooting ...
Страница 277: ...Clearing Media Misfeeds 10 17 4 Remove any misfed media 5 Close the ADF cover 6 Close the ADF feed cover ...
Страница 282: ...Clearing Media Misfeeds 10 22 5 Close the fuser unit cover 6 Push down the 2 levers 7 Close the right door ...
Страница 309: ...11 11Installing Accessories ...
Страница 313: ...Dual In Line Memory Module DIMM 11 5 2 Remove the rear cover 3 Using a coin remove a screw 4 Open the cover ...
Страница 316: ...Hard Disk Kit HD P03 11 8 2 Remove the rear cover 3 Using a coin remove a screw 4 Open the cover ...
Страница 320: ...CF Adapter MK 725 and CompactFlash Card 11 12 4 Open the cover 5 Attach CF Adapter MK 725 to the back of the cover ...
Страница 325: ...12 AAppendix ...


