5
ENGLISH
Step 3
(page 10 to 15)
Finally, setting up the system.
Step 2
(page 10)
Next, insert the batteries into the remote control unit.
6
READ THIS FIRST
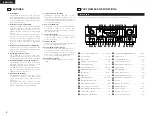
This AV Surround Receiver must be setup before use. Following these steps.
Step 1
(page 5 to 9)
Choose the best location to setup the speakers and connecting the components.
7
SETTING UP THE SPEAKER SYSTEMS
2
Speaker system layout
Basic system layout
• The following is an example of the basic layout for a system consisting of seven speaker systems and a
television monitor:
Subwoofer
Center speaker system
Surround speaker systems
Front speaker systems
Set these at the sides of the TV or
screen with their front surfaces as flush
with the front of the screen as possible.
Remote control unit
• For details on the functions of these parts, refer to the pages given in parentheses ( ).
VIDEO SELECT button.................(20)
Cursor buttons .................(10, 17, 23)
TEST TONE button ......................(21)
System buttons .....................(16, 17)
Input source selector buttons
...............................................(16~19)
SYSTEM SETUP/
SETUP button ........................(10, 17)
SURROUND
buttons.............................(19, 21, 27)
Mode select
switches ................................(16~18)
Power buttons .................(11, 16~18)
Tuner system/System
buttons.............................(16, 17, 30)
MUTING button ...........................(20)
Master volume control
buttons.........................................(19)
SURROUND BACK/
RETURN button .....................(17, 25)
Remote control signal
transmitter ...................................(10)
SURROUND PARAMETER
button.....................................(17, 22)
CH SELECT (channel select)/
ENTER button............(10, 17, 22, 23)
DIMMER button...........................(20)
INPUT MODE selector
buttons...................................(19, 21)
LED (indicator) .......................(16, 18)
STATUS/
DISPLAY button .....................(17, 20)
Surround back speaker system
SPEAKER button..........................(18)
NOTE:
• The shaded button
does not function with
the AVR-1705. (Nothing happens when they are
pressed.)
Содержание AVR-1705
Страница 44: ...44 A B 6 16 ohms A B 12 16 ohms 6 16 ohms 1 2 3 LED DENON 4 ohms L R L R L R 80Hz A B...
Страница 66: ...66 2 1 2 1 AUDIO 1 SHIFT 2 PRESET 16 3 1 2 1 2 17 1 2 A SPEAKER A B 3 1...
Страница 68: ...68 1 60 90cm 1 360 3 60 90cm 0 20cm 2 1 DTS ES 1 1 spkr 60 60 90 1 spkr 60 90 60 90cm 2 60 90 60 120...
Страница 79: ...79 A B 6 16 ohms A B 12 16 ohms 6 16 ohms 1 2 3 LED DENON 4 ohms L R L R L R 80Hz A B...
Страница 101: ...101 2 1 2 1 AUDIO 1 SHIFT 2 PRESET 16 3 1 2 1 2 17 1 2 A SPEAKER A B 3 1...
Страница 103: ...103 1 60 90cm 1 360 3 60 90cm 0 20cm 2 1 DTS ES 1 1 spkr 60 60 90 1 spkr 60 90 60 90cm 2 60 90 60 120...
Страница 111: ...TOKYO JAPAN www denon com Printed in China 511 4177 002...


