10
6.14 Default values
This resets all menu settings and programmed quantities for
all profiles back to the default values (with the exception of the
language which remains as set).
To reset the default values, proceed as follows:
1. Press "DEFAULT VALUES". "DEFAULT VALUES" is displayed.
Press
to confirm (or press
to
cancel the operation);
2. "DEFAULT VALUES SET": press
to confirm.
6.15 Statistics
This displays statistics relating to the machine. To view the sta-
tistics, proceed as follows:
1. Press "STATISTICS" and check all the statistics by scrolling
through the items using
.
6.16 Customise profile
To customise the icon of the current profile, proceed as follows:
1. Press "CUSTOMISE PROFILE";
2. Press the desired icon. On the homepage, the top band is
displayed with the colour of the icon.
7.
MAKING COFFEE
7.1 Making coffee using coffee beans
Important!
Do not use green, caramelised, flavored or candied coffee beans
as they could stick to the coffee grinder and make it unusable.
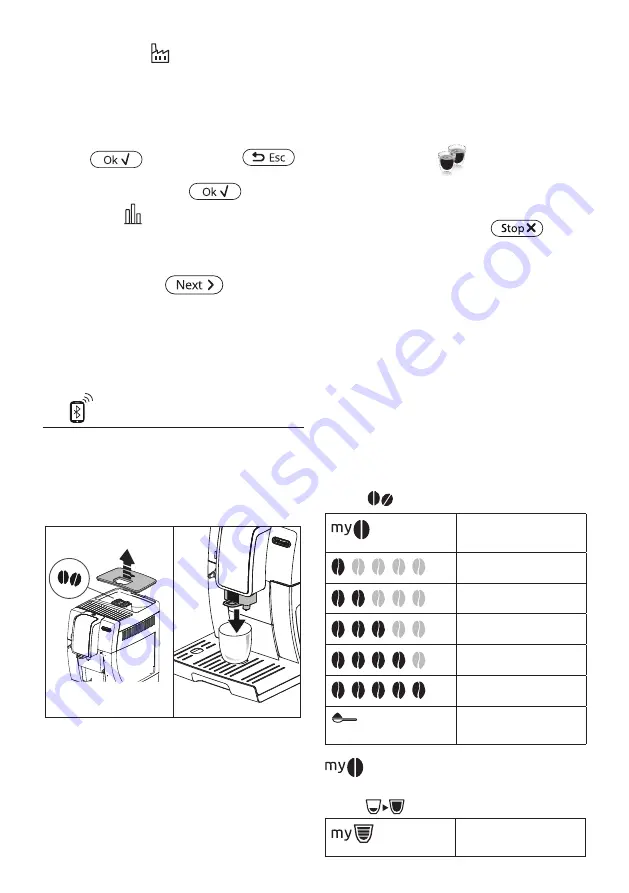
1. Fill the container (A3) with coffee beans (fig. 10);
11
10
2. Place a cup under the coffee spouts (A9);
3. Lower the spouts as near as possible to the cup (fig. 11).
This makes a creamier coffee;
4. Then select the desired recipe:
• ESPRESSO
• LONG
• COFFEE
•
• 2X ESPRESSO
5. Preparation begins. An image of the selected beverage
appears on the display, together with a progress bar which
gradually fills as preparation proceeds.
Please note:
• You can prepare 2 cups of ESPRESSO coffee at the same
time by pressing "2X
" during preparation of 1 ES-
PRESSO (the image is displayed for a few seconds at the
start of preparation).
• While the machine is making coffee, delivery can be inter-
rupted at any moment by pressing
.
Once the coffee has been delivered, the machine will be ready
for further use.
Please note!
• Various alarm messages could be displayed while using
the machine (FILL TANK, EMPTY GROUNDS CONTAINER,
ETC.). Their meaning is explained in section "19. Displayed
messages".
• For hotter coffee, see section "7.6 Tips for a hotter coffee".
• If the coffee is delivered a drop at a time, too weak and not
creamy enough or too cold, read the tips in sections "7.5
Adjusting the coffee grinder" and "20. Troubleshooting".
• Preparation of each coffee can be customised (see sections
"12. Customising the beverages
" and "13. Memorising
your own user profile").
7.2 Selecting the coffee strength
Press the
button (C6):
Custom (if programmed) /
Standard
EXTRA LIGHT
LIGHT
MEDIUM
STRONG
X-STRONG
(see "7.4 Making coffee
using pre-ground coffee")
After delivering the beverage, the strength setting is reset to the
value.
7.3 Selecting the coffee quantity
Press the
button (C1):
Custom (if programmed) /
Standard


