background image

6

NOTE: The maximum power rating is based on the
knife blade attachment.

Before plugging in

- Make sure your electricity supply is the same as the one

shown on the underside of your machine.

- This appliance conforms to EC directive 2004/108/EC on

Electromagnetic Compatibility and EC regulation no.
1935/2004 of 27/10/2004 on materials intended for con-
tact with food.

Before using for the first time

1 Remove all packaging including the plastic blade covers

from the knife blade. Take care the blades are very sharp.
These covers should be discarded as they are to protect the
blade during manufacture and transit only.

2 Wash the parts see ‘cleaning’.
3 Push excess cord into the back of the machine.

This appliance has a polarized plug (one blade is wider
than the other). To reduce the risk of electric shock,
this plug will fit in a polarized outlet only one way. If
the plug does not fit fully in the outlet, reverse the
plug. If it still does not fit, contact a qualified electri-
cian. Do not modify the plug in any way.

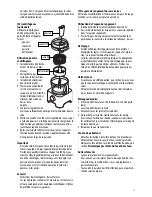
To use your food processor

1 Fit the detachable drive shaft onto the power unit (1).
2 Then fit the bowl. Place the handle towards the back and

turn clockwise until it locks (2).

3 Fit an attachment over the drive shaft.
- Always fit the bowl and attachment onto the machine

before adding ingredients.

4 Fit the lid (3) - ensuring the top of the drive shaft locates

into the center of the lid.

-

Do not use the lid to operate the processor, always
use the on/off control.

5 Switch on and select a speed.
-

The processor won’t work if the bowl and lid are fit-
ted incorrectly.

- Use the pulse for short bursts. The pulse will operate for as

long as the control is held in position.

6 Reverse the above procedure to remove the lid, attach-

ments and bowl.

-

Always switch off before removing the lid.

Important

- Your processor is not suitable for crushing or grinding coffee

beans, or converting granulated sugar to superfine sugar.

- When adding almond extract or flavoring to mixtures avoid

contact with the plastic as this may result in permanent
marking.

To use your blender

1 Screw the carafe into the blade unit.
2 Put your ingredients into the carafe.
3 Put the filler cap in the lid, then turn.
4 Turn the lid in a clockwise direction to lock onto the carafe.
5 Place the blender onto the power unit and turn to lock (4).
6 Select a speed or use the pulse control.
-

Allow all liquids to cool to room temperature before
placing them in the blender.

Hints

- When making mayonnaise, put all the ingredients, except

the oil into the blender. Then with the machine running,
pour the oil into the filler cap and let it run through.

- Thick mixtures, e.g. pates and dips, may need scraping

down. If it’s difficult to process, add more liquid.

- When crushing ice use the pulse in short bursts.
- To ensure the long life of your blender, never run it for

longer than 60 seconds. Switch off as soon as you’ve got
the right consistency.

- Don’t process spices - they may damage the plastic.
- The machine won’t work if the blender is fitted incorrectly.
- Don’t put dry ingredients into the blender before switching

on. If necessary, cut them into pieces; remove the filler cap;
then with the machine running, drop them through one by
one.

- Don’t use the blender as a storage container. Keep it empty

before and after use.

- Never blend more than 1

1

⁄ 2 litres (2pts 12floz) - less for

frothy liquids like milkshakes.

USING THE ATTACHMENTS
(M) knife blade/(N) dough tool

The knife blade is the most versatile of all the attachments.
The length of the processing time will determine the texture
achieved. For coarser textures use the pulse control.
Use the knife blade for cake and pastry making, chopping raw
and cooked meat, vegetables, nuts, pate, dips, pureeing soups
and to also make crumbs from biscuits and bread. It can also
be used for yeasted dough mixes if the dough tool is not sup-
plied.
Use the dough tool for yeasted mixes.

Hints
knife blade

- Cut food such as meat, bread, vegetables into cubes

approximately 2cm/

⁄ 4in before processing.

- Biscuits should be broken into pieces and added down the

feed tube while the machine is running.

- When making pastry use butter straight from the fridge cut

into 2cm/

⁄ 4 in cubes. 

- Take care not to over-process.

Содержание DFP735

Страница 1: ...ion com Visit www delonghi com for a list of service centers near you Enregistrez ce produit en ligne et recevez un num ro gratuit de Cook s Illustrated Visitez www delonghiregistration com Visitez ww...

Страница 2: ...r carafe DESCRIPTION DE L APPAREIL A unit moteur B manche amovible C bol D couvercle E tube d alimentation F poussoirs G syst mes de verrouillage de s curit H enrouleur I commande de la vitesse J bouc...

Страница 3: ...pais R disque pour lamelles fines r peuse fin S disque d couperenfineslamelles styleJulienne optionnel T disque grattoir optionnel 21 presse agrumes r cipient optionnel 22 r cipient mulsionne optionne...

Страница 4: ...ers multiple sockets and extensions com plying with current safety standards and regula tions should be used taking care not to exceed the power limit indicated on the adapter and or exten sion In the...

Страница 5: ...blades or disc while blending to reduce the risk of severe injury to person or damage to the blen der A scraper may be used but only when the blenderisnotrunning Top reduce the risk of injury when us...

Страница 6: ...plastic as this may result in permanent marking To use your blender 1 Screw the carafe into the blade unit 2 Put your ingredients into the carafe 3 Put the filler cap in the lid then turn 4 Turn the...

Страница 7: ...ng it sits on the ledge inside the bowl fig 1 Do not push down on the canopy hold by the center grip 5 Fit the lid and switch on Slicing shredding discs Reversible slicing shredding discs thick Q thin...

Страница 8: ...half full 2 Fit the sealing ring into the blade unit 3 Turn the blade unit upside down Lower it into the jar blades down 4 Screw the blade unit onto the jar until it is finger tight 5 Place the mill o...

Страница 9: ...instead 25 Attachments carousel Your food processor is supplied with an attachment storage carousel that fits inside the bowl To use the storage carousel 1 Fit the knife blade to the bowl 2 Then fit t...

Страница 10: ...resulting from the use of this product or arising out of any breach of contract or breach of this war ranty are not recoverable under this warranty Some states do not allow the exclusion or limitation...

Страница 11: ...tre laiss port e des enfants car il peut pr senter un risque potentiel Si la fiche d alimentation lectrique de l appareil ne peut se brancher la prise de courant faire remplacer la fiche d alimentati...

Страница 12: ...fugeuse est en marche Pour m langer les liquides chauds retirer la pi ce centrale du couvercle deux pi ces Lorsque l appareil est mis la poubelle apr s avoir t d branch de la prise de courant sec tion...

Страница 13: ...p tes 8 600 g viande Lame tranchante avec Soupes d marrer vitesse faible puis 1 8 1 5 litres couvercle mixeur augmenter progressivement jusqu la vitesse 8 Batteur Blancs d oeufs 8 6 blancs d oeufs Oe...

Страница 14: ...tre vide avant et apr s utilisa tion Ne jamais mixer plus de 1 5 litres moins pour les liquides pais comme les milk shakes Utilisation des accessoires M lame couteau N m langeur Cette lame est l acces...

Страница 15: ...le Parmesan et les pommes de terre pour la pr paration de boulettes S curit Ne retirez jamais le couvercle tant que les disques de coupe ne sont pas compl tement arr t s Manipulez les disques de coupe...

Страница 16: ...Vissez l unit porte lames sur le bocal jusqu ce qu elle soit correctement viss e et fix e 5 Placez le r cipient mulsionner sur le bloc moteur puis tournez pour verrouiller 6 Mettez en marche vitesse...

Страница 17: ...robot multifonction est fourni avec un espace de range ment des accessoires qui se place dans le bol Utilisation de l espace de rangement 1 Introduisez d abord la lame tranchante dans le bol 2 Puis in...

Страница 18: ...e ne sont pas recouvrables dans le cadre de cette garantie Certains tats ou provinces n autorisent pas l exclu sion ou la limitation des dommages int r ts directs ou indirects Par cons quent la limita...

Страница 19: ...representa un peli gro potencial Si el enchufe montado en el aparato no es ade cuado para el tomacorriente h galo sustituir por personal calificado Se desaconseja utilizar adaptadores tomacorrientes...

Страница 20: ...ente forzar el mecanismo de enclavamien to de la tapa Aseg rese de llevar el conmutador a la posici n APAGADO despu s de cada uso de su exprimidor Aseg rese de que el motor se detiene completa mente a...

Страница 21: ...adora en la unidad de potencia y g rela para fijarla 4 6 Seleccione una velocidad o use el bot n pulse Deje que todos los l quidos se enfr en a temperatura ambiente antes de ponerlos en la licuadora C...

Страница 22: ...esta operaci n podr a afectar a la estabilidad del aparato O batidor doble opcional Util celo para alimentos ligeros como claras de huevo nata leche evaporada o para montar claras con az car para sufl...

Страница 23: ...obtendr rebanadas y cortes m s cortos que si los dispone horizontalmente Despu sdeutilizarunacuchilladecorte siemprequedar n peque ascantidadesdedesperdicioseneldiscooenelbol 21 Exprimidor de c trico...

Страница 24: ...n detenido totalmente Las cuchillas est n muy afiladas man jelas siempre con cuidado Importante No procese especias ya que podr an da ar el pl stico No procese alimentos duros como granos de caf cubit...

Страница 25: ...ar el pl stico Esto es algo totalmente normal y no causa ning n da o en el pl s tico ni afecta al sabor de los alimentos Para eliminar las manchas frote el pl stico con un pa o suave mojado en aceite...

Страница 26: ...n incumplimiento de los t rminos y condiciones que hacen v lida la garant a En algunos estados no se permiten exclusiones ni limitaciones de los perjuicios reconocidos por una garant a por lo cual las...

Страница 27: ...40872 06 11_00 Printed in China www delonghi com...

Отзывы: