


Steps
1
Reconnect the cable to the back of the optical drive.
2
Align the optical drive with the optical drive slot in the front of the chassis.
3
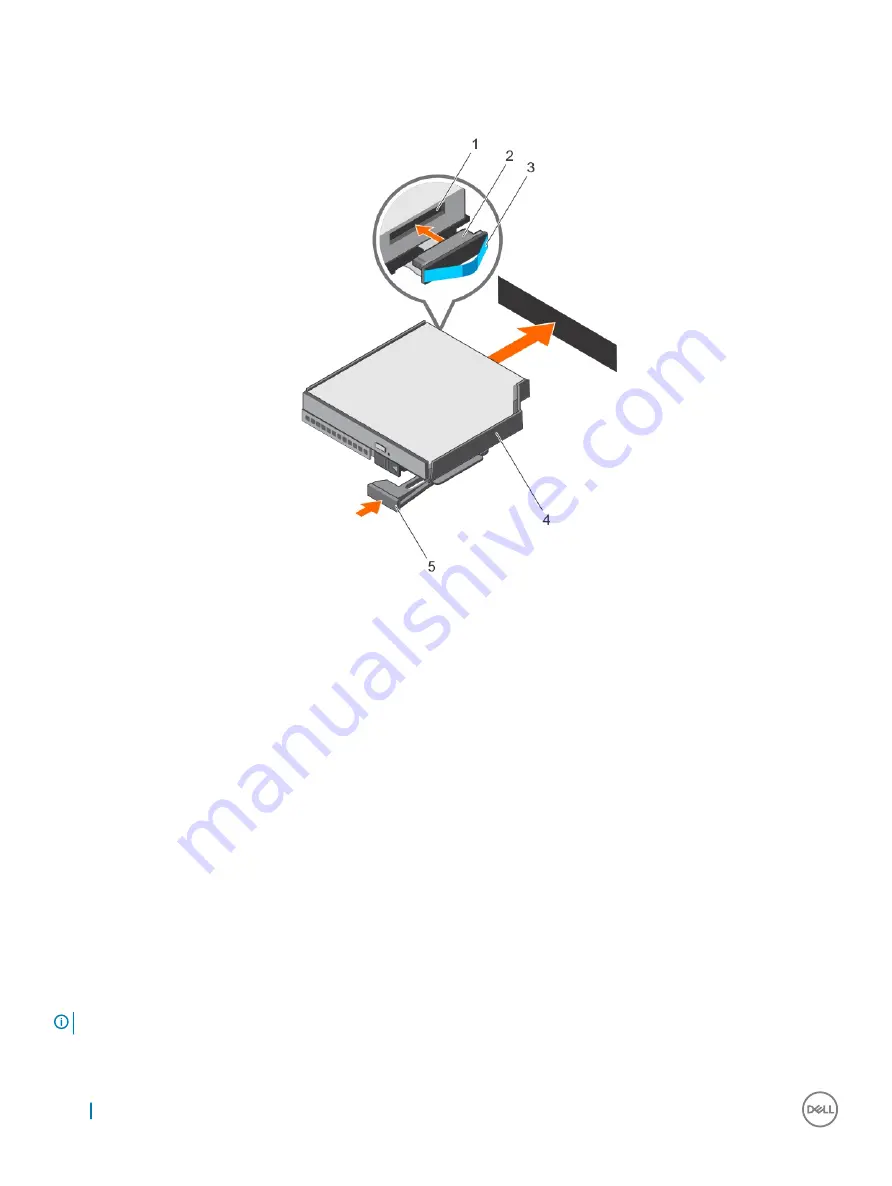
Slide the optical drive into the optical drive slot until the optical drive connector engages with SATA connector on the system board.
Figure 43. Installing the optical drive
1
optical drive connector
2
cable
3
pull tab
4
optical drive carrier
5
ejector handle
Next step
1
Follow the procedure listed in the After working inside your system section.
Related links
Safety instructions
Before working inside your system
After working inside your system
Internal USB memory key (optional)
An optional USB memory key installed inside your system can be used as a boot device, security key, or mass storage device.
To boot from the USB memory key, configure the USB memory key with a boot image and then specify the USB memory key in the boot
sequence in System Setup.
The internal USB port must be enabled in
Internal USB Port
option in the
Integrated Devices
screen of
System Setup
.
NOTE:
To locate the internal USB port (INT_USB) on the system board, see the System board jumpers and connectors section.
100
Installing and removing system components


